 OPS Login
Layout
I. Guide by Video
- You can se detail video here: Layout video
II. How to link and search by Style.
1. Link to Layout
- On the default page you click on menu Operation plan and select Layout.
- This link will direct you to screen Layout.
2. Search on Layout.
- First you can input to texbox search on the top bar.
- Or you can click on icon search on top bar or sidebar.
- Example: Input "UNI0037" and press enter or left mouser click on icoin search.
The popup will display like below.
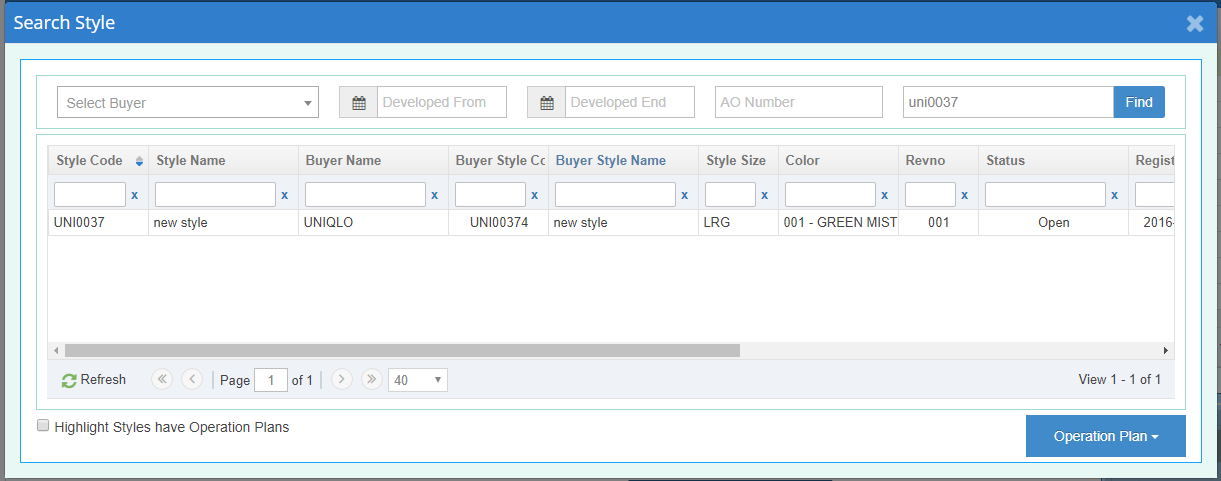
Double click on the row that you want to load Opereation plan.
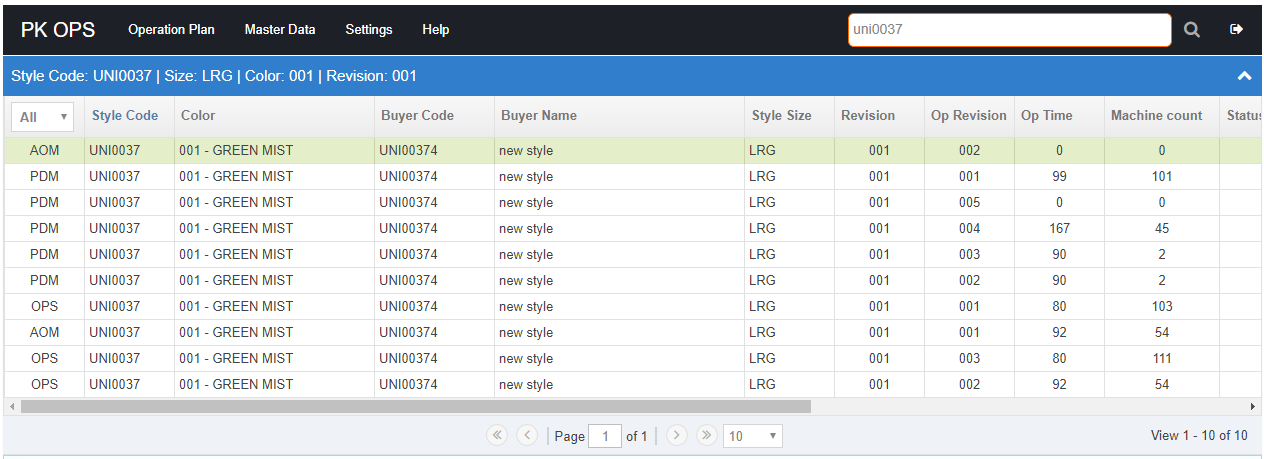
All the Opereation plan will load in to the screen like below.
III. How to using button action.

1. Zoom to fit
- Click on this button, the Operation plan will automatic reset to fit screen of page.
for example: If you has been to zoom in too larger or zoom out to small, you need to set Operation plan to default, You can press on button Zom to fit.
2. Pan mode
- When you select Pan mode it will remove select mode that you has been selected.
3. Select mode
- Select all group you want to selected.
4. New group
Click on new group you will see the popup like below.
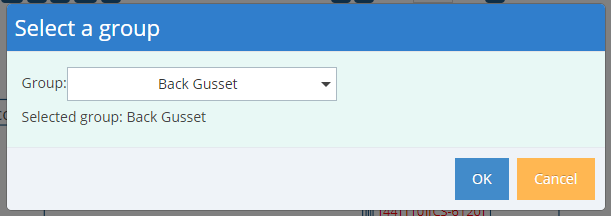
In the image we selected Back Guiset. Click Ok this will be created new group name is Back Guiset, this group is empty. You can drag one or more process detail to this group.
5. New process
Click this button you can add new process. This is the same add new project in screen register.
You can see more here
6. Clone process
When you click on Clone process and click on a process detail, it will create clone one process detail, the process detail that you has been cloned will have the same properties with the process detail you has been click on it.
7. Grouping
First, be careful in this screen, There is have a little difference when update Process detail at module grouping
+ If you are checking Module type, you can't update Module.
+ If you are checking OpGroup, you can't update Process group.
+ If you are checking Machine type, you can't update Main Machine.
We have three way to grouping.
- Grouping by Module type
If we select Module type all Process detail will be arrange to Module.
Module: This is the Module that you has been selected when you add or update Process detail.
- Grouping by OpGroup
If we select OpGroup all Process detail will be arrange to Process group.
Process group: This is the Process group that you has been selected when you add or update Process detail.
- Grouping by Machine type
If we select Machine type all Process detail will be arrange to Main Machine.
Main Machine: This is the Process group that you has been selected when you add or update Process detail, the column selected is Main Machine.
8. Font and layout

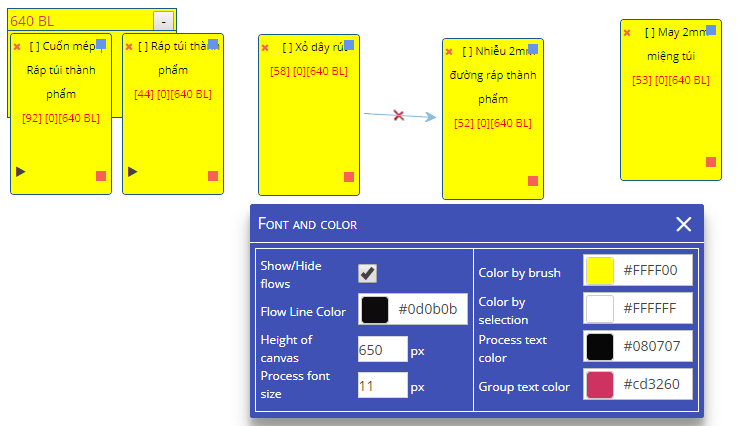
- Show/Hide flow and flow line color
Show/Hide flow
+ If you checked check box the flow line will show on the screen
+ If you Un checked check box the flow line will hide on the screen
Flow line color
+ If you selected color on the Flow line color the flow line will change the color to the color you have just selected.
Example below: Show line color and selected color black.

- Height of canvas: This is a number of height screen, the value is Pixel
- Process font size: This is a number of the font for process detail.
- Color by brush.
When you selected Color by brush you can set back ground for individala process detail by clink on Color by brush and click on process detail that you want set back ground, the back ground of the process detail will be change to color that you has been selected.
If you want to change background of all process detail in a group you can selected color for Color by brush and click on the group that you want set back ground, the back ground of all process detail in this group will be change to color that you has been selected.
- Color by selection.
First you need used button acction select mode, you will select all group that you want change background color. Then you can selected color by selection. the back ground of all process detail and group will be change to color that you has been selected.
- Process text color: When you selected this box all the color of the text in all process detail will be change to this color you has been selected.
- Group text color: When you selected this box all the color of the text in all group will be change to this color you has been selected.
Example image below:
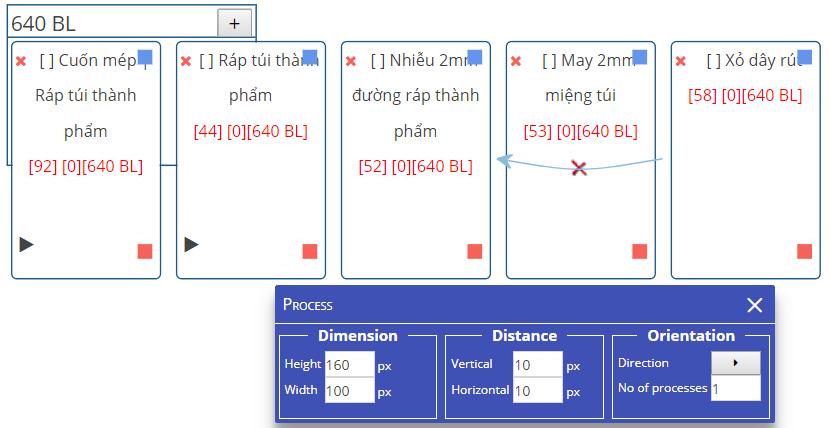
9. Process
- Dimension
Height: This is the height of process detail rectangle.
Width: This is the width of process detail rectangle.
- Distance
Horizontal: This is the distance of two process detail rectangle in a line of horizontal
Vertical: This is the distance of two process detail rectangle in a line of vertical
- Orientation
Direction: You have two direction horizontal and vertical. If you selected horizontal all process detail rectangle will display by horizontal. If you selected vertical all process detail rectangle will display by vertical.
No of processes: This is the number of processes detail will be displayed in a line by direction horizontal or vertical
Example 1: Setting derection horizontal and num of process 1 and other setting is standard.
Example 2: Setting derection vertical and num of process 2, height: 150, width: 110, vertical:20, horizontal:20.

10. Summary
- Main summary
If you want show Main summary, you can click on Summary and drang from Main summary to the screen. The popup will display like this:
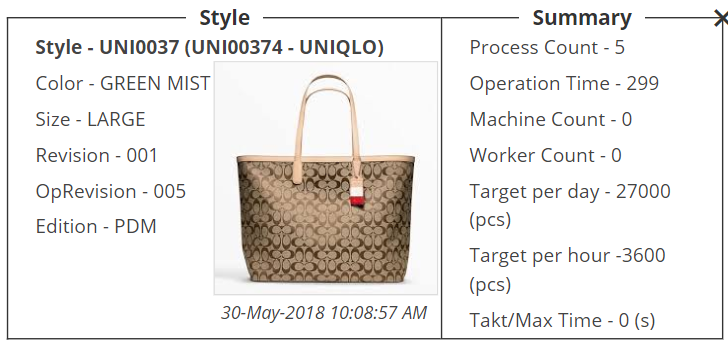
The left rectangle is information about process plan
The right rectangle is some thing information about process detail
- Edit able summary
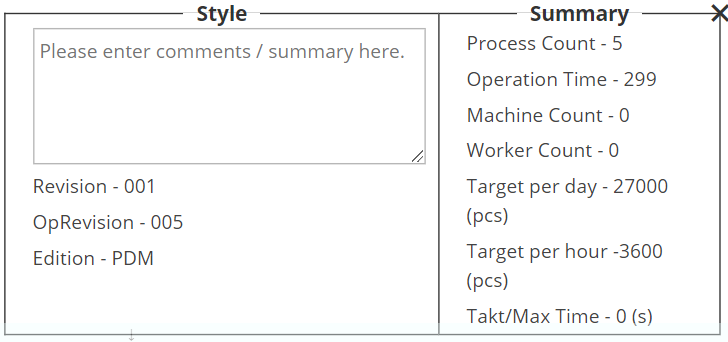
This is the same Main summary, the difference is on the left of rectangle you can input something to the text area.
- Action process summary
If you want show Action process summary, you can click on Summary and drang from Action process summary to the screen. The popup will display like this:
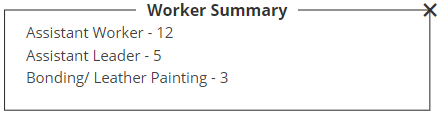
This is sum of the column Worker(s) by Job type in the edit process detail screen
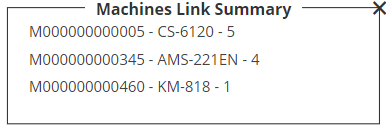
- Main machine summary
If you want to show Main machine summary, you can click on Summary and drang from Main machine summary to the screen. The popup will display like below:
This is the sum of the column Machine(s) by Main Machine in the edit process detail screen or Main machine that you has been selected in screen Machine Linking
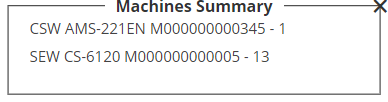
- All machine summary
If you want to show All machine summary, you can click on Summary and drang from All machine summary to the screen. The popup will display like below:
This is the count of the column Machine in the edit process detail screen or The Machine that you has been linked in the screen Machine Linking.
- Tools summary
If you want to show Tools summary, you can click on Summary and drang from Tools summary to the screen. The popup will display like below:
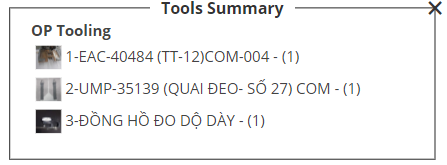
This is the count of the column Tool in the edit process detail screen or Tools that you has been linked in screen Tools Linking
- Pattern summary
If you want to show Pattern summary, you can click on Summary and drang from Pattern summary to the screen. The popup will display like below:
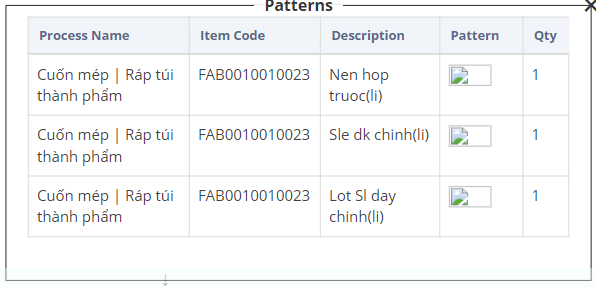
This is the list pattern that you has been linked in screen Bom Linking
- Material summary
If you want to show Material summary, you can click on Summary and drang from Material summary to the screen. The popup will display like below:
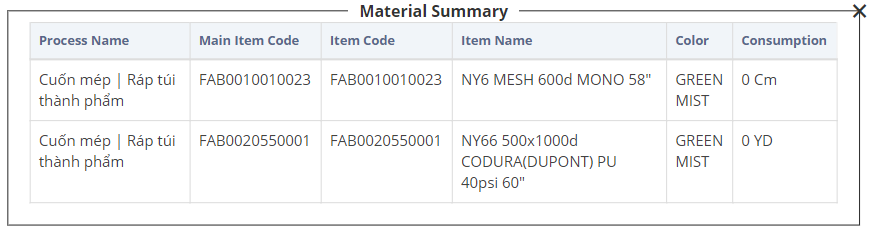
This is the list Bill of material that you has been linked in screen Bom and Pattern Linking
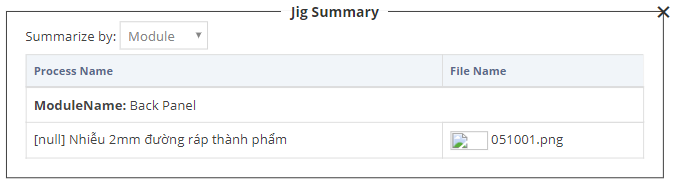
- Jig Summary
If you want to show Jig summary, you can click on Summary and drang from Jig summary to the screen.
This is the list of images that you has been uploaded in screen Operation Plan: column Upload file.
There are three summary by Jig
+ Summary by module
This summary will show all image by Module Name
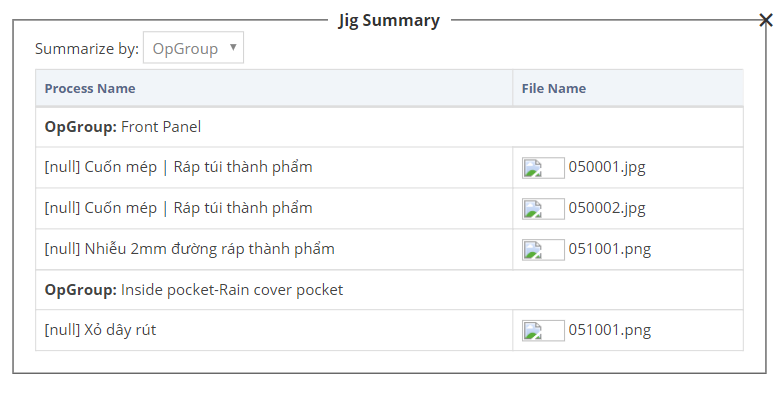
+ Summary by OpGroup
This summary will show all image by OpGroup
+ Summary by File name
This summary will show all image by image name

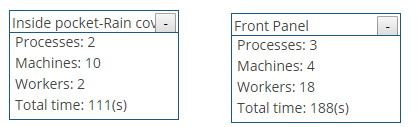
- Group Summary
If you want to show Group Summary click on Group Summary.
It will be shown on group
+ Total process detail of Operation plan
+ Total Machine
+ Total worker
+ Total time
11. Save data
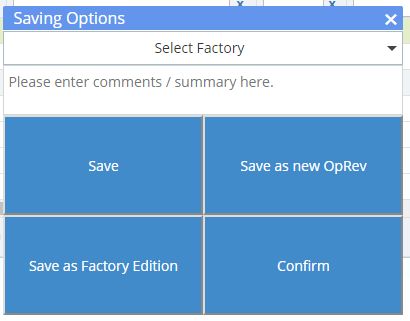
- Save
Click Save data, click on button Save that is save all thing you has been edited on the screen. This include: Add, edit, delete, drag, change group, remove group...for process detail.
- Save as new OpRe
This manipulation will create new operation plan with Op Revision is max old Op Revision add one. For example. Max Old Op Revision 005, new Op Revision is 006. New operation plan will have the same old operation plan, it include all process detail, linking, group....
- Save as Factory Edition
This manipulation will create new operation plan with edtion is AOM, Op Revision is max old Op Revision of AOM and add one. For example. Max Old Op Revision of AOM is 005, new Op Revision is 006. New operation plan will have the same old operation plan, it include all process detail, linking, group....
- Confirm
This manipulation will set column Status of operation plan from empty to a key(Confirmed).
12. Export pdf
Click on Export pdf, It will be print any thing on the screen to pdf file.
13. Export png
Click on Export png, It will be print any thing on the screen to image file with extendtion png.
14. Show printing line
Click on Show printing line. It will show the line of printing
IV.Some action on screen.
1. Add page
If you want to add new page click on icon: Create new page
A new page will be created and it is a blank page
Back to old page, right click on group you want to change page, one popup will show like below.
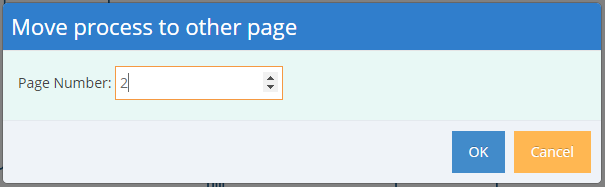
Click Ok, all process detail in this group will change to page that you has been selected. Now click next page you has been change to, you will see all group and process detail you moved to here.
Click Save data and click Save to save all your acttion
2. Connect between process detail.
On process detail click on the red icon rectangle and drag it to other process detail. You will get the connect from root to destination.
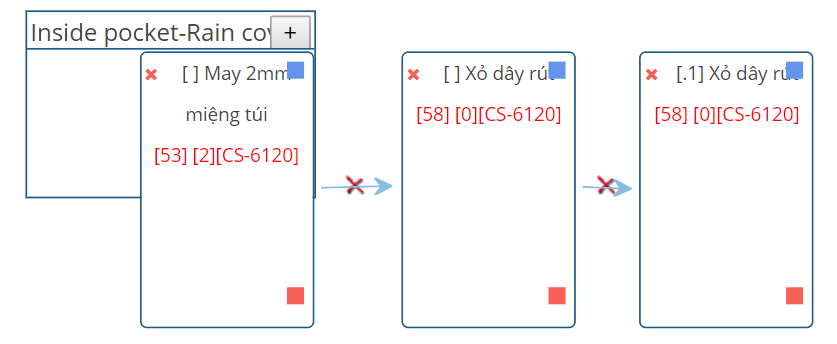
If you want to remove this connect click on the icon X.
Click Save data and click Save to save all your acttion