MES Login
WIP Warehouse Management Last updated 2025/01/22
Purpose:
- To efficiently manage WIP stock and location in WIP warehouse and supermarket within MES .
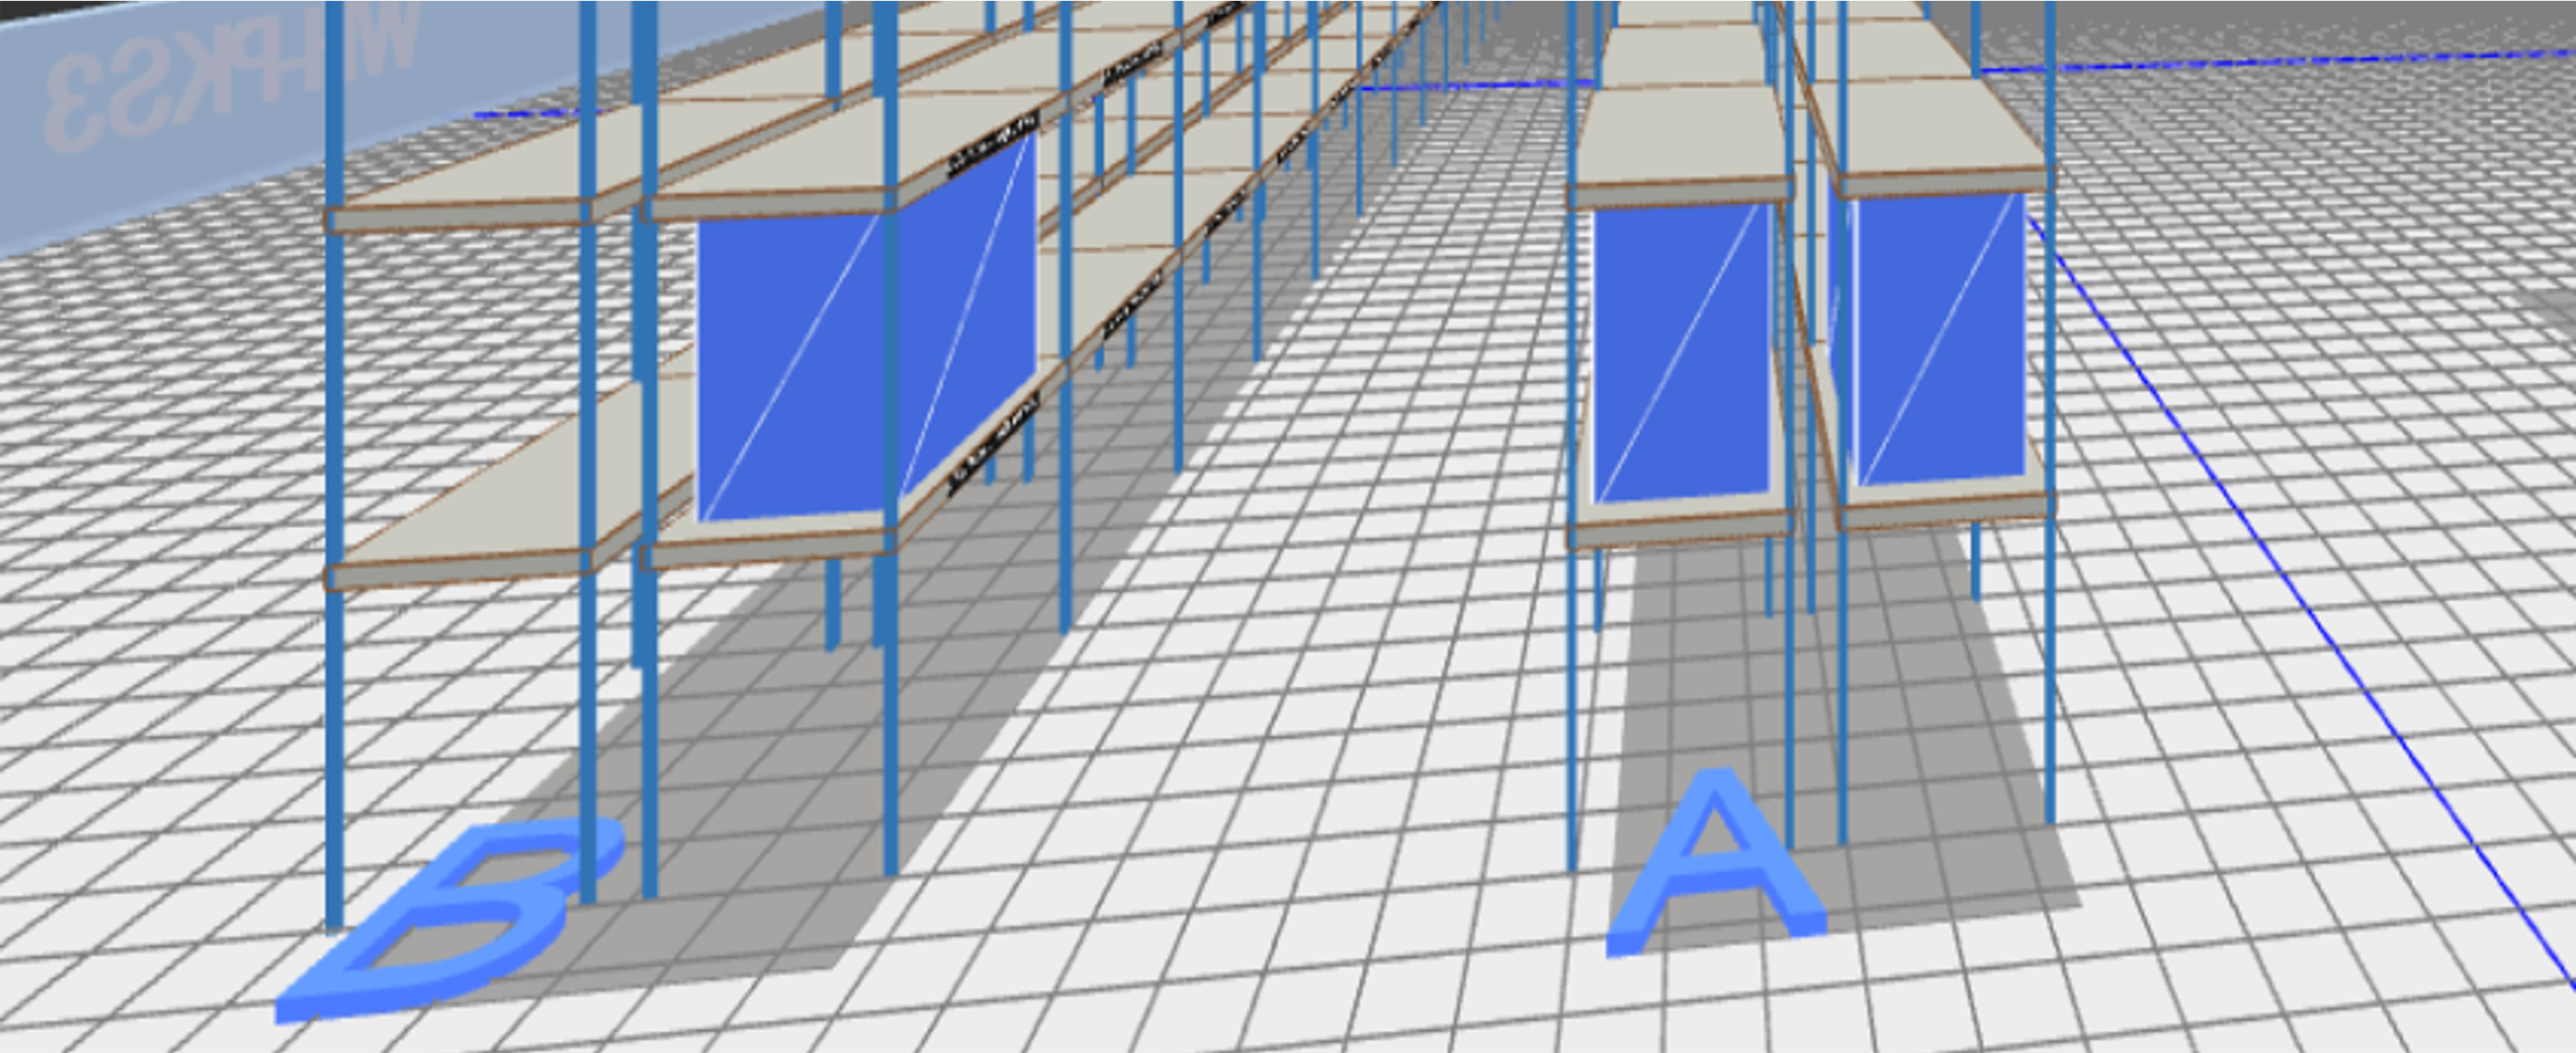
- Offering 3D warehouse which could dynamically visualize the inventory status, support searching by multiple criterias.
MANAGING PARTS AND SUB STOCk
From MES website
Precondition: Production completed and confirmed for SUB and Part packages.
To move the Parts and SUB output to warehouse, access MES system, navigate to menu Production=>Production Management=>Production Scheduling
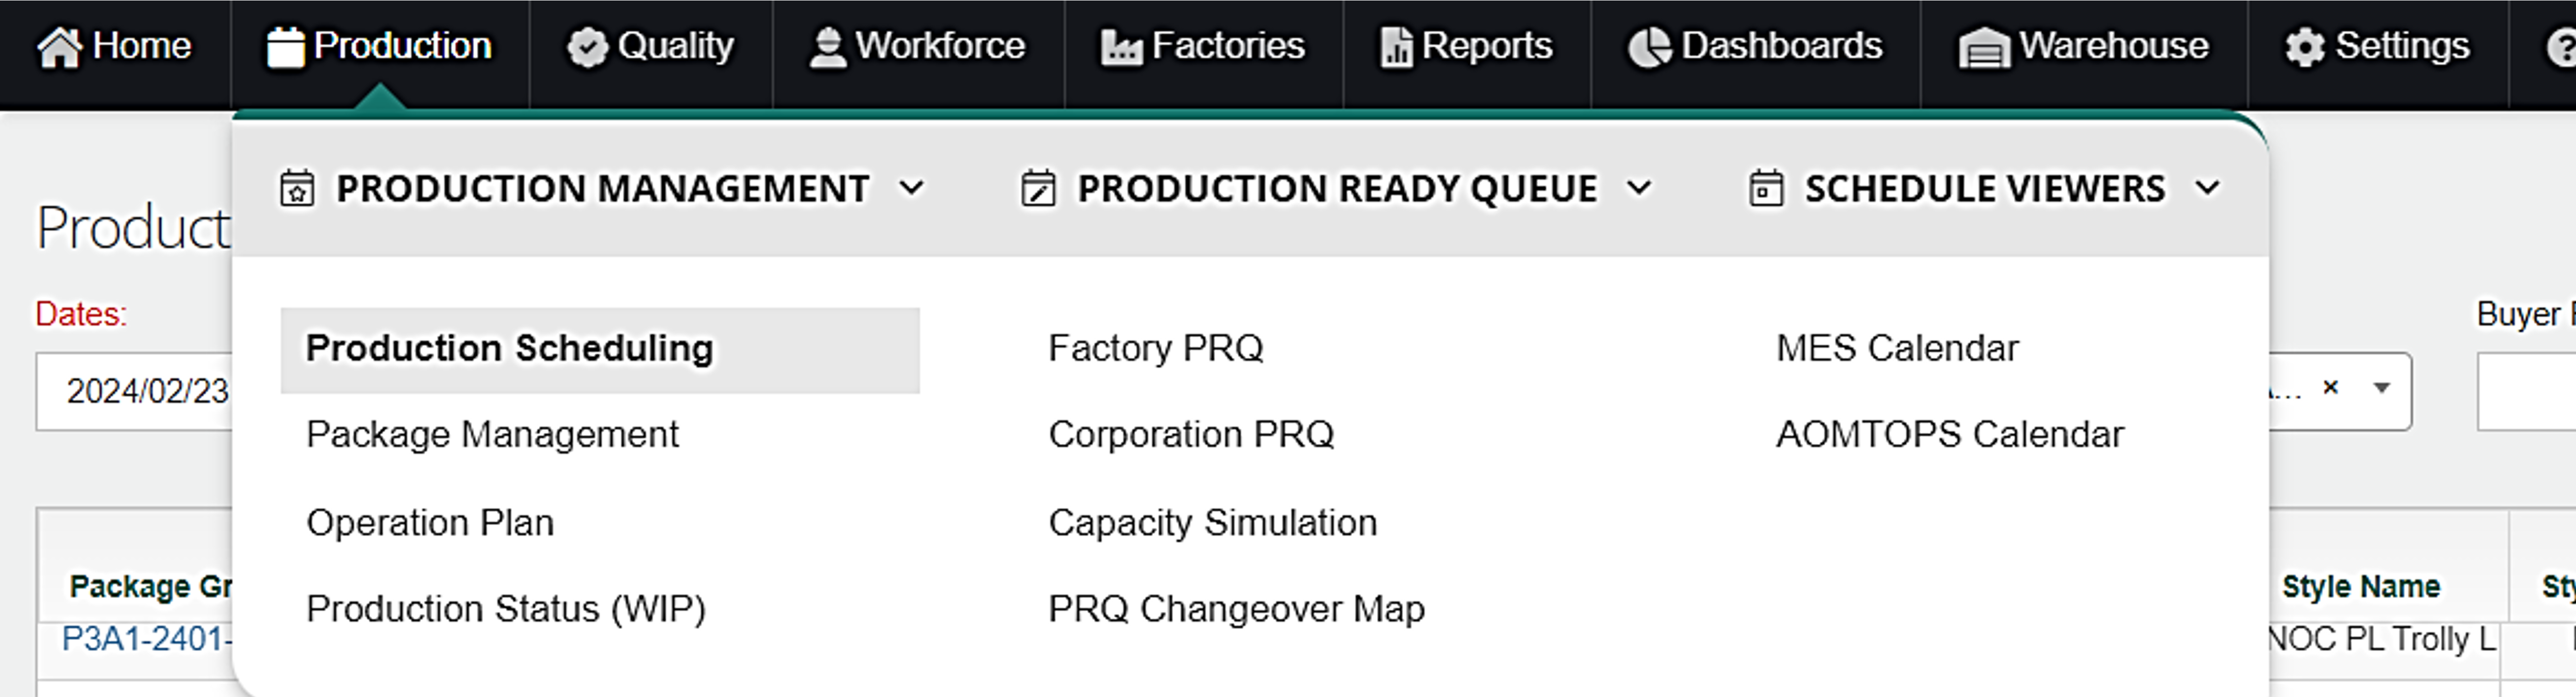
In Production Scheduling screen:
- Find and select the Package Group.
- At Sub Assembly Packages or Part Packages, after confirming output, click “Update” button under the Location column.

- At Location Management pop-up window:
- Select Supermarket warehouse if the Package is ready to be in assembly Line.
- Select WIP warehouse if the Package needs to be moved to warehouse.
Select line, rack, shelf, input quantity to move=>Click Move.
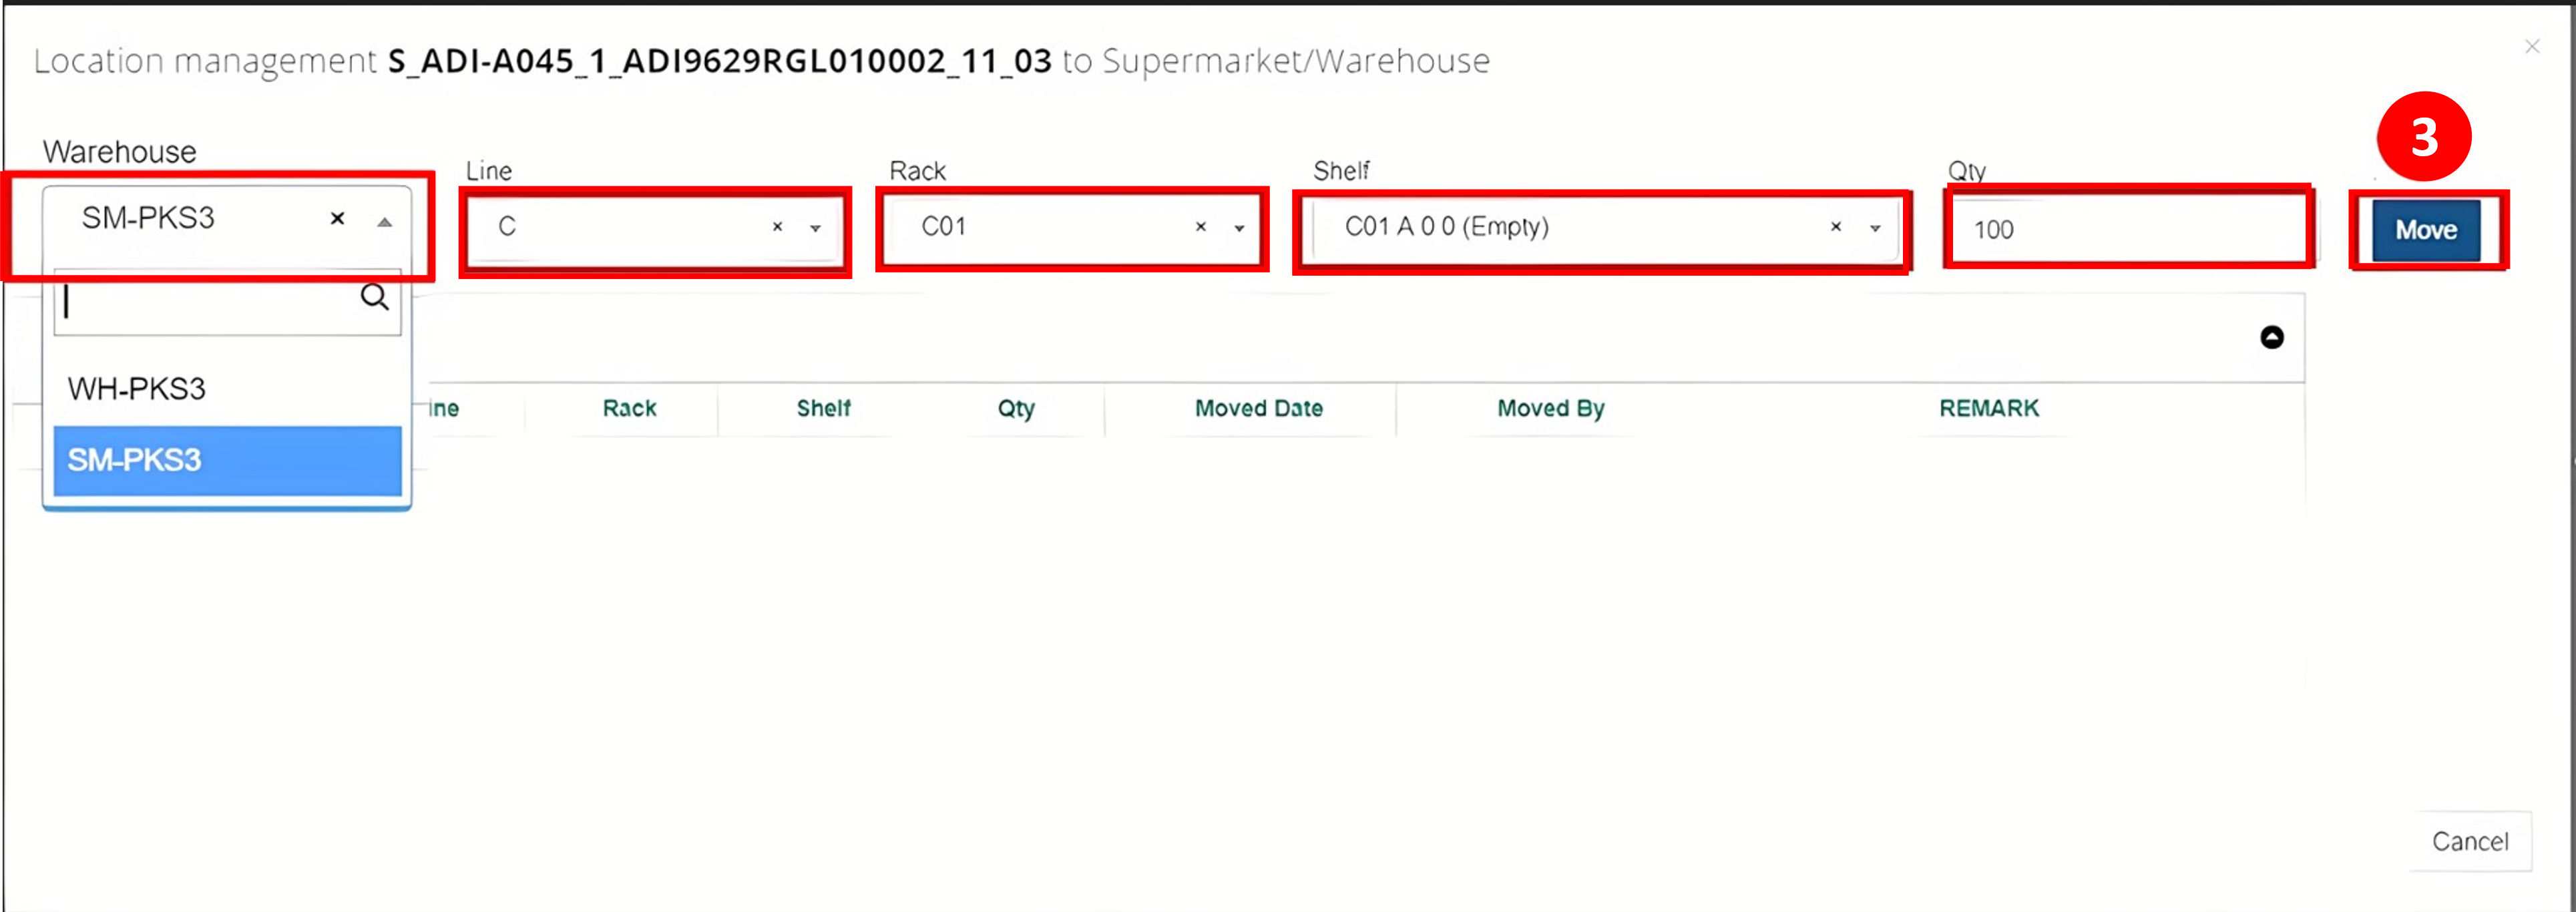
- After successfully moving to warehouse or supermarket, the Location column will update the quantity number

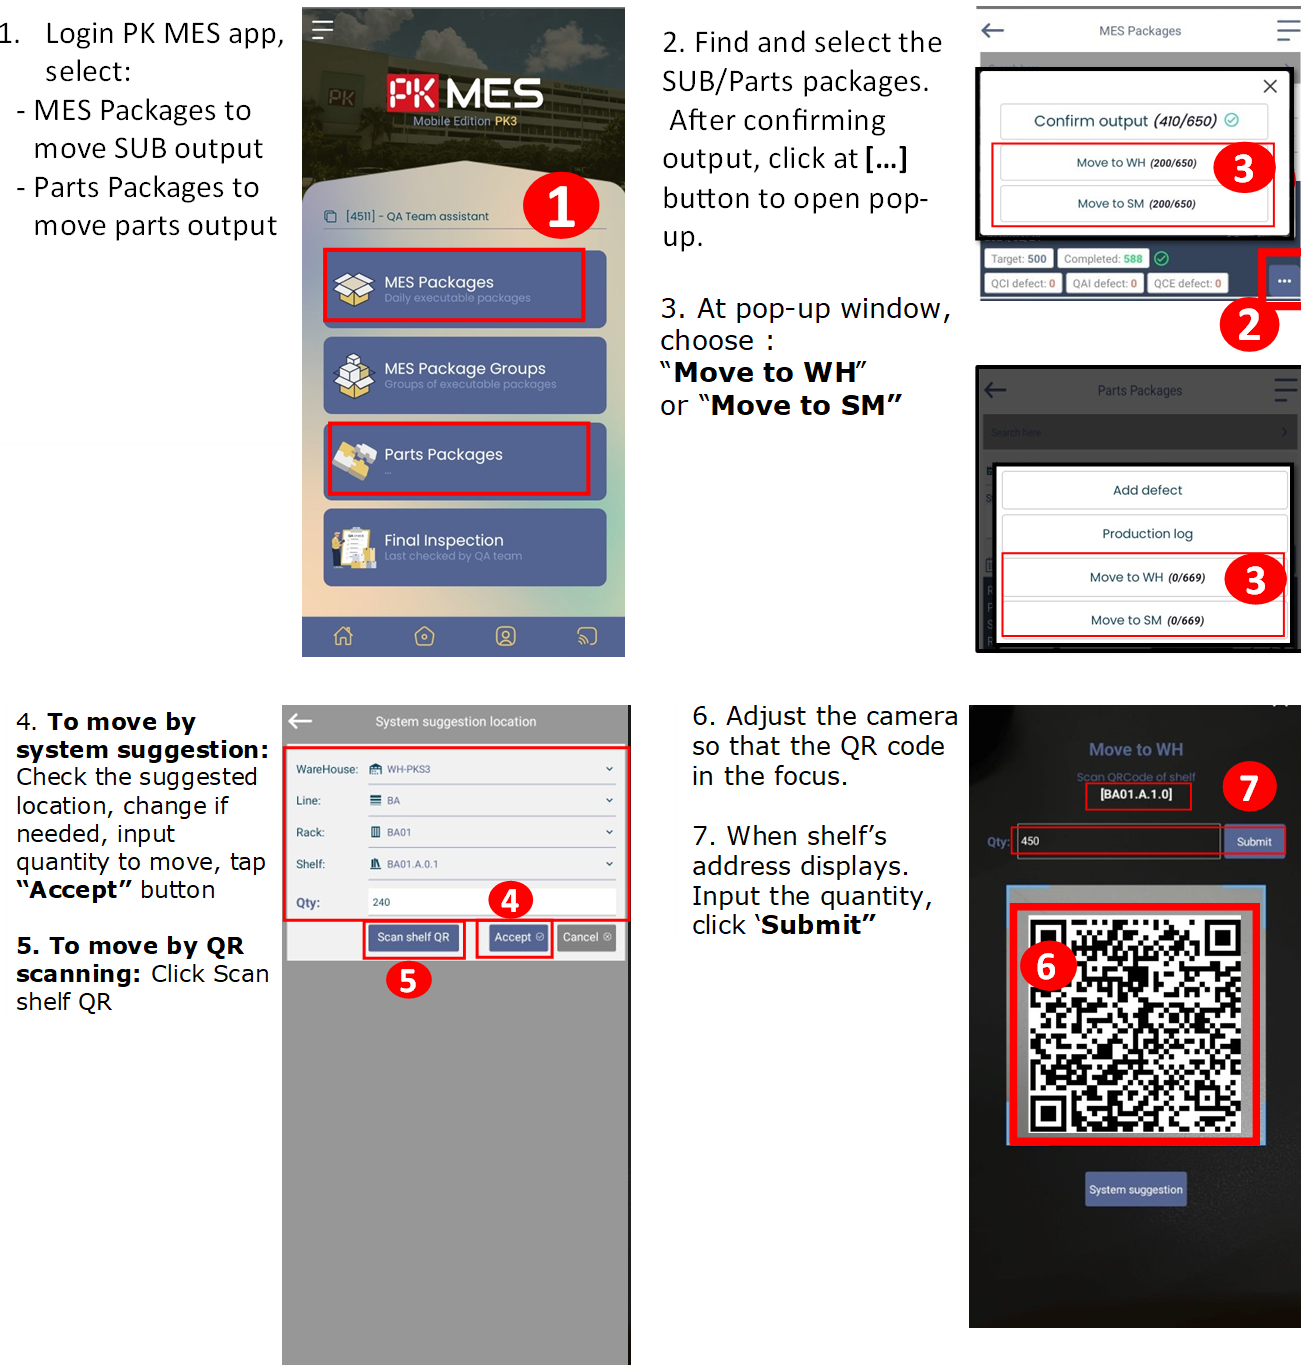
From MES mobile app
Purpose: Allow the SUB or parts stock to be placed in WIP warehouse by using MES mobile app.
Precondition:
- Using the MES Mobile app version
- Production completed and confirmed for SUB and Part packages.
-
SEARCH
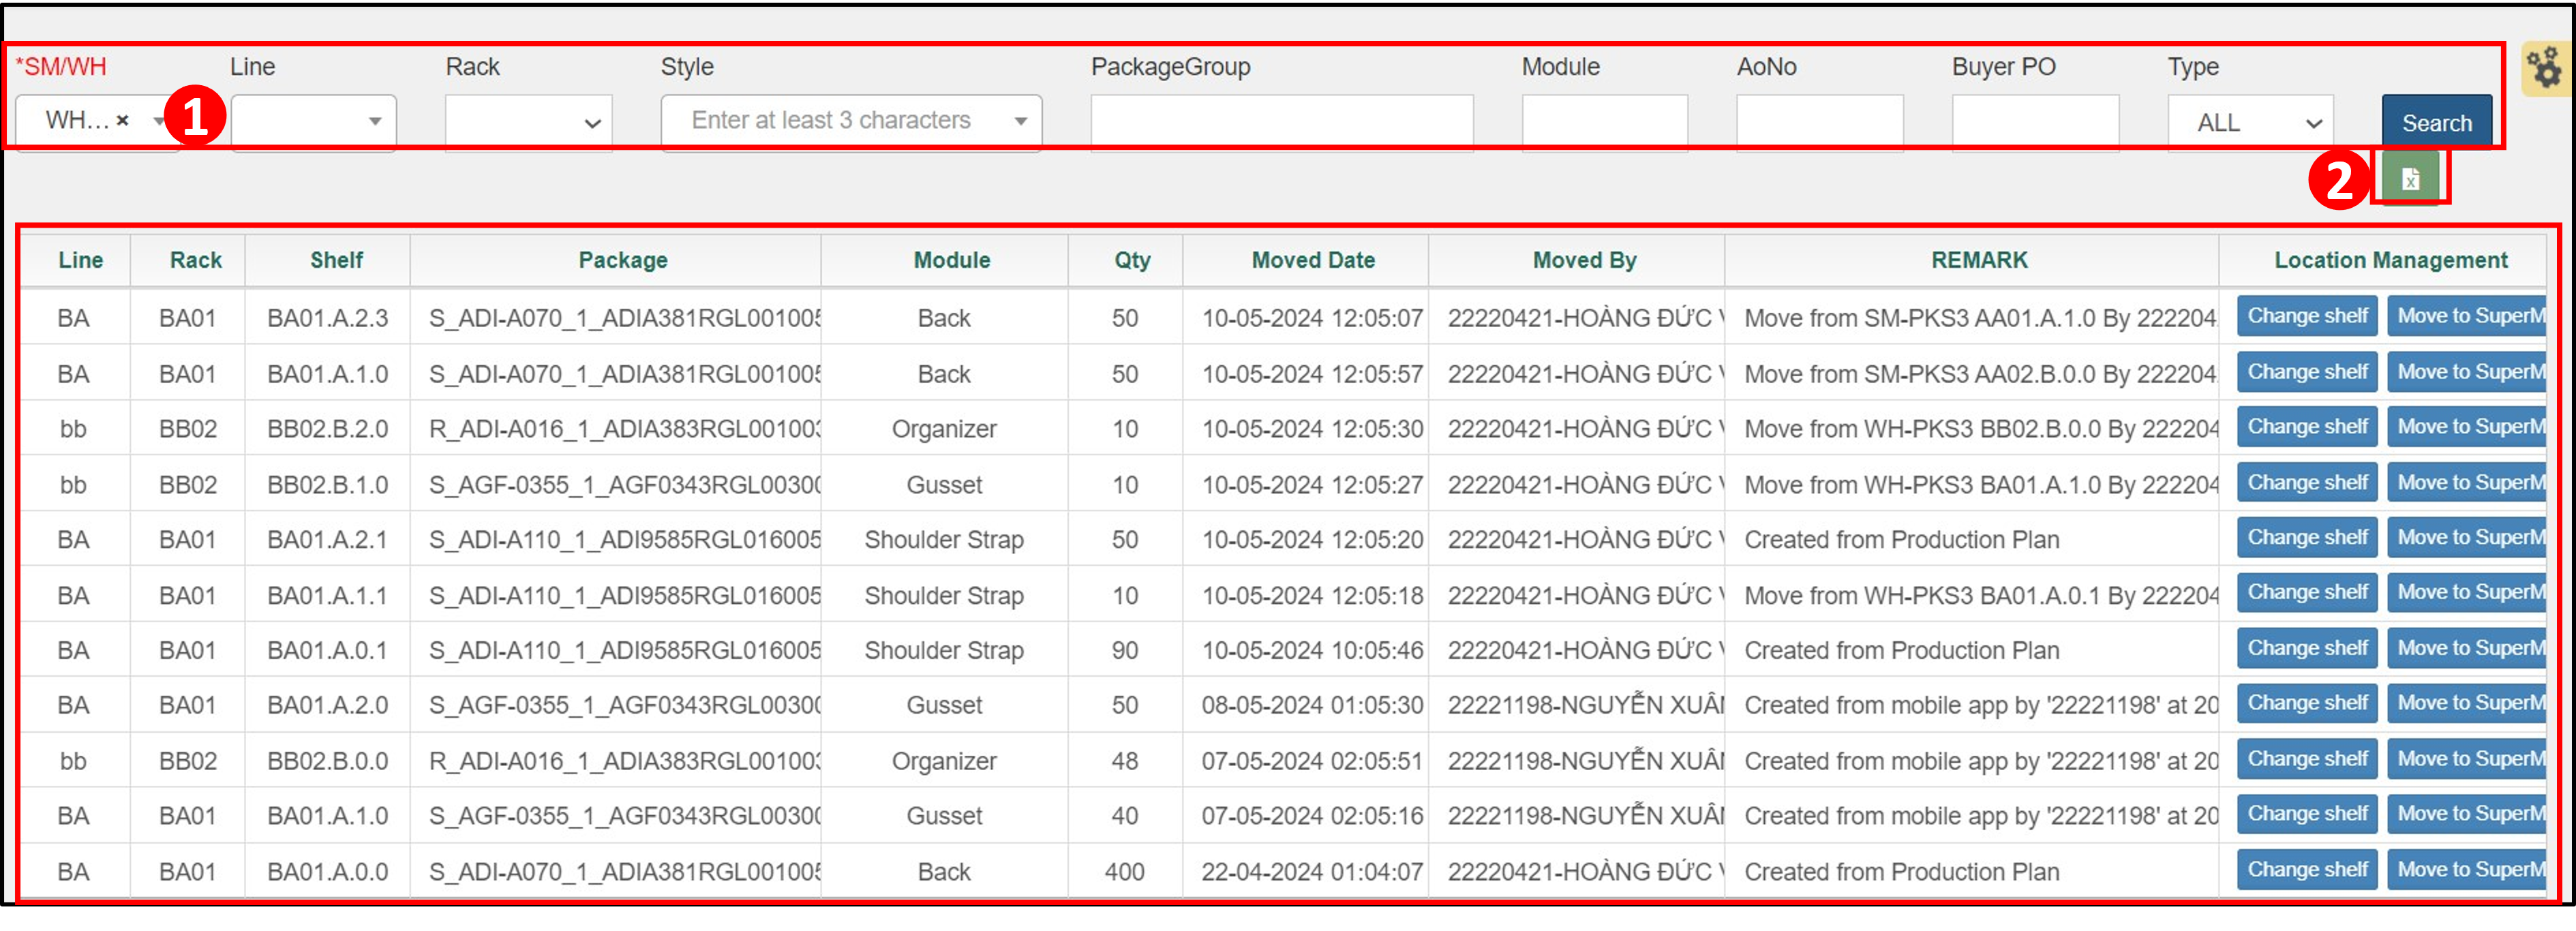
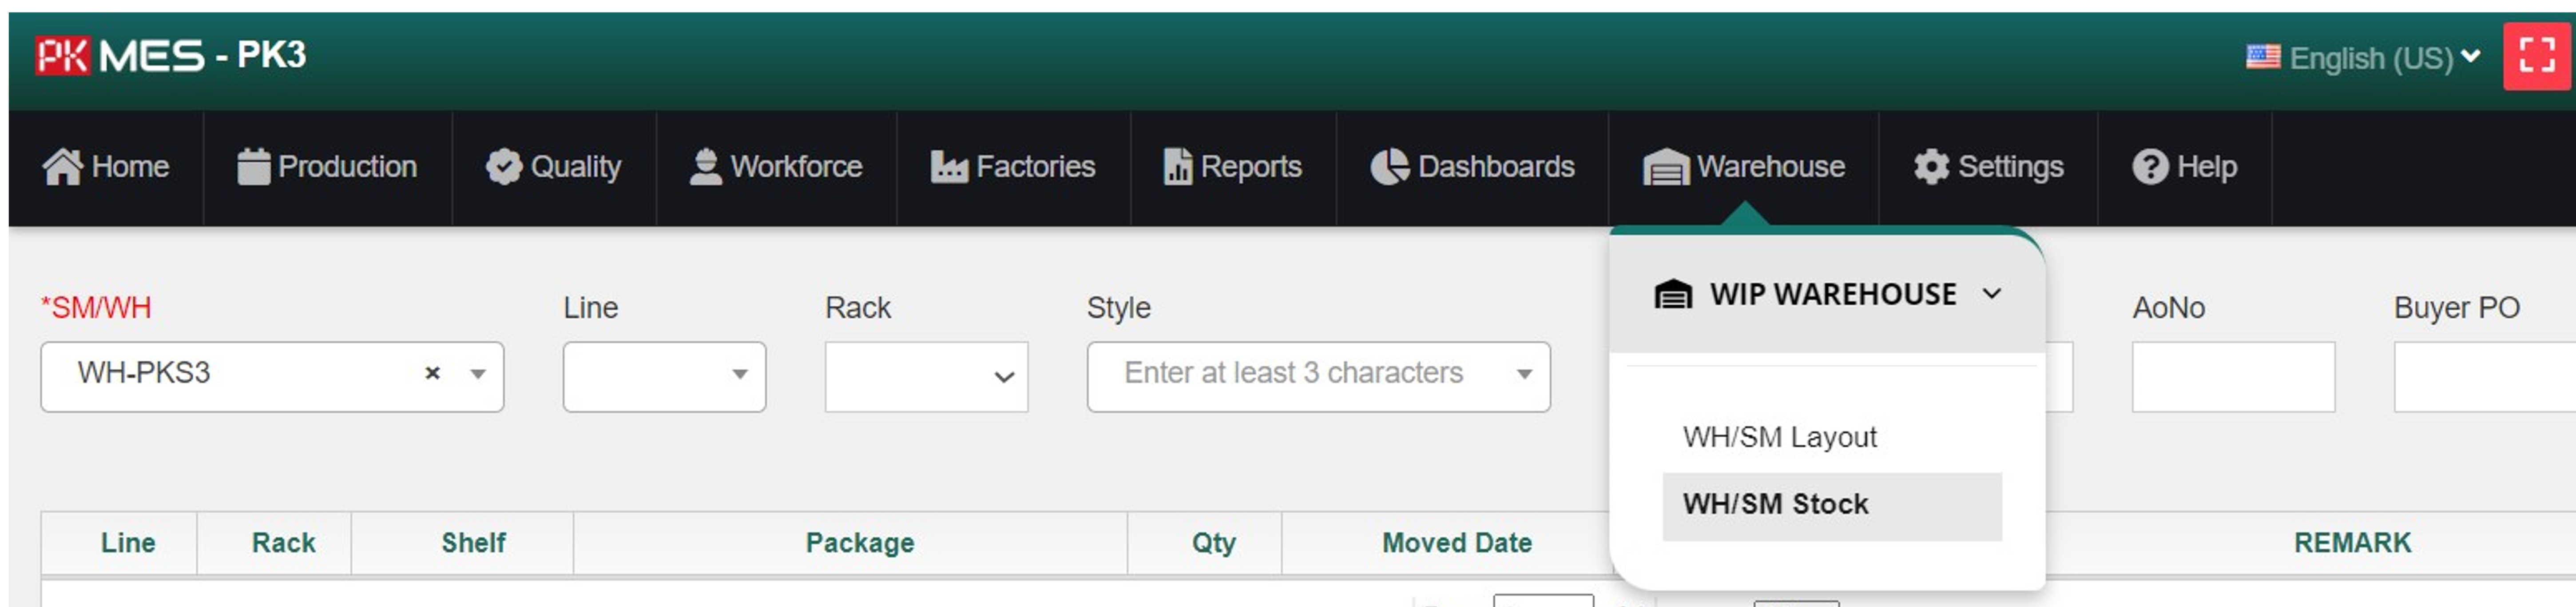
To perform this action, navigate to menu Warehouse => WH/SM Stock

- Select/input criterias, click Search. The result will be displayed in the section below.
- Click Sheet icon to Export Searching result to Excel file.
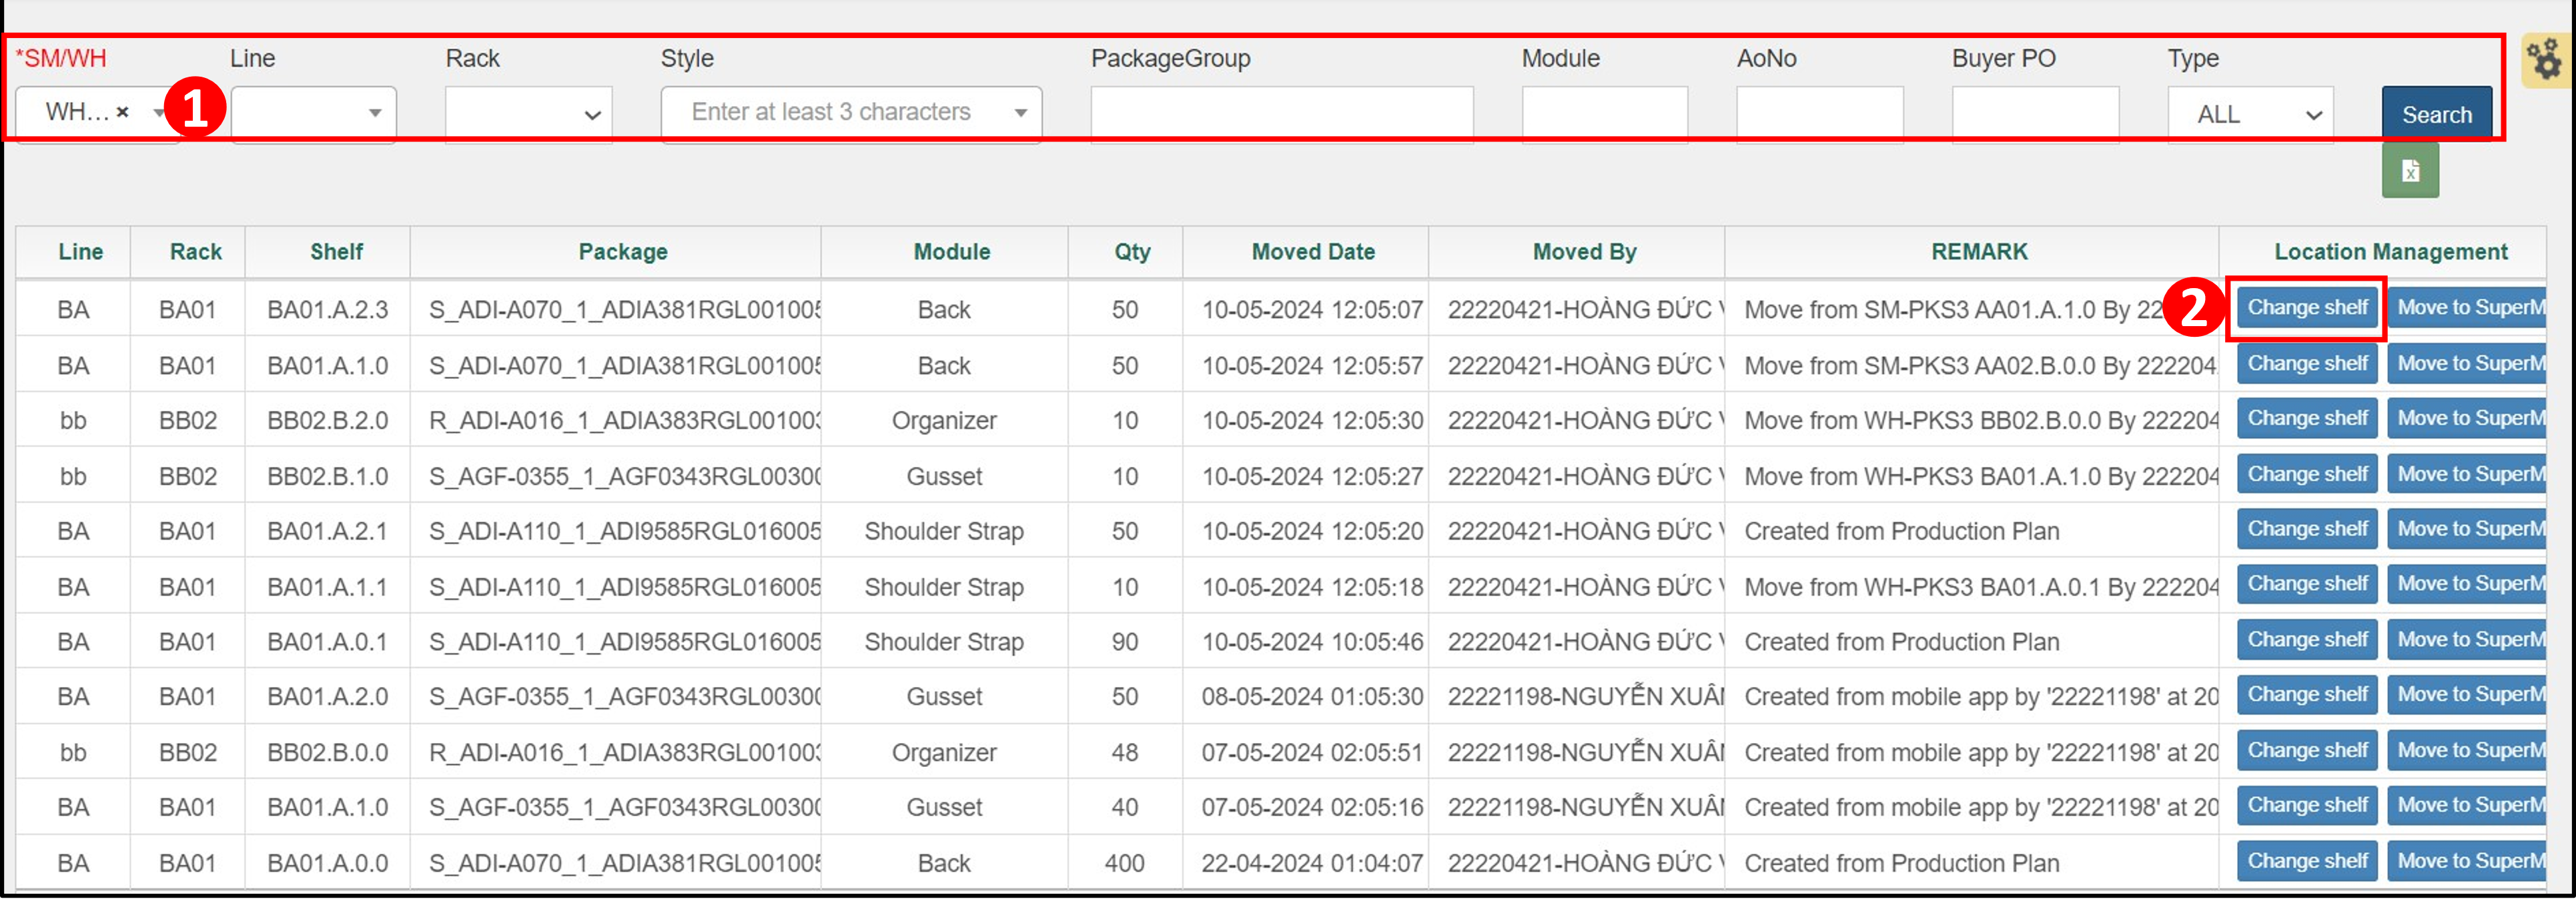
CHANGE SHELF
Purpose: To relocate Parts and SUB to another shelf in WIP warehouse
From Stock menu
To perform this action, navigate to menu Warehouse => WH/SM Stock
- Select WIP warehouse (mandatory) and other fields (optional), click Search.
- Click Change shelf on the needed row.
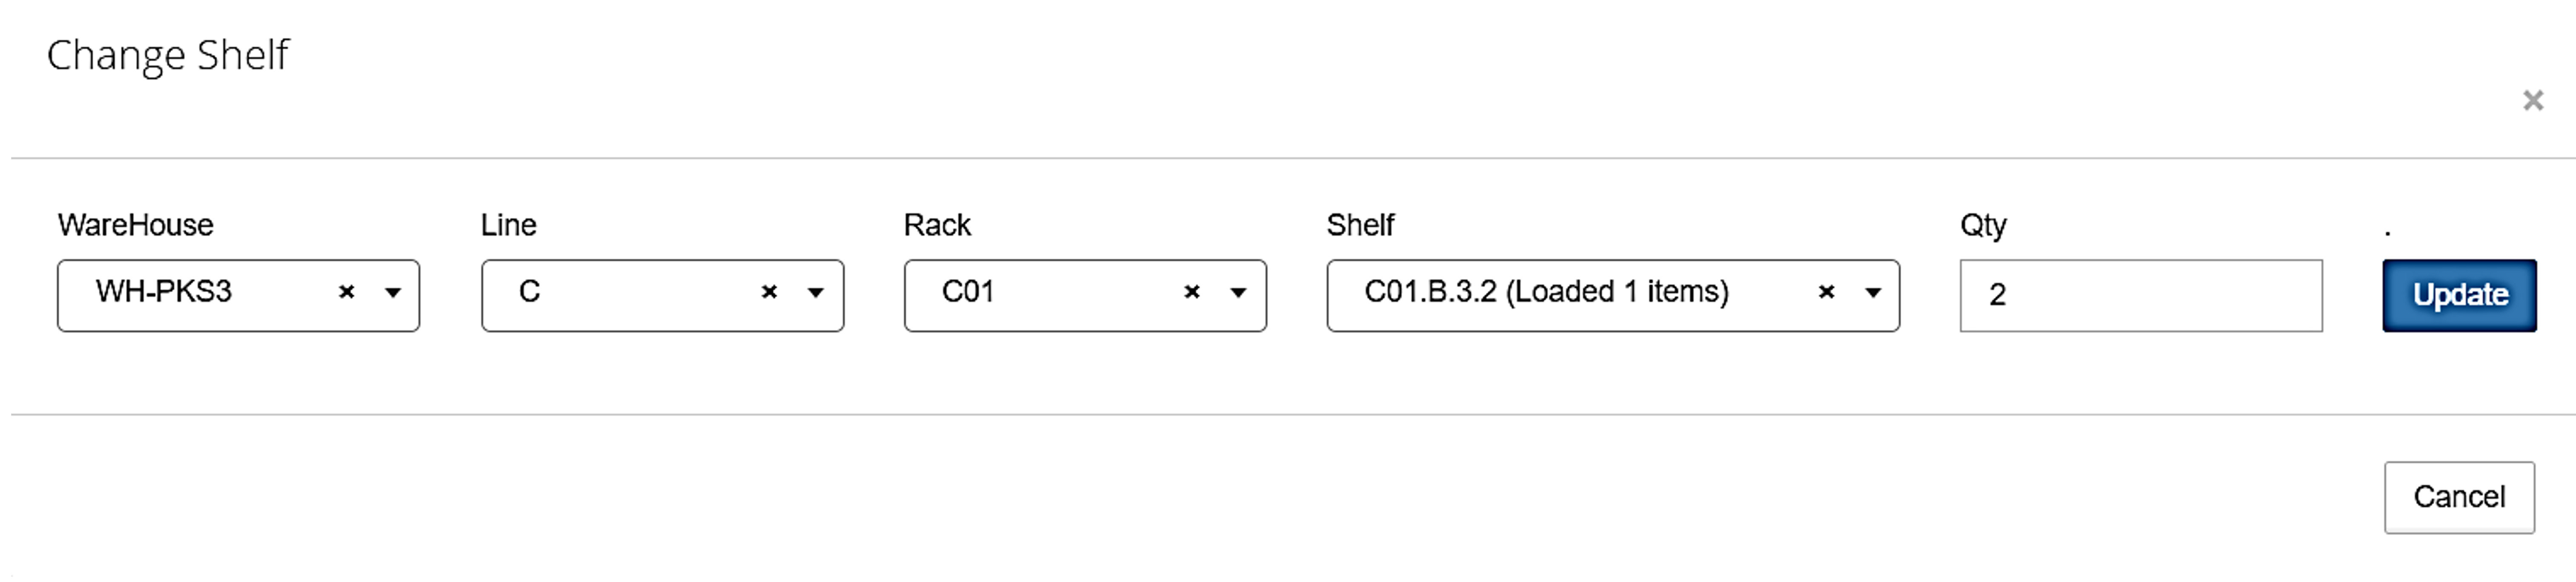
- Select new shelf address in a WIP warehouse, fill in the quantity to move, then click Update
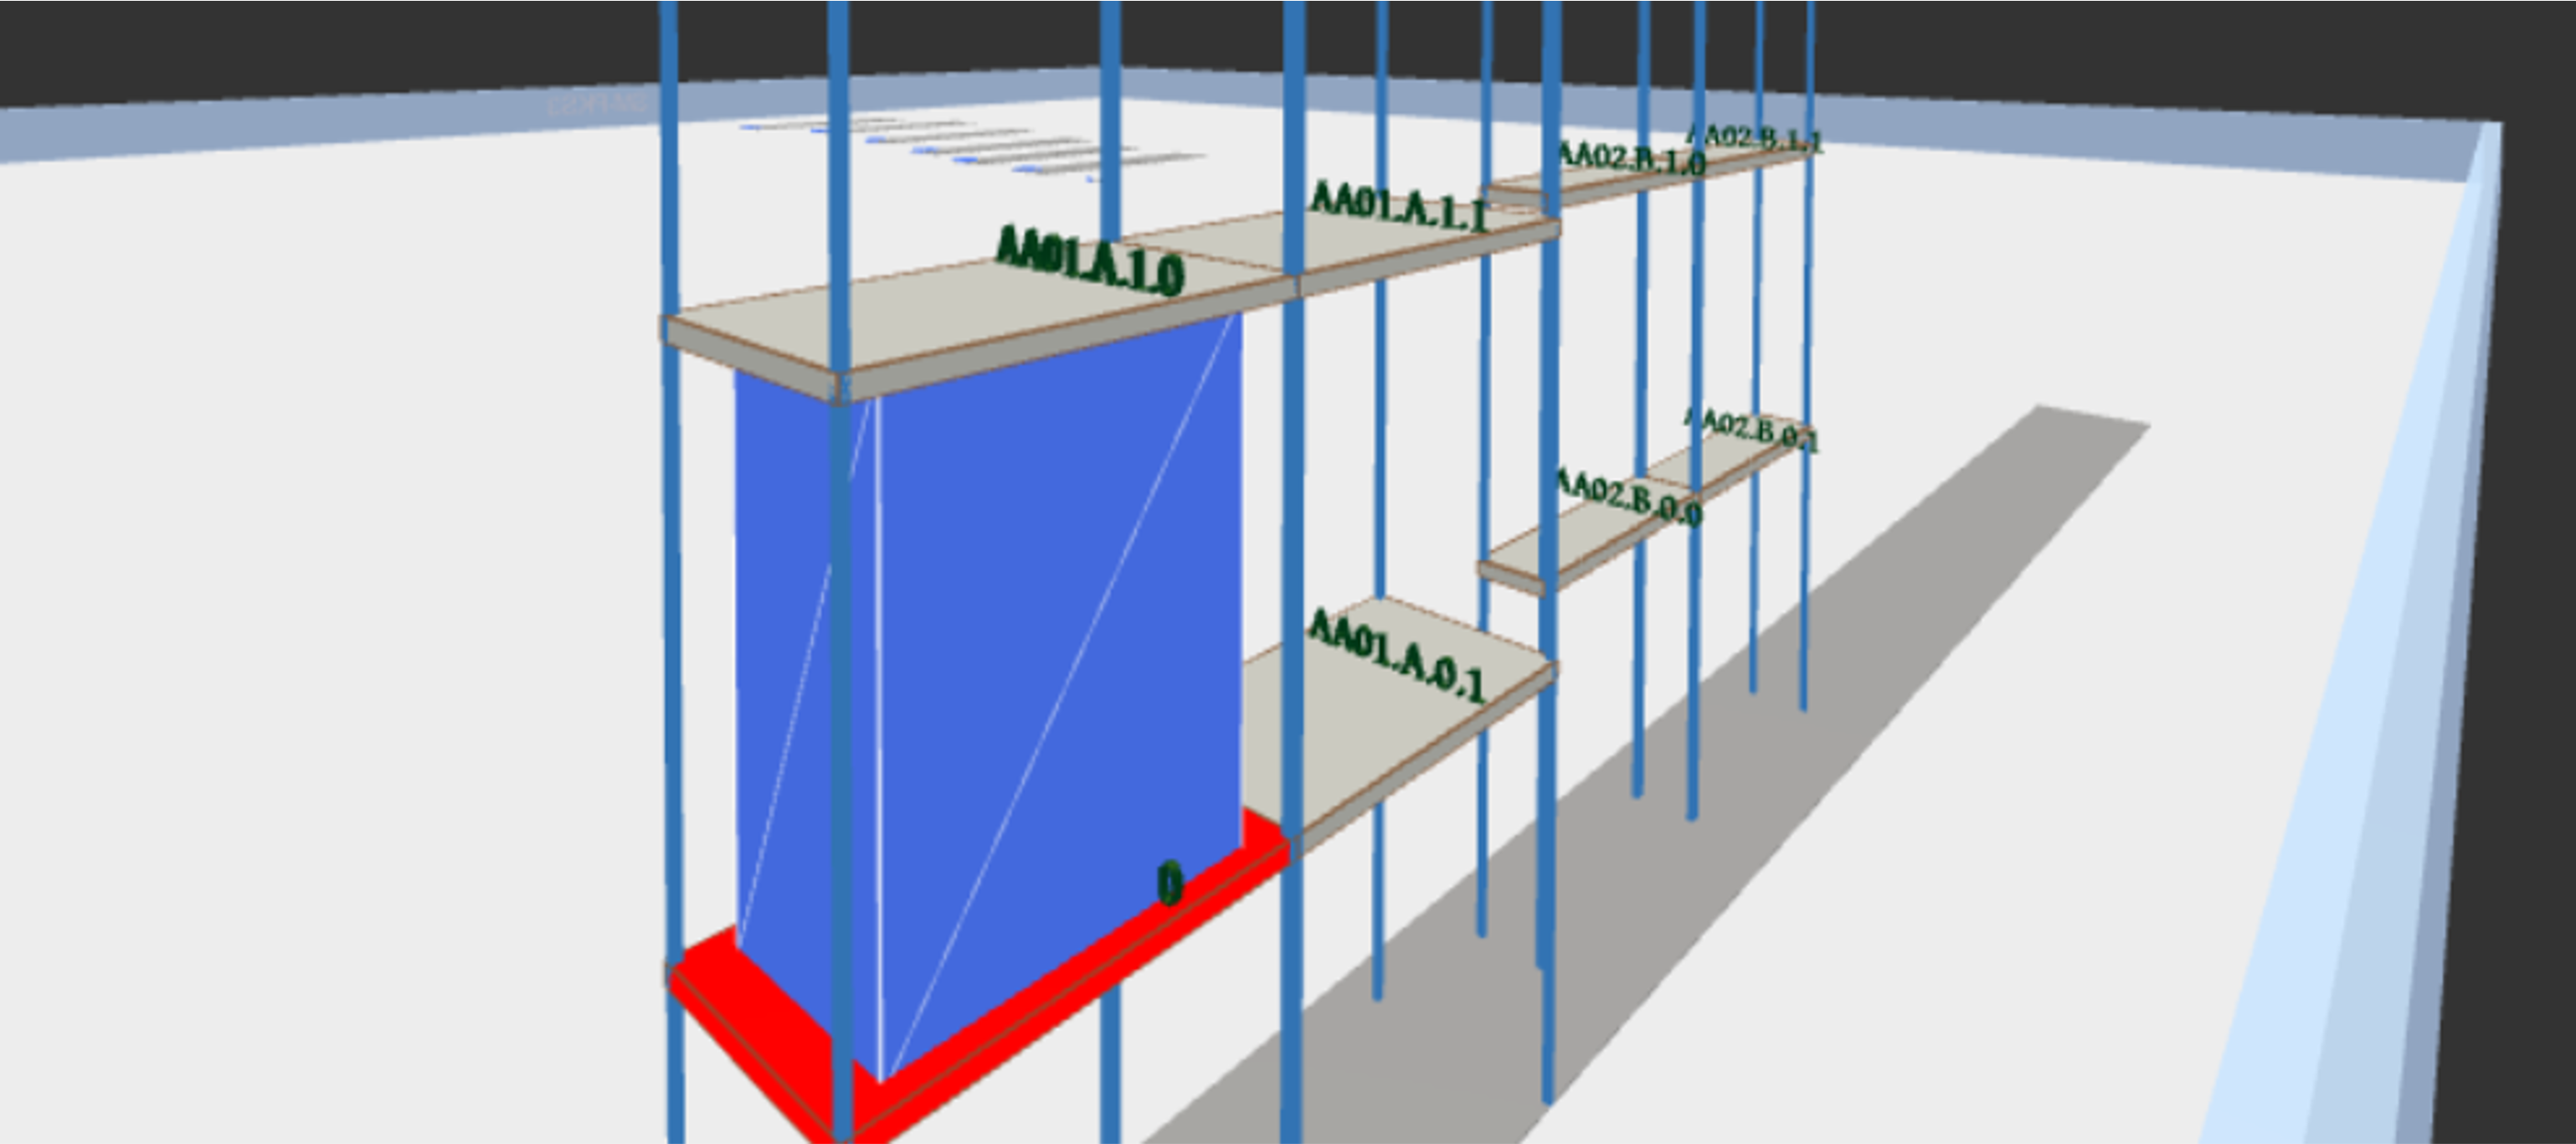
From Layout screen
- At simulation warehouse, click on the Shelf contain the Parts/SUB to adjust.

- At Shelf detail window, click Change shelf

- Select new Shelf address and fill in the quantity to move, then click Update

MOVE TO SUPERMARKET
Purpose: To move Parts and SUB from WIP warehouse to Supermarket warehouse, to be ready for Finished goods production.
From stock menu
- In Stock menu, select WIP warehouse (mandatory) and other fields (optional), click Search.
- Click Move to Supermarket on the needed row.

- Select new Shelf address in a Supermarket warehouse and fill in the quantity to move, click Update

From Layout screen
- At simulation warehouse, click on the shelf contain the Parts/SUB which need to be moved to Supermarket.
- At Shelf detail window, click Move to Supermarket

- Select new Shelf address and fill in the quantity, then click Update

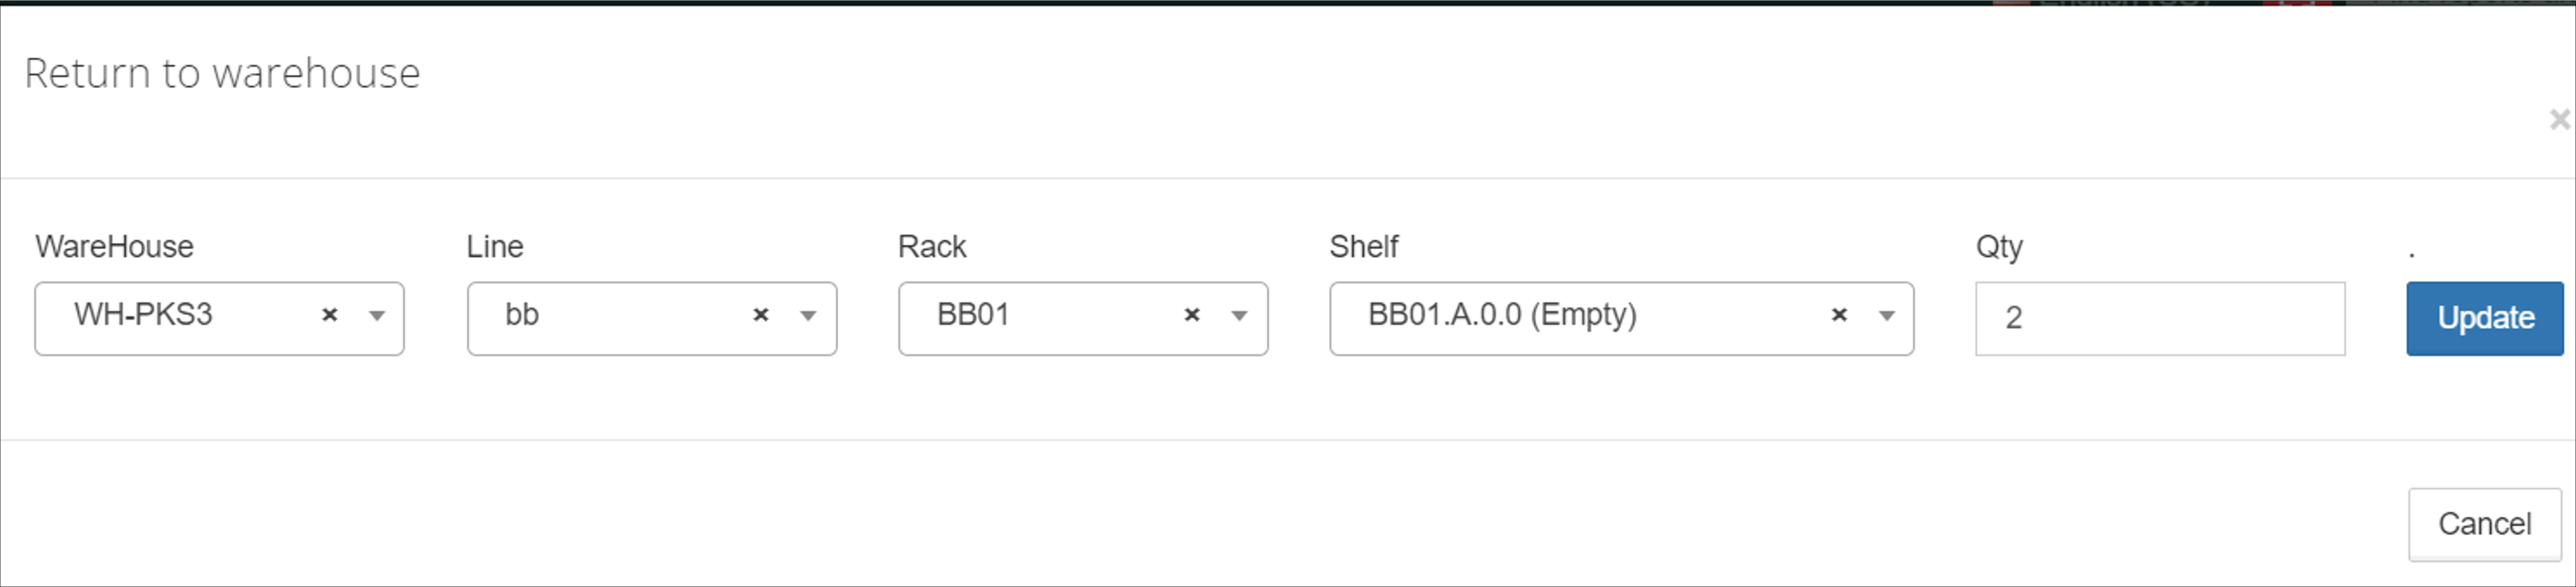
RETURN TO WAREHOUSE
Purpose: To move or restock Parts and SUB from Supermarket warehouse to WIP warehouse.
From Stock menu
- In stock menu, please select Supermarket warehouse (mandatory) and other fields (optional), click Search.
- Click Return to warehouse on the needed row.

- Select new shelf address in a WIP warehouse and fill in the quantity, then click Update

From Layout screen
- At simulation warehouse, click on the Shelf contain the Parts/SUB which need to be returned to warehouse.
- At Shelf detail window, click Return to warehouse on the needed row.

- Select new Shelf address, fill in the quantity to move, click Update