MES Login
Warehouse Layout Last updated 2025/01/22
Warehouse layout is defined by lines, racks, and shelves.
Purpose:
- To define and manage actual WIP warehouse layout using 3D simulation.
- Here we can manage exclusive WIP warehouse and supermarket.
To access, navigate to menu Warehouse => WH/SM Layout

WAREHOUSE AND SUPERMARKET MANAGEMENT
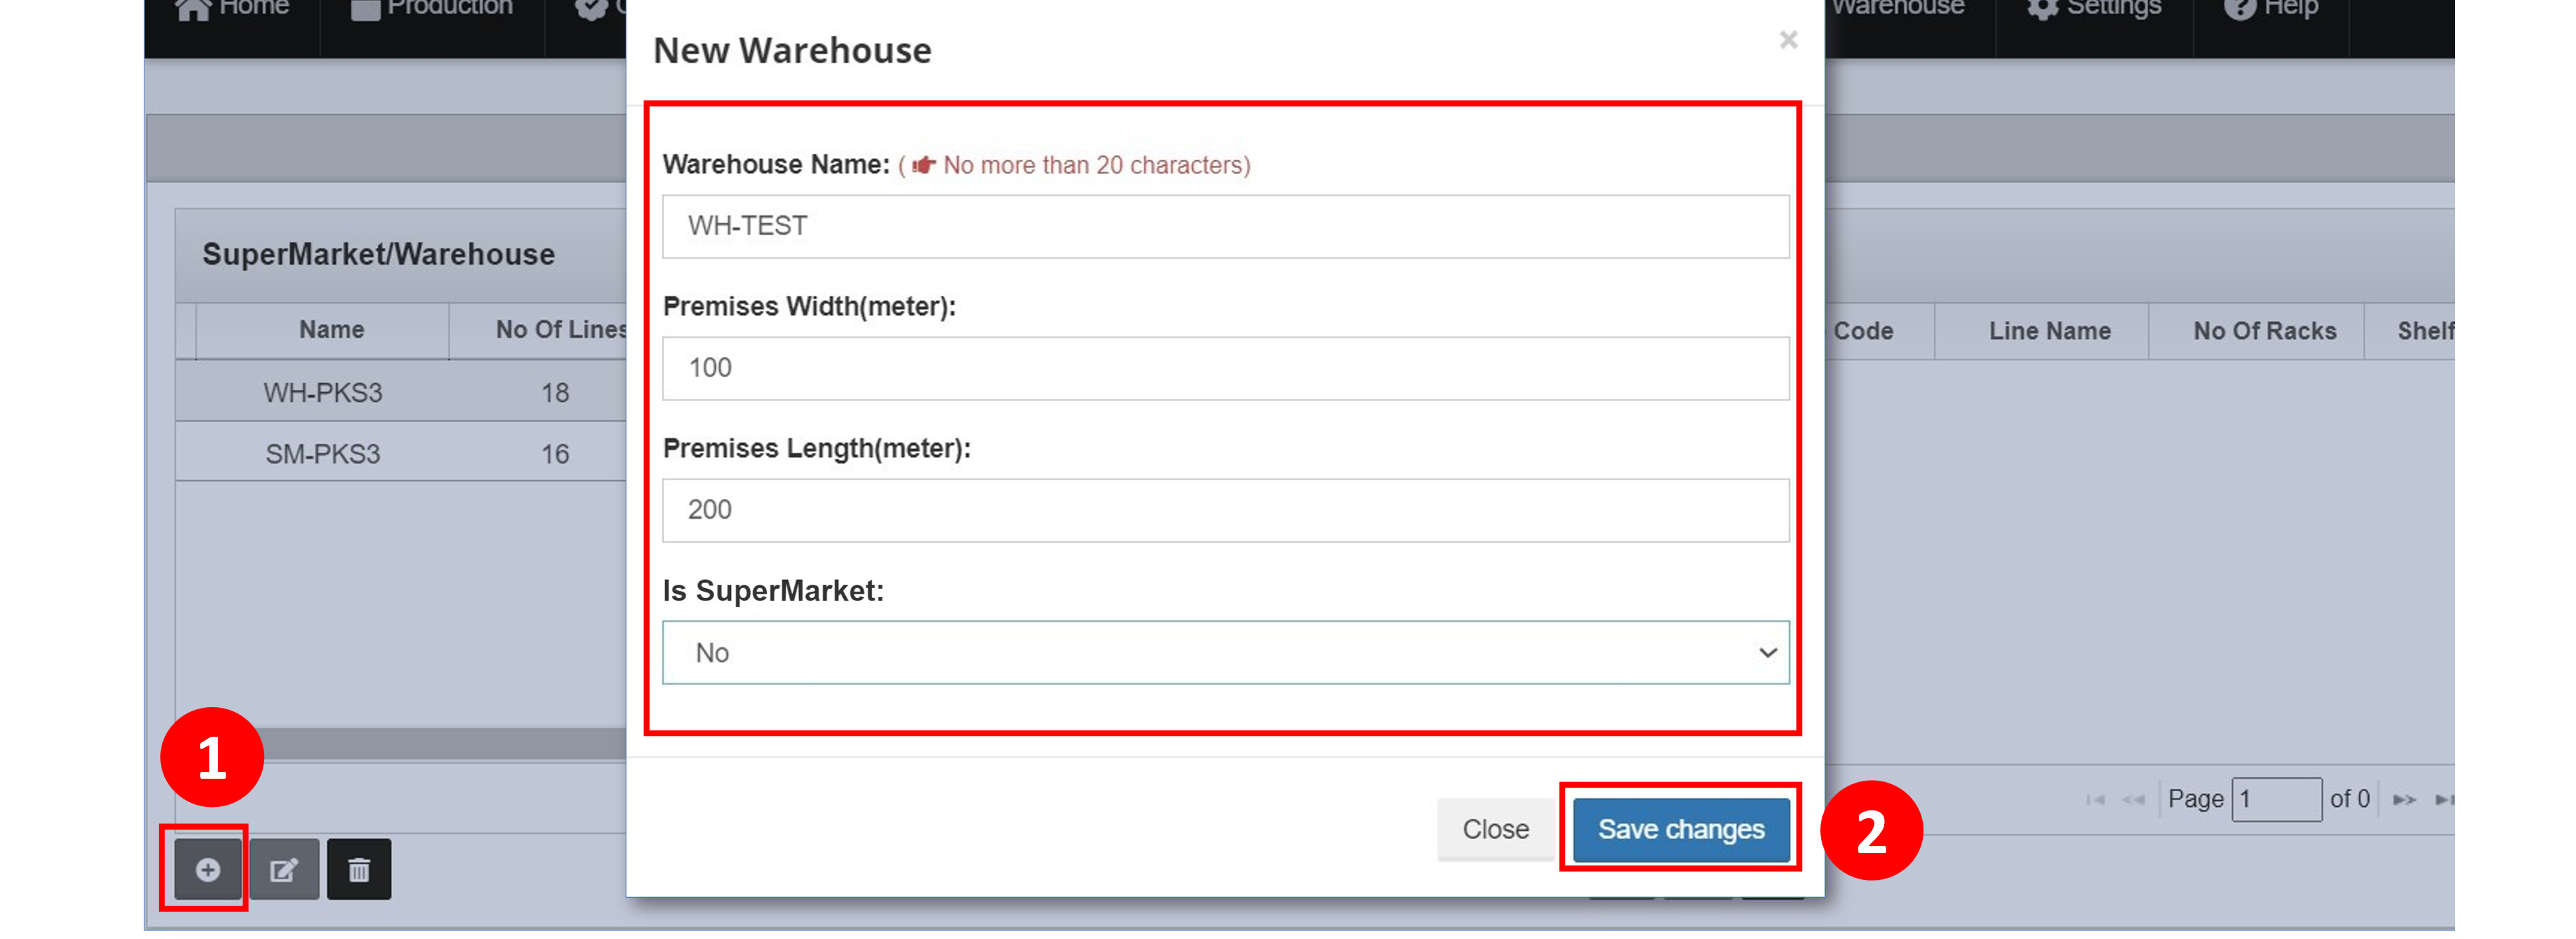
Add warehouse or supermarket
Purpose: Allow creating a new warehouse.
To add a warehouse:
- Click “+” button to open pop-up to define a new warehouse.
- In the pop-up, input warehouse name, premises dimensions(length and width), select warehouse type, click “save changes”
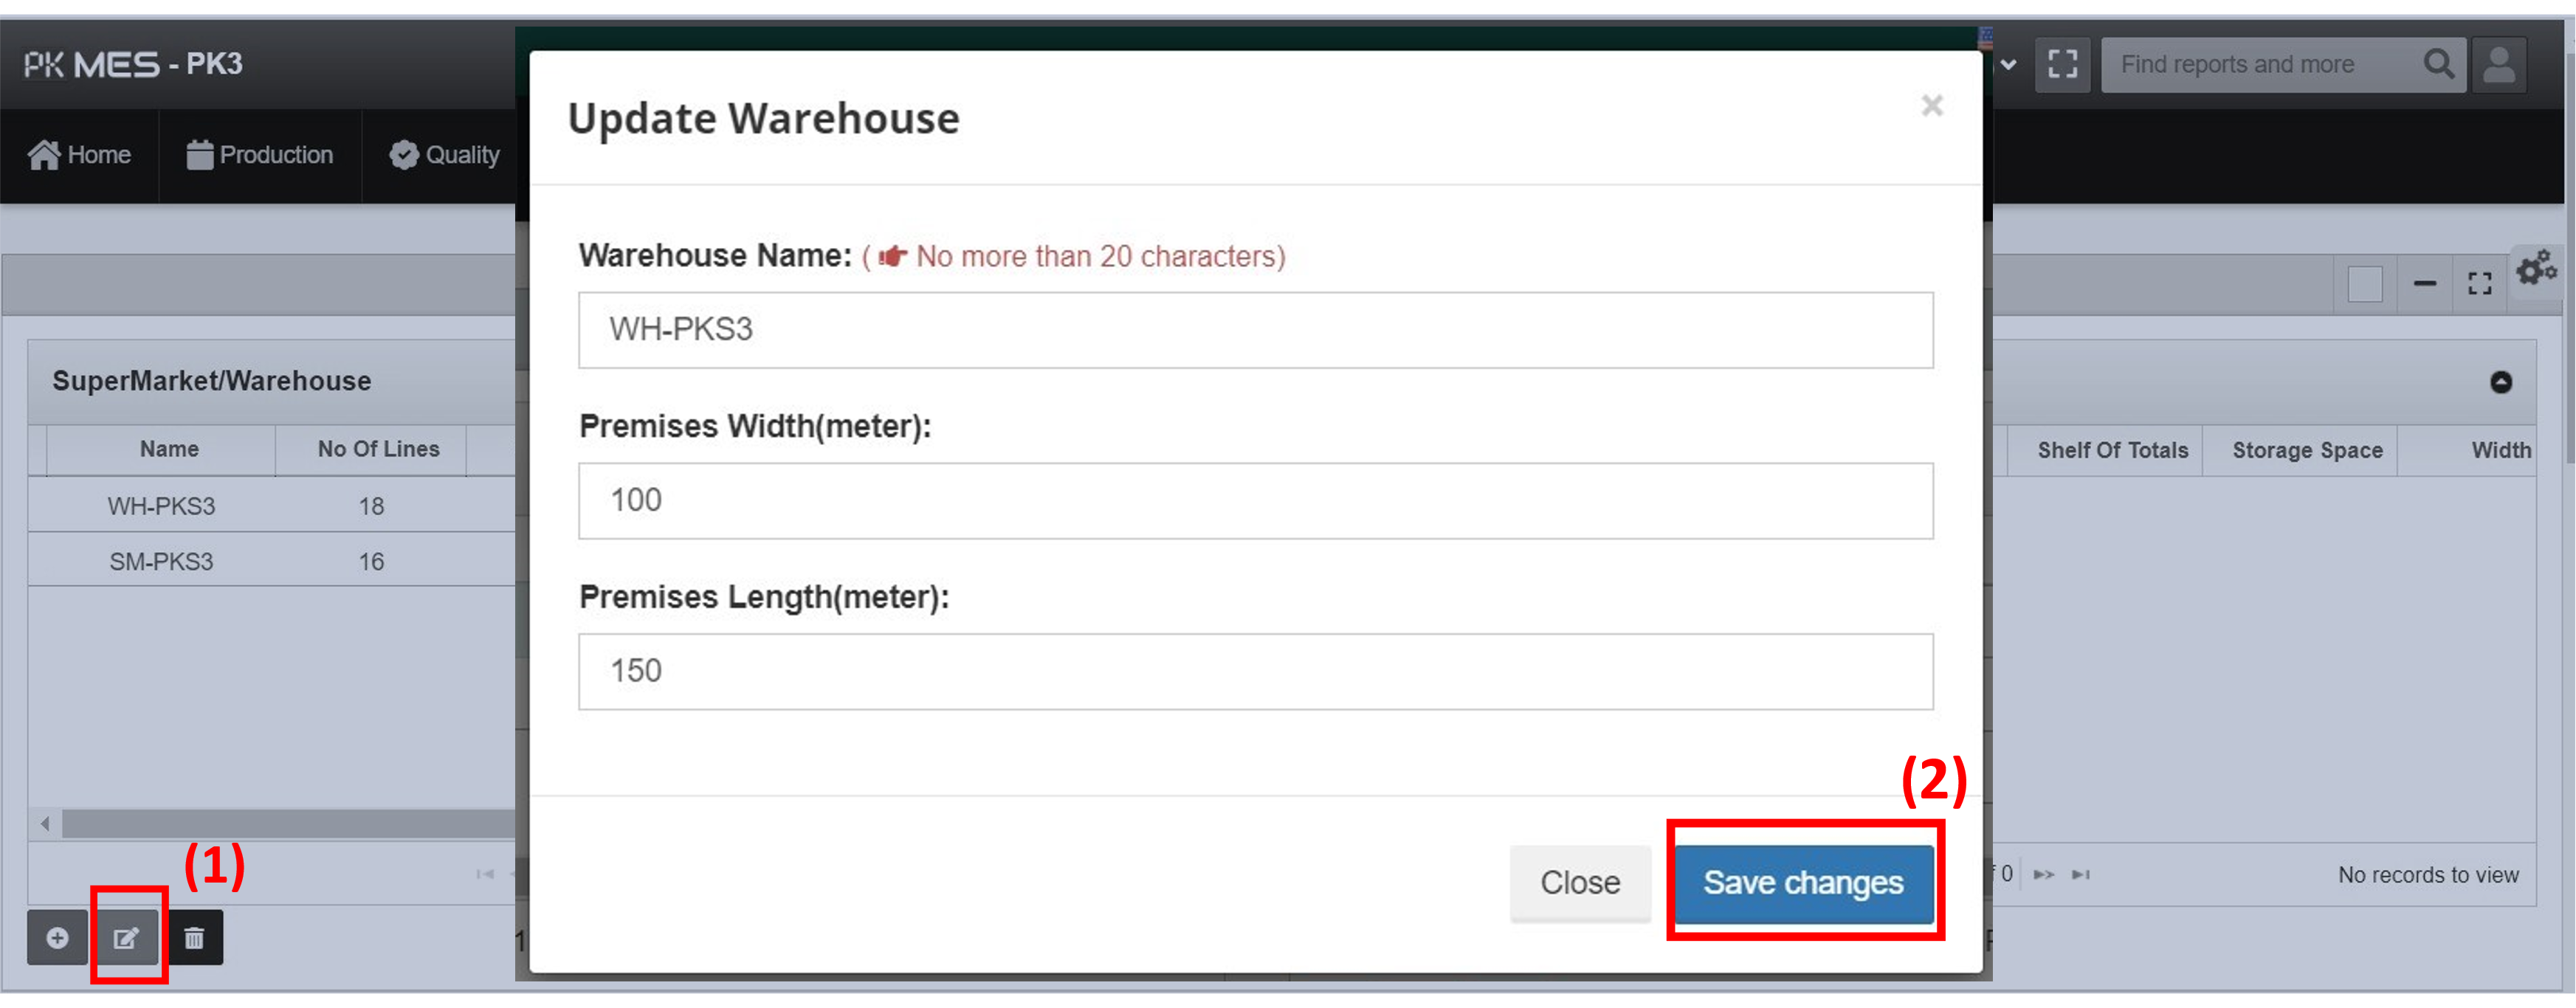
Edit warehouse or supermarket
Purpose: Allow editing a selected warehouse.
Precondition: No stock exists.
To edit a warehouse:
- Click the Edit button to open the edit window, this allows changing the warehouse name, premises width (meter) and premises length (meter).
- Click “Save changes” to preserve the data.
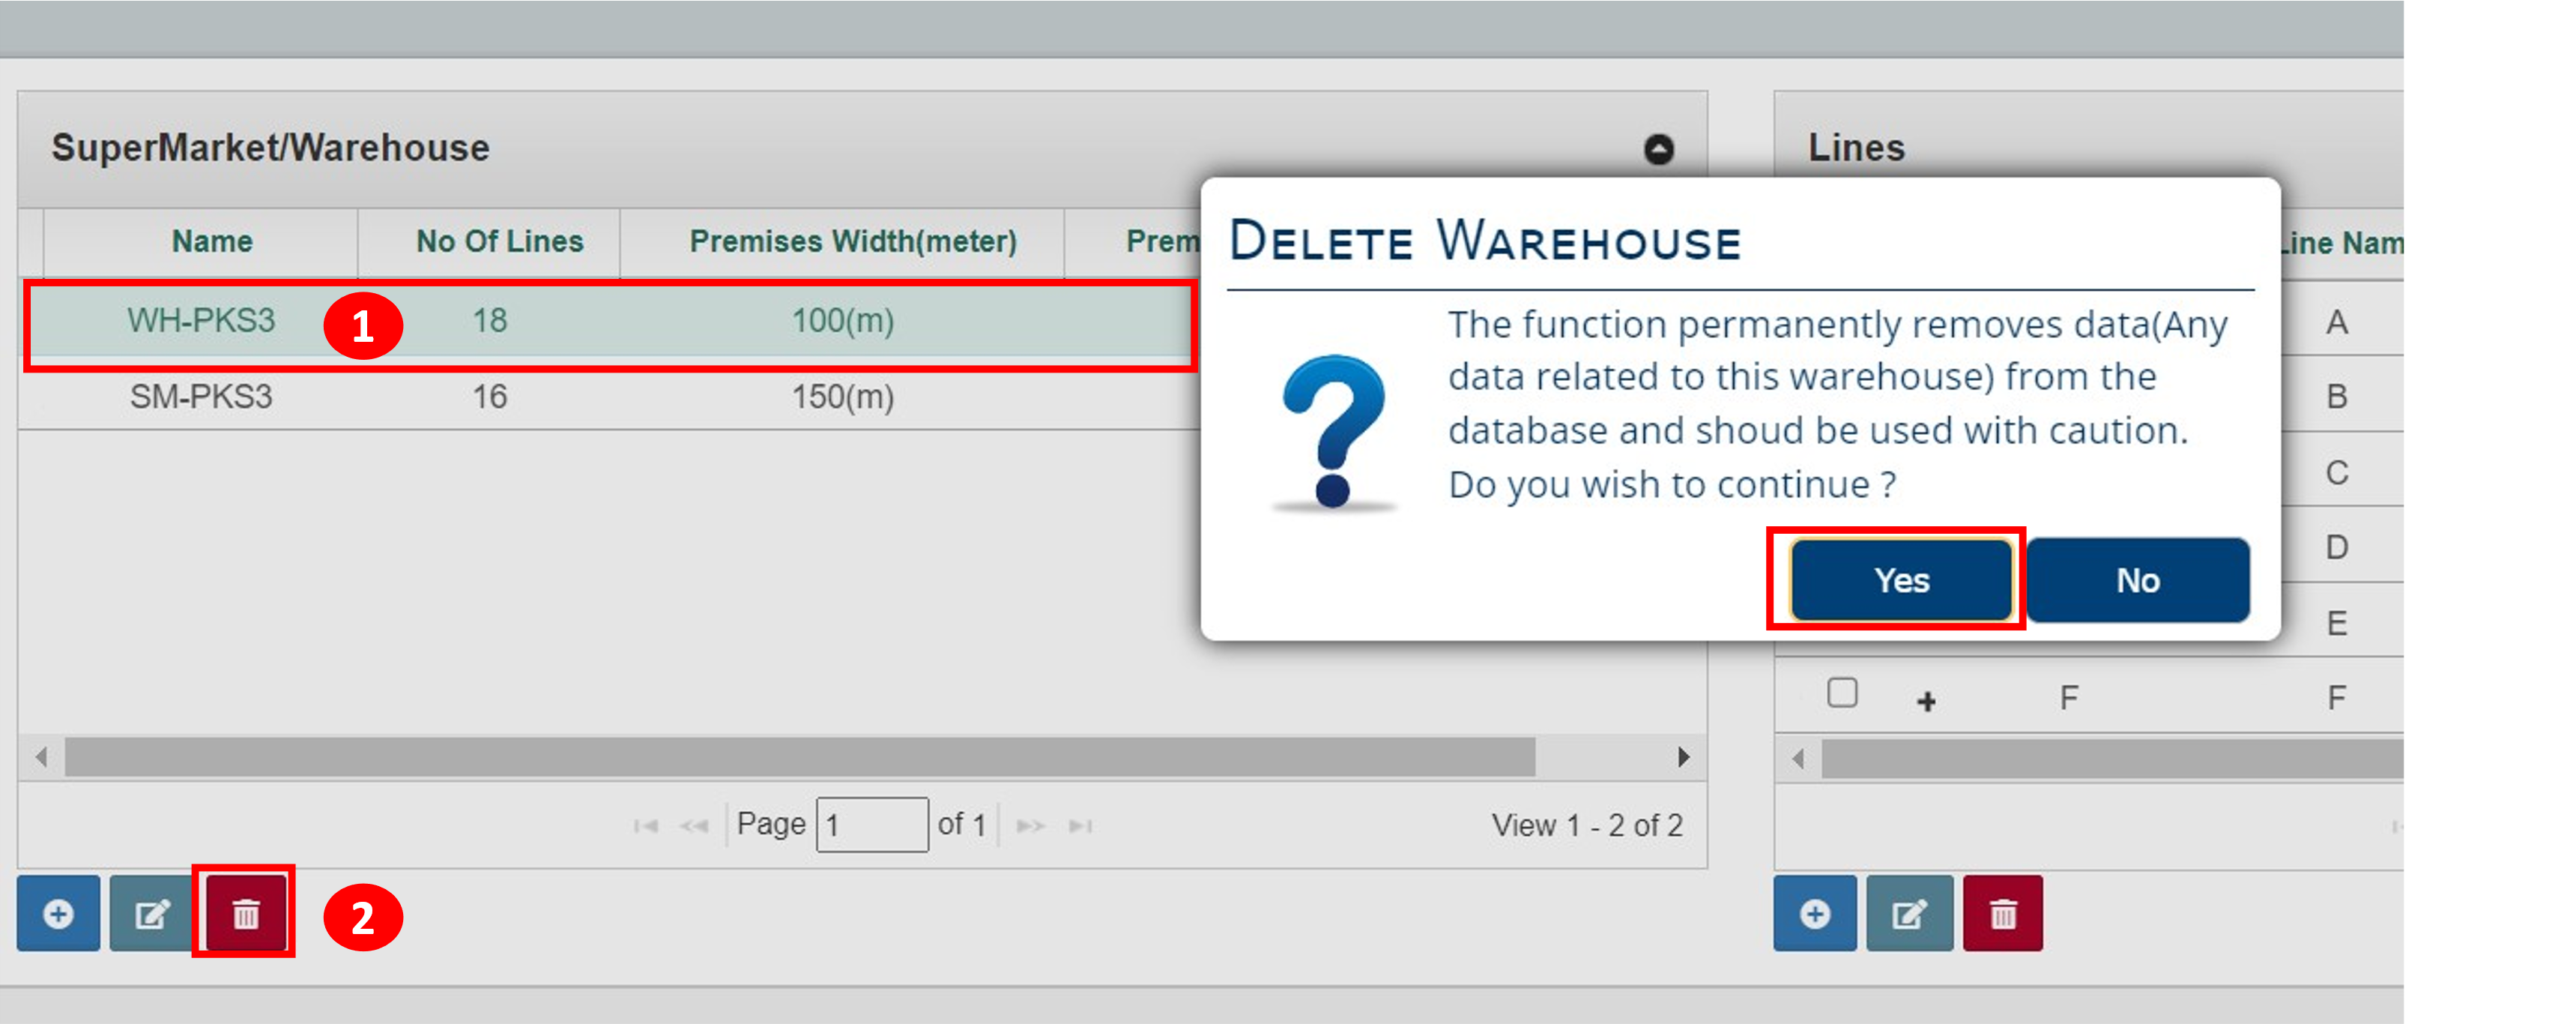
Delete warehouse or supermarket.
Purpose: Allow deleting a selected warehouse.
Precondition: No stock exists.
- Select the warehouse.
- Click delete button then choose “Yes”
LINE MANAGEMENT
Create new line
Purpose: Allow creating new line of a selected warehouse.
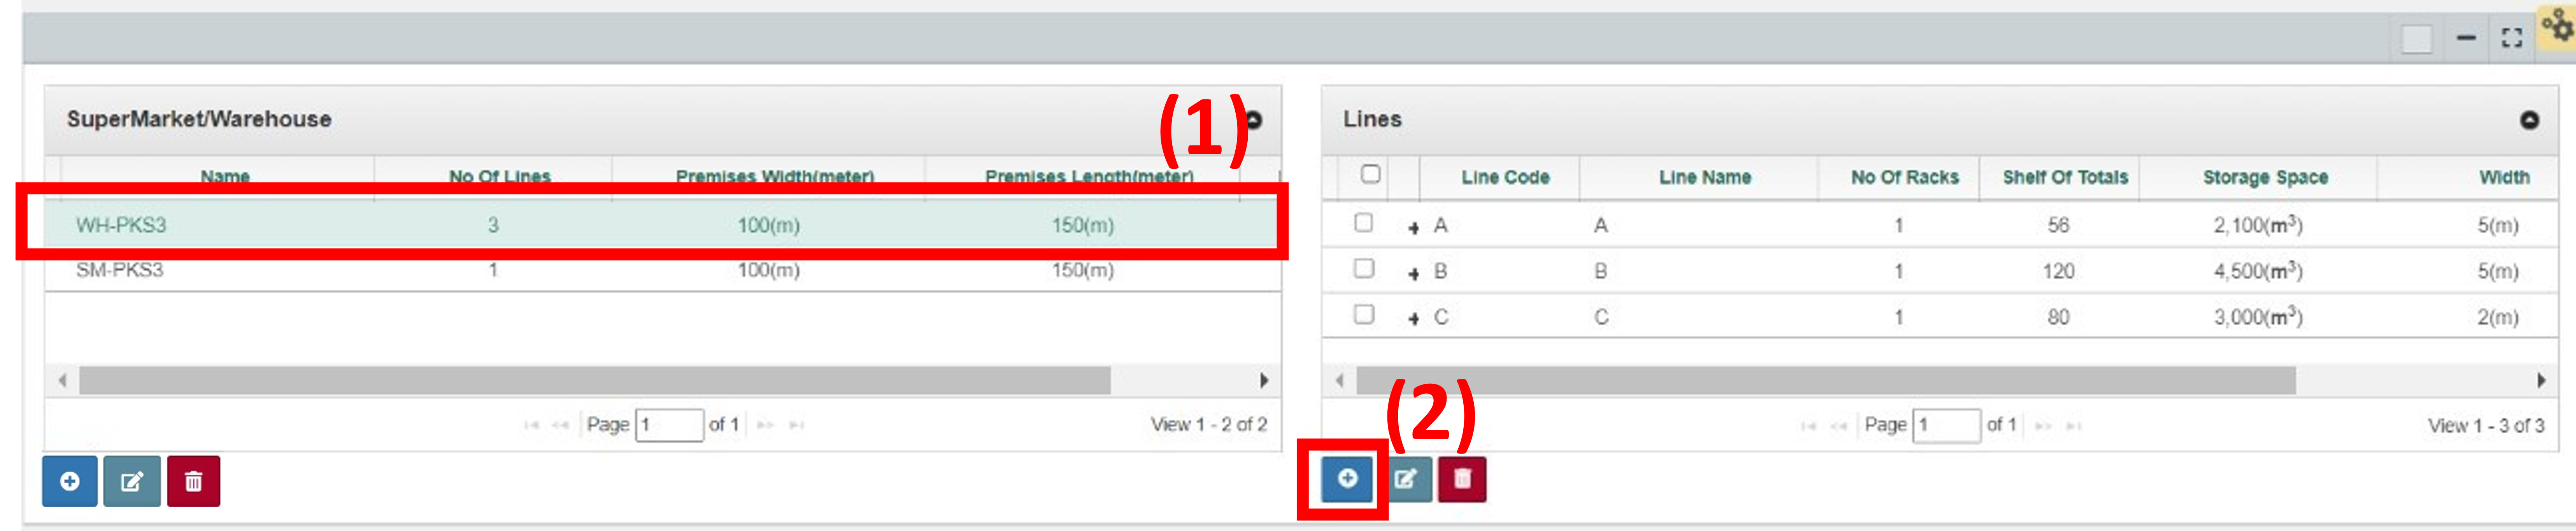
To create a line:
- Select the warehouse.
- Click “+” button to open pop-up to define a new line.
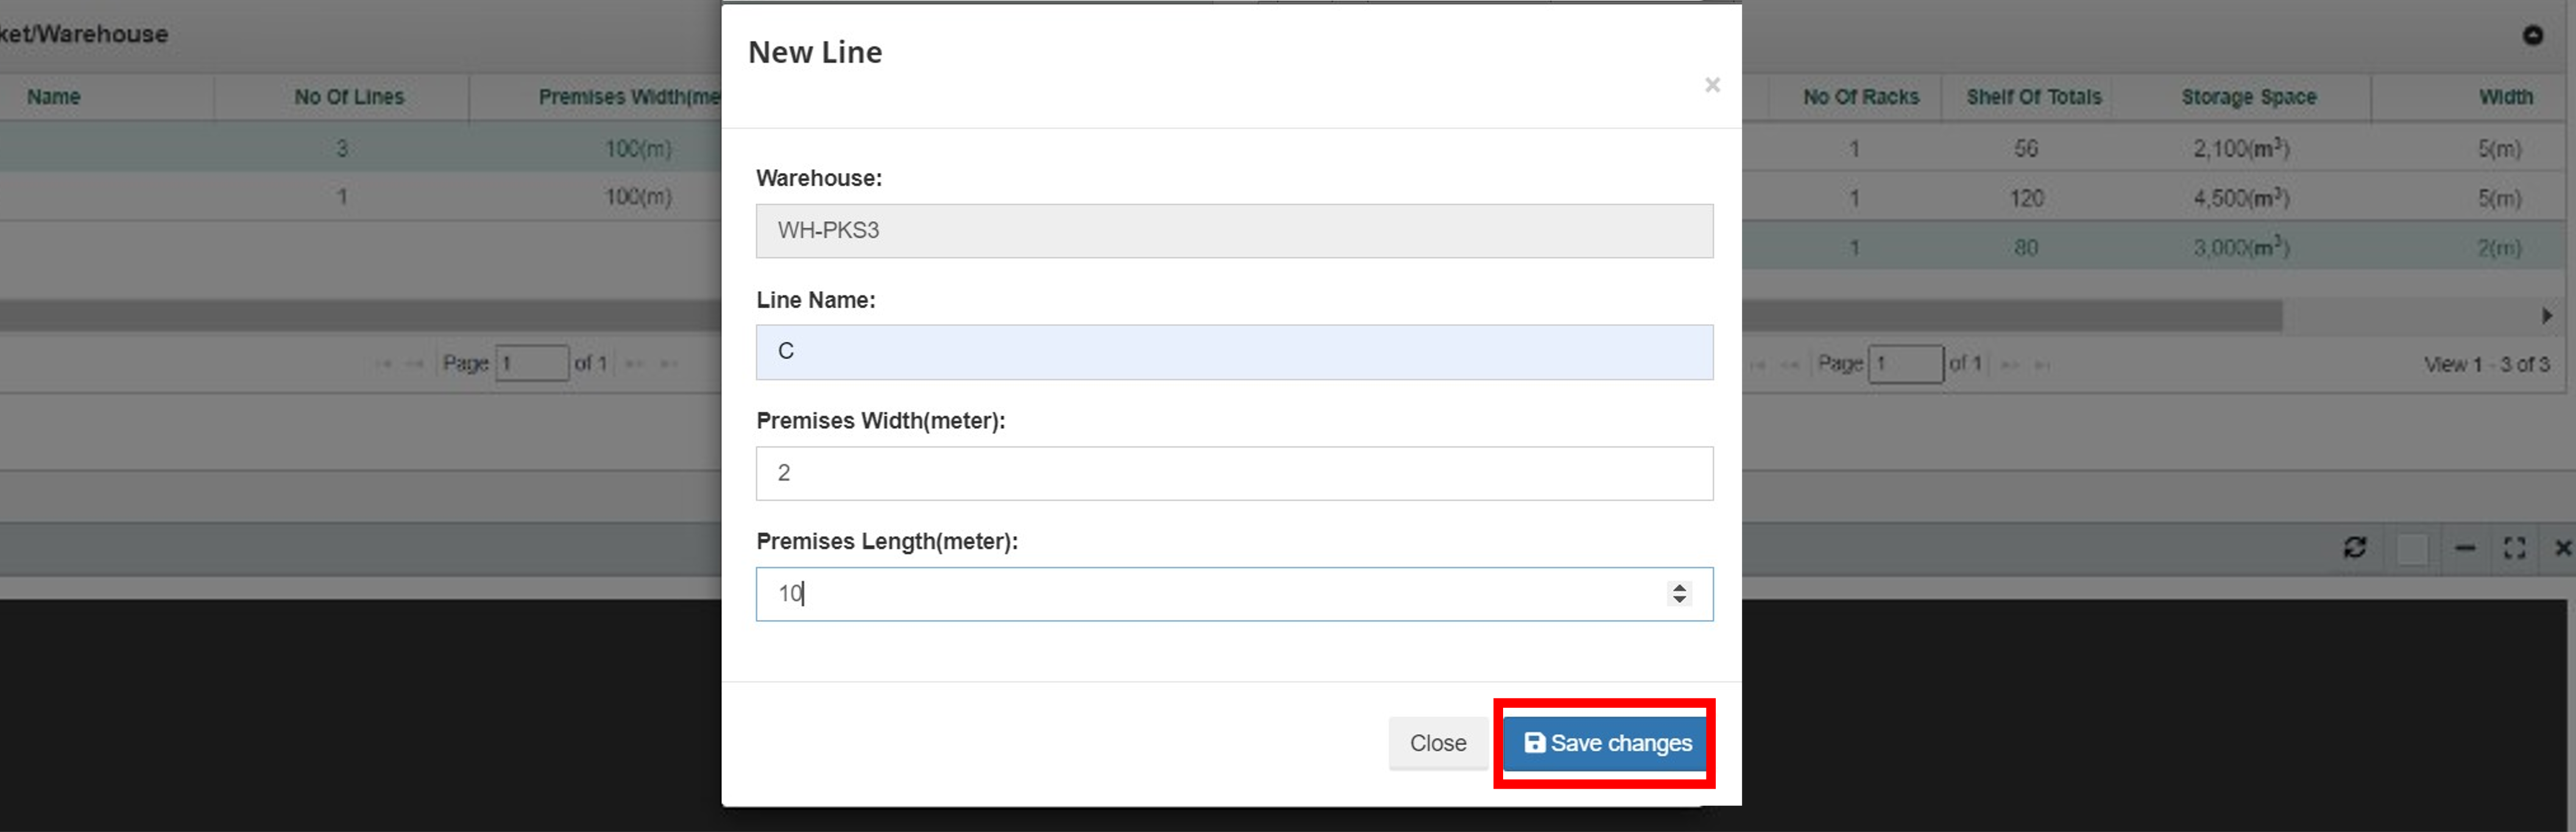
- In the pop-up, input line name (maximum 2 characters), premises width (meter), premises length (meter) and click “save changes”.
- The new line has been created as below picture.
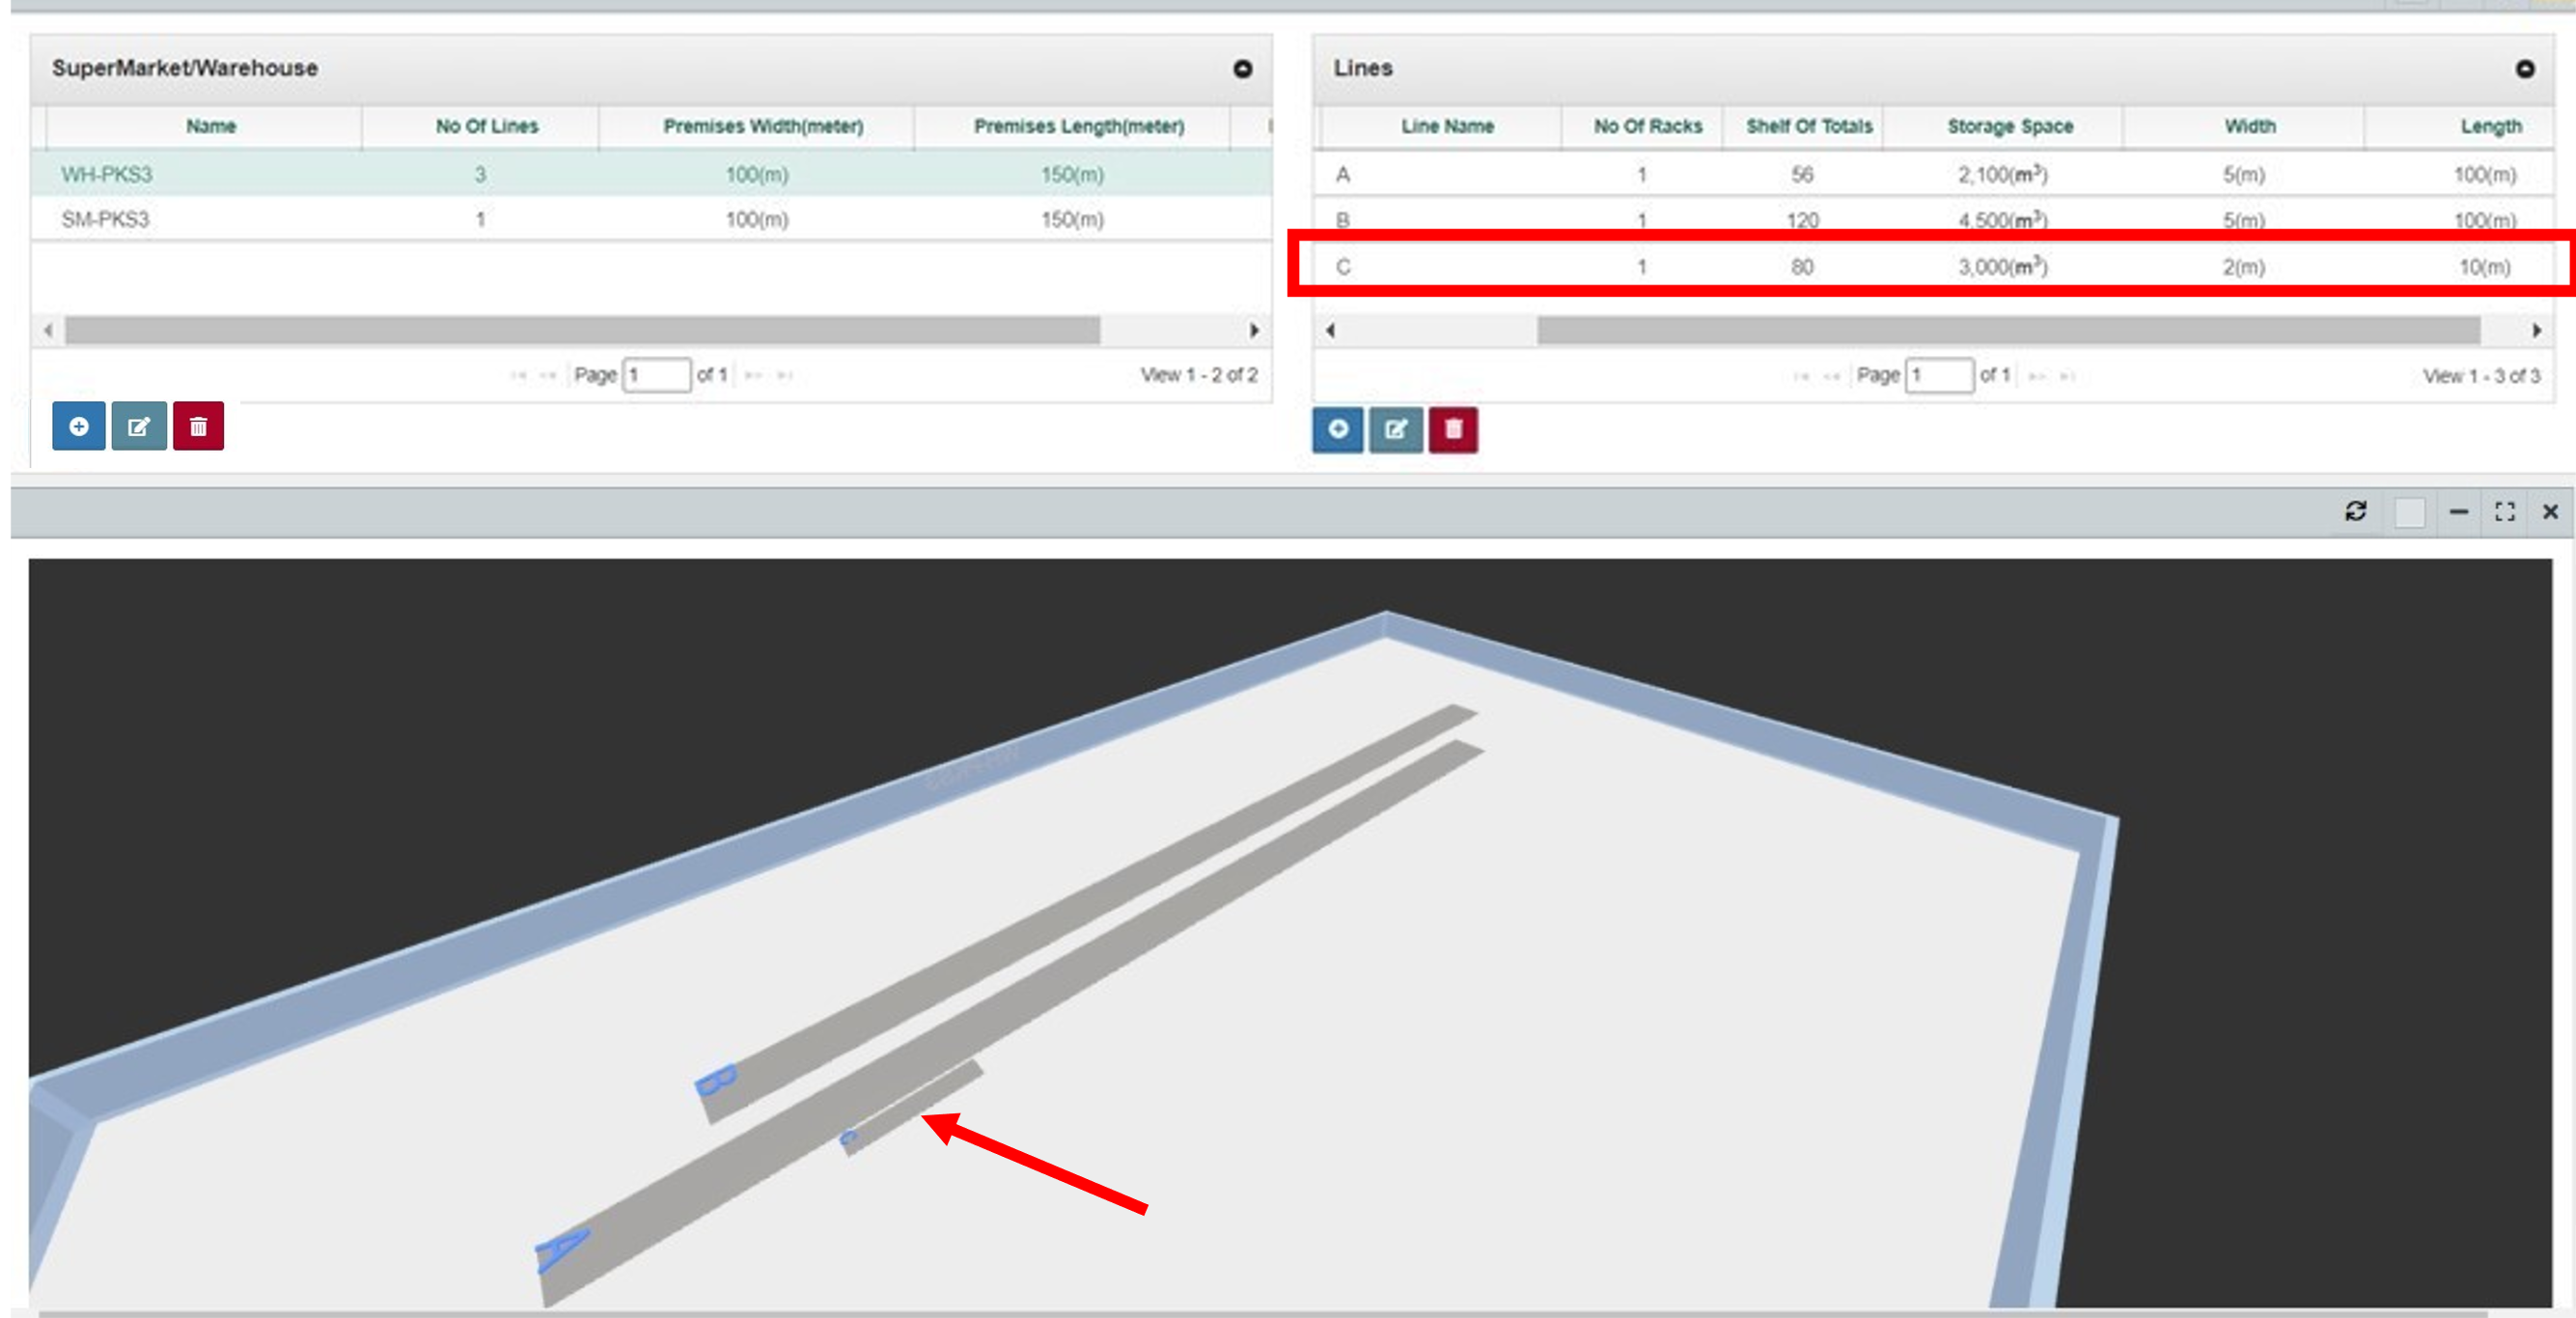
- This 3D simulation support 360 degrees viewing, using mouse(rotate, zoom…).
Edit line
Purpose: Allow editing a selected line.
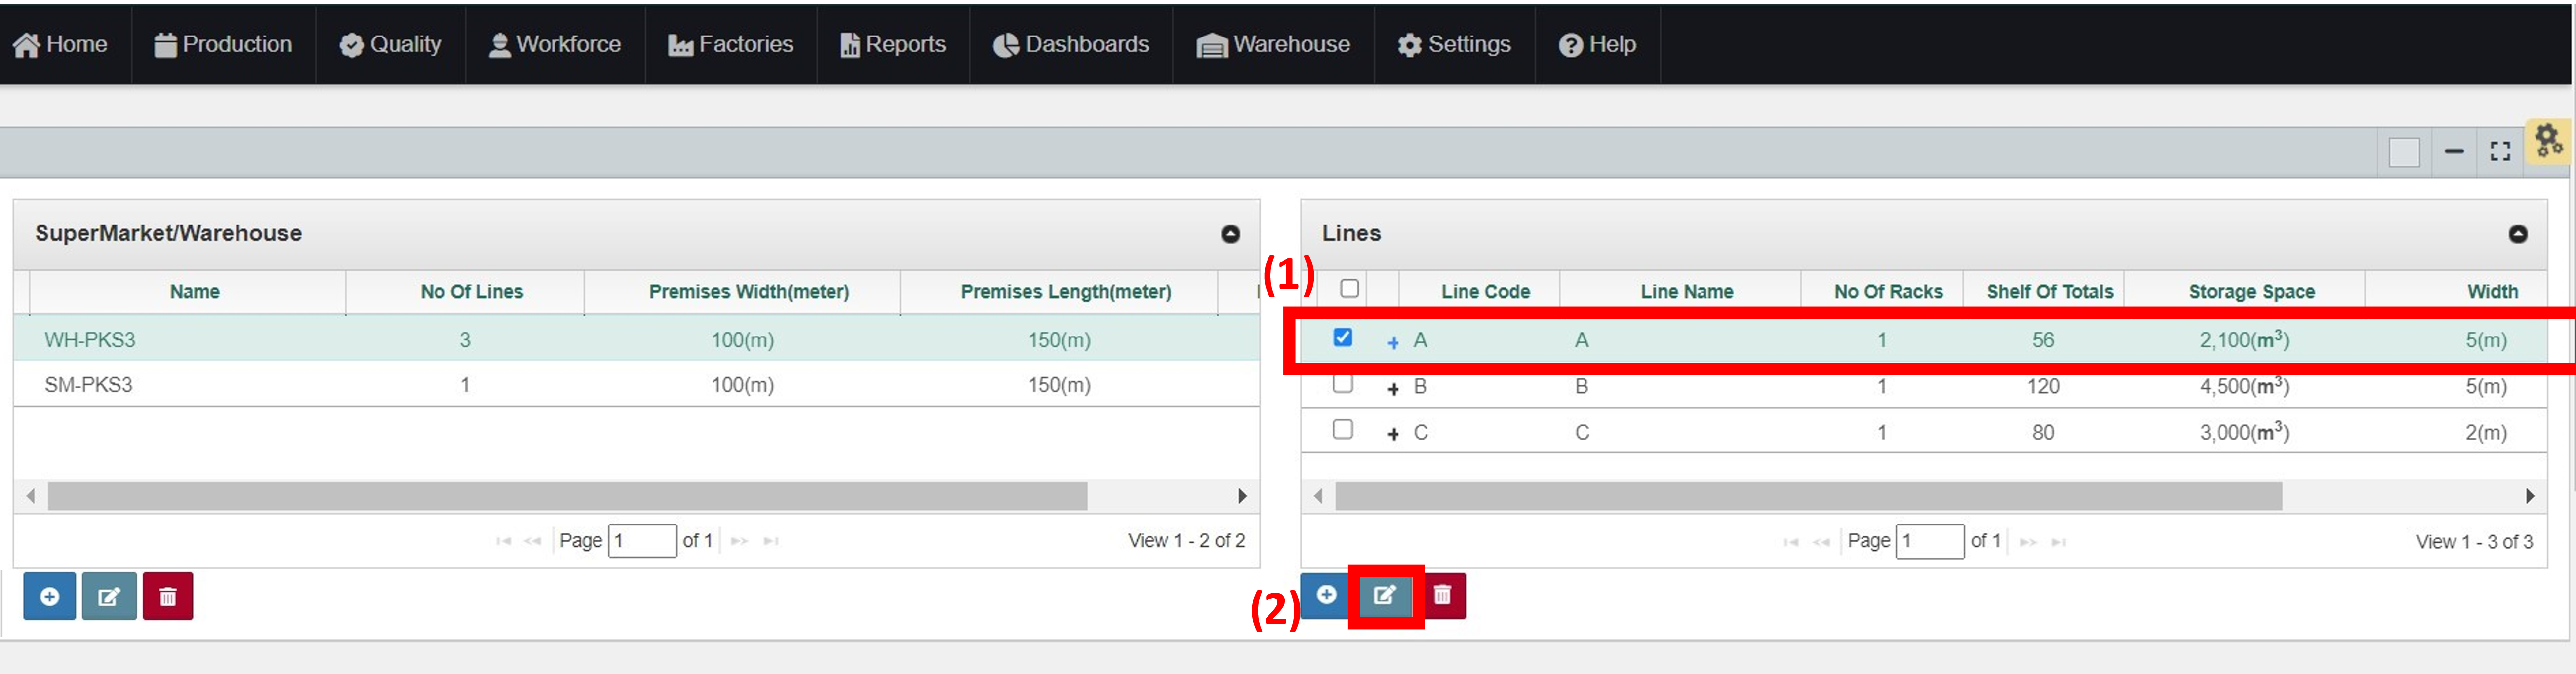
To edit a line:
- Select the line.
- Click the Edit button to open the pop-up.
- Change premises dimensions(length and width) if needed, then click “save changes”.

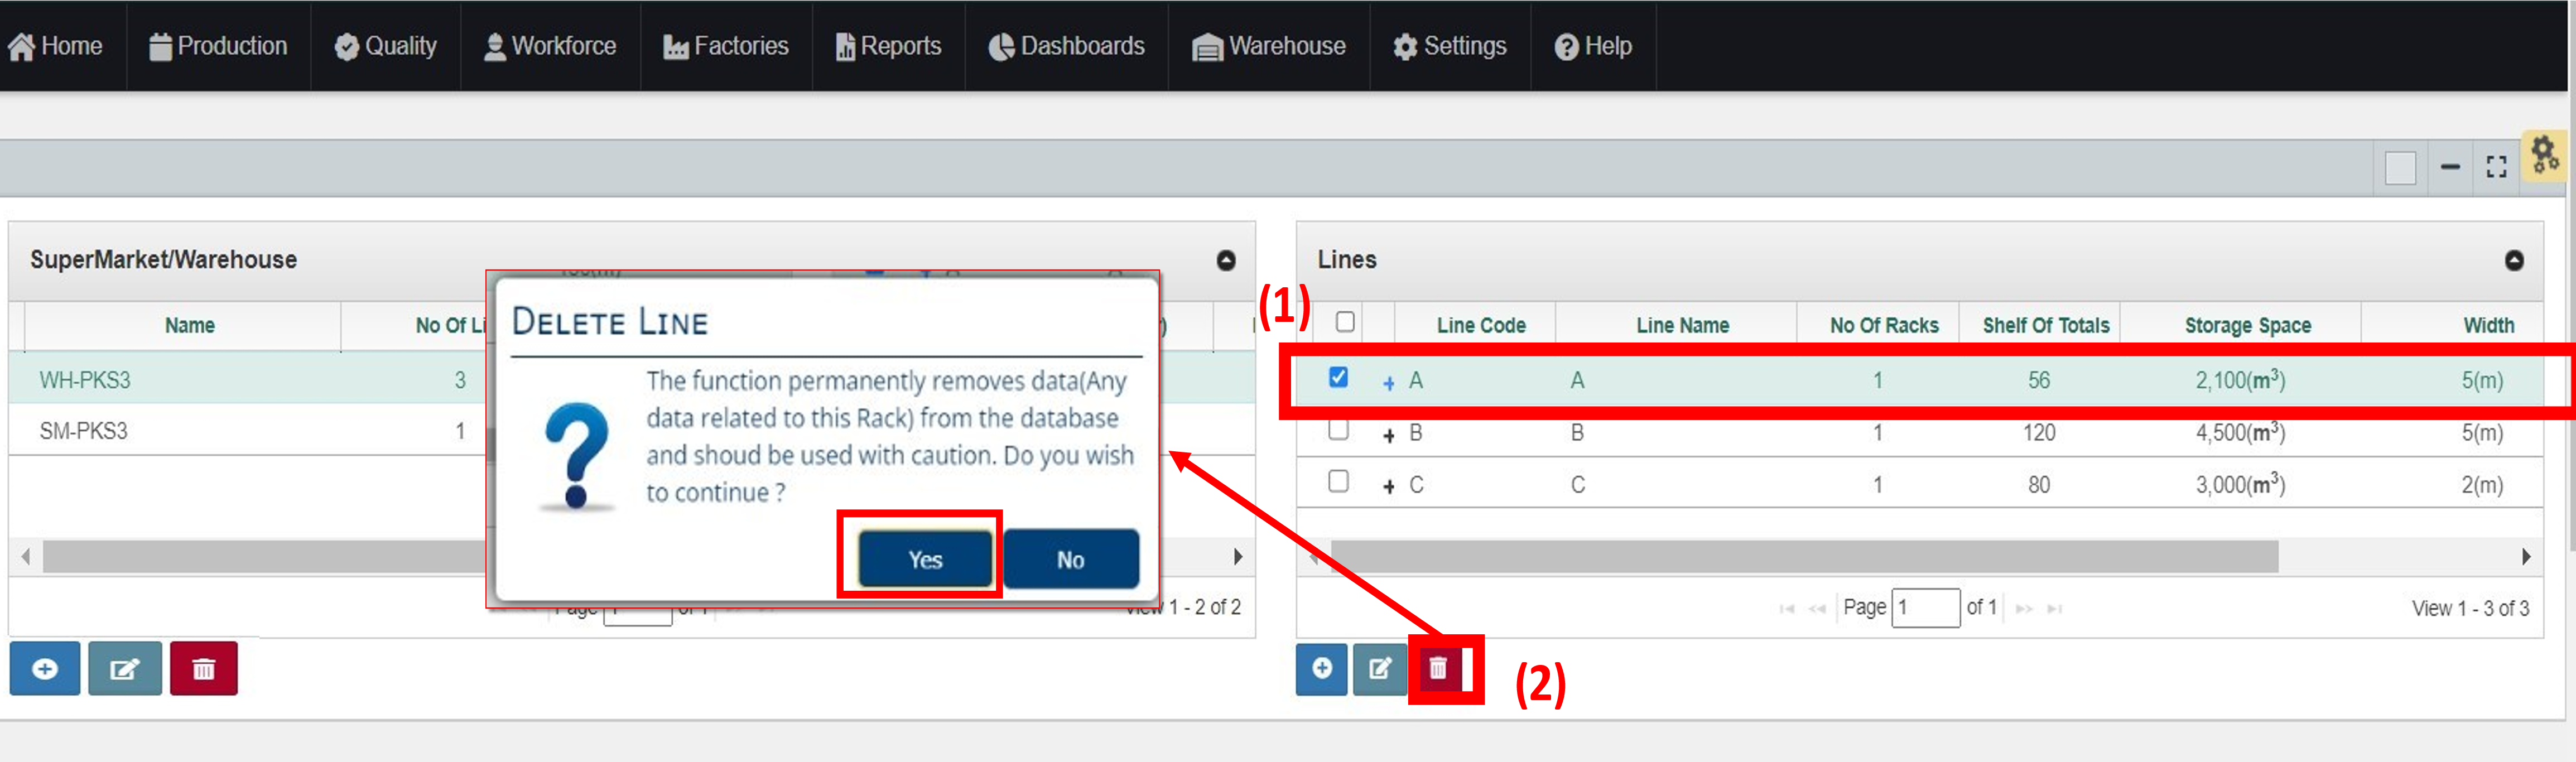
Delete line
Purpose: Allow deleting a selected line.
Precondition: No rack within the line.
- Select the line.
- Click delete button then choose “Yes”
RACK MANAGEMENT
There can be multiple racks within a line.
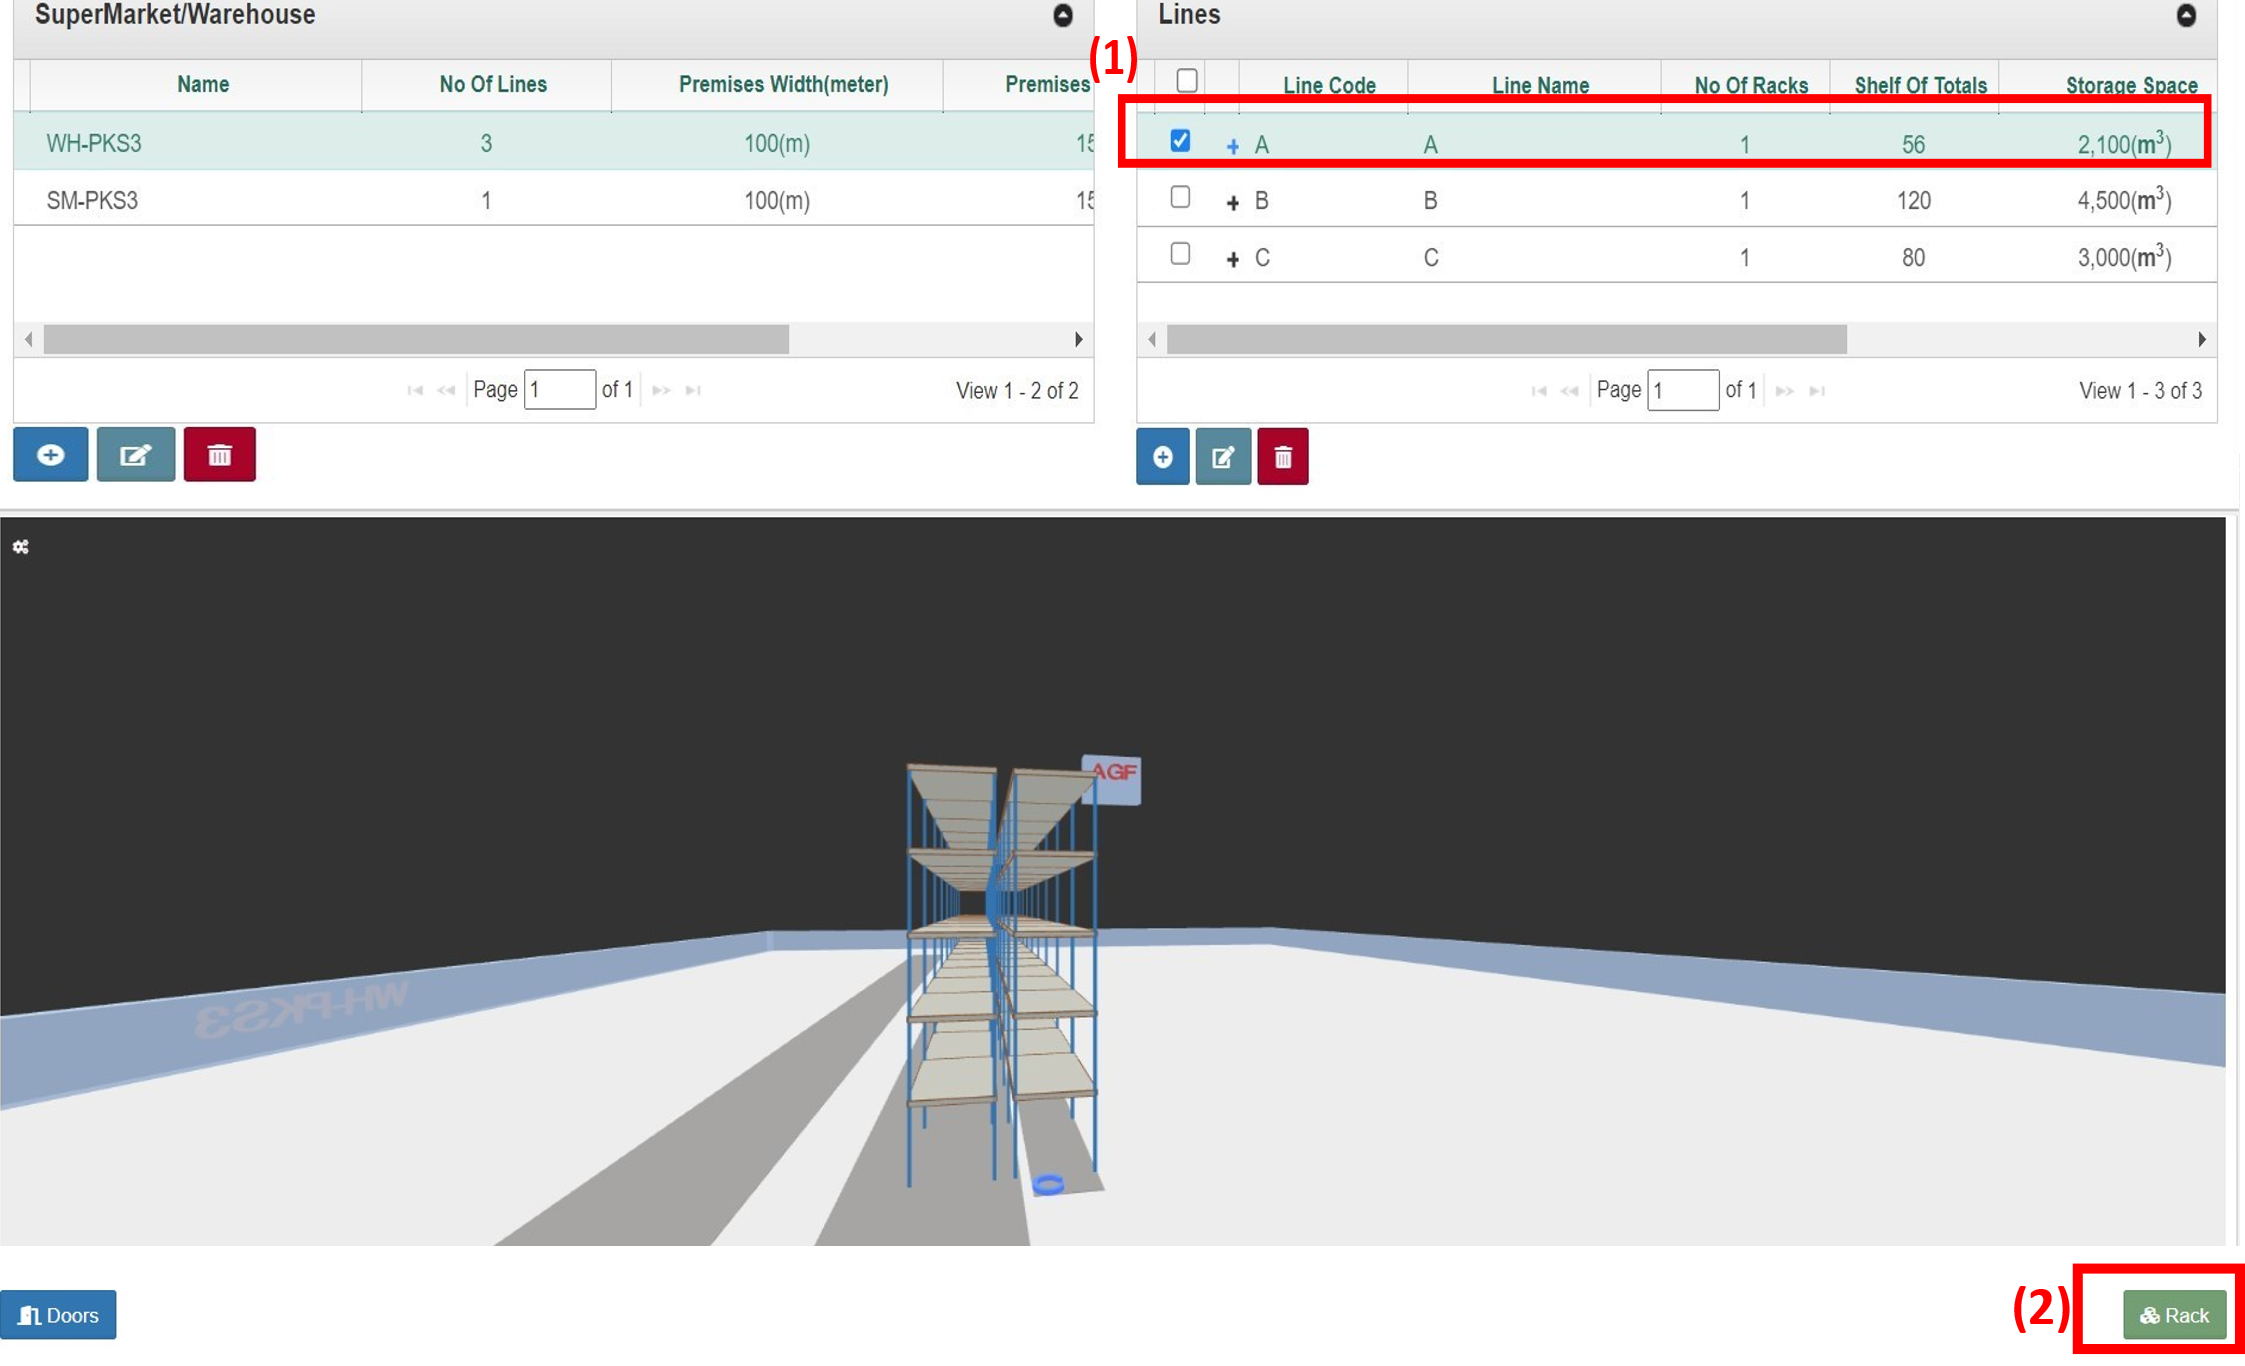
Create rack
Purpose: Allow creating a rack within a selected line, simulating the actual layout.
To create a rack:
- Choose the line.
- Click the Rack button at right corner to open the pop-up for defining rack.
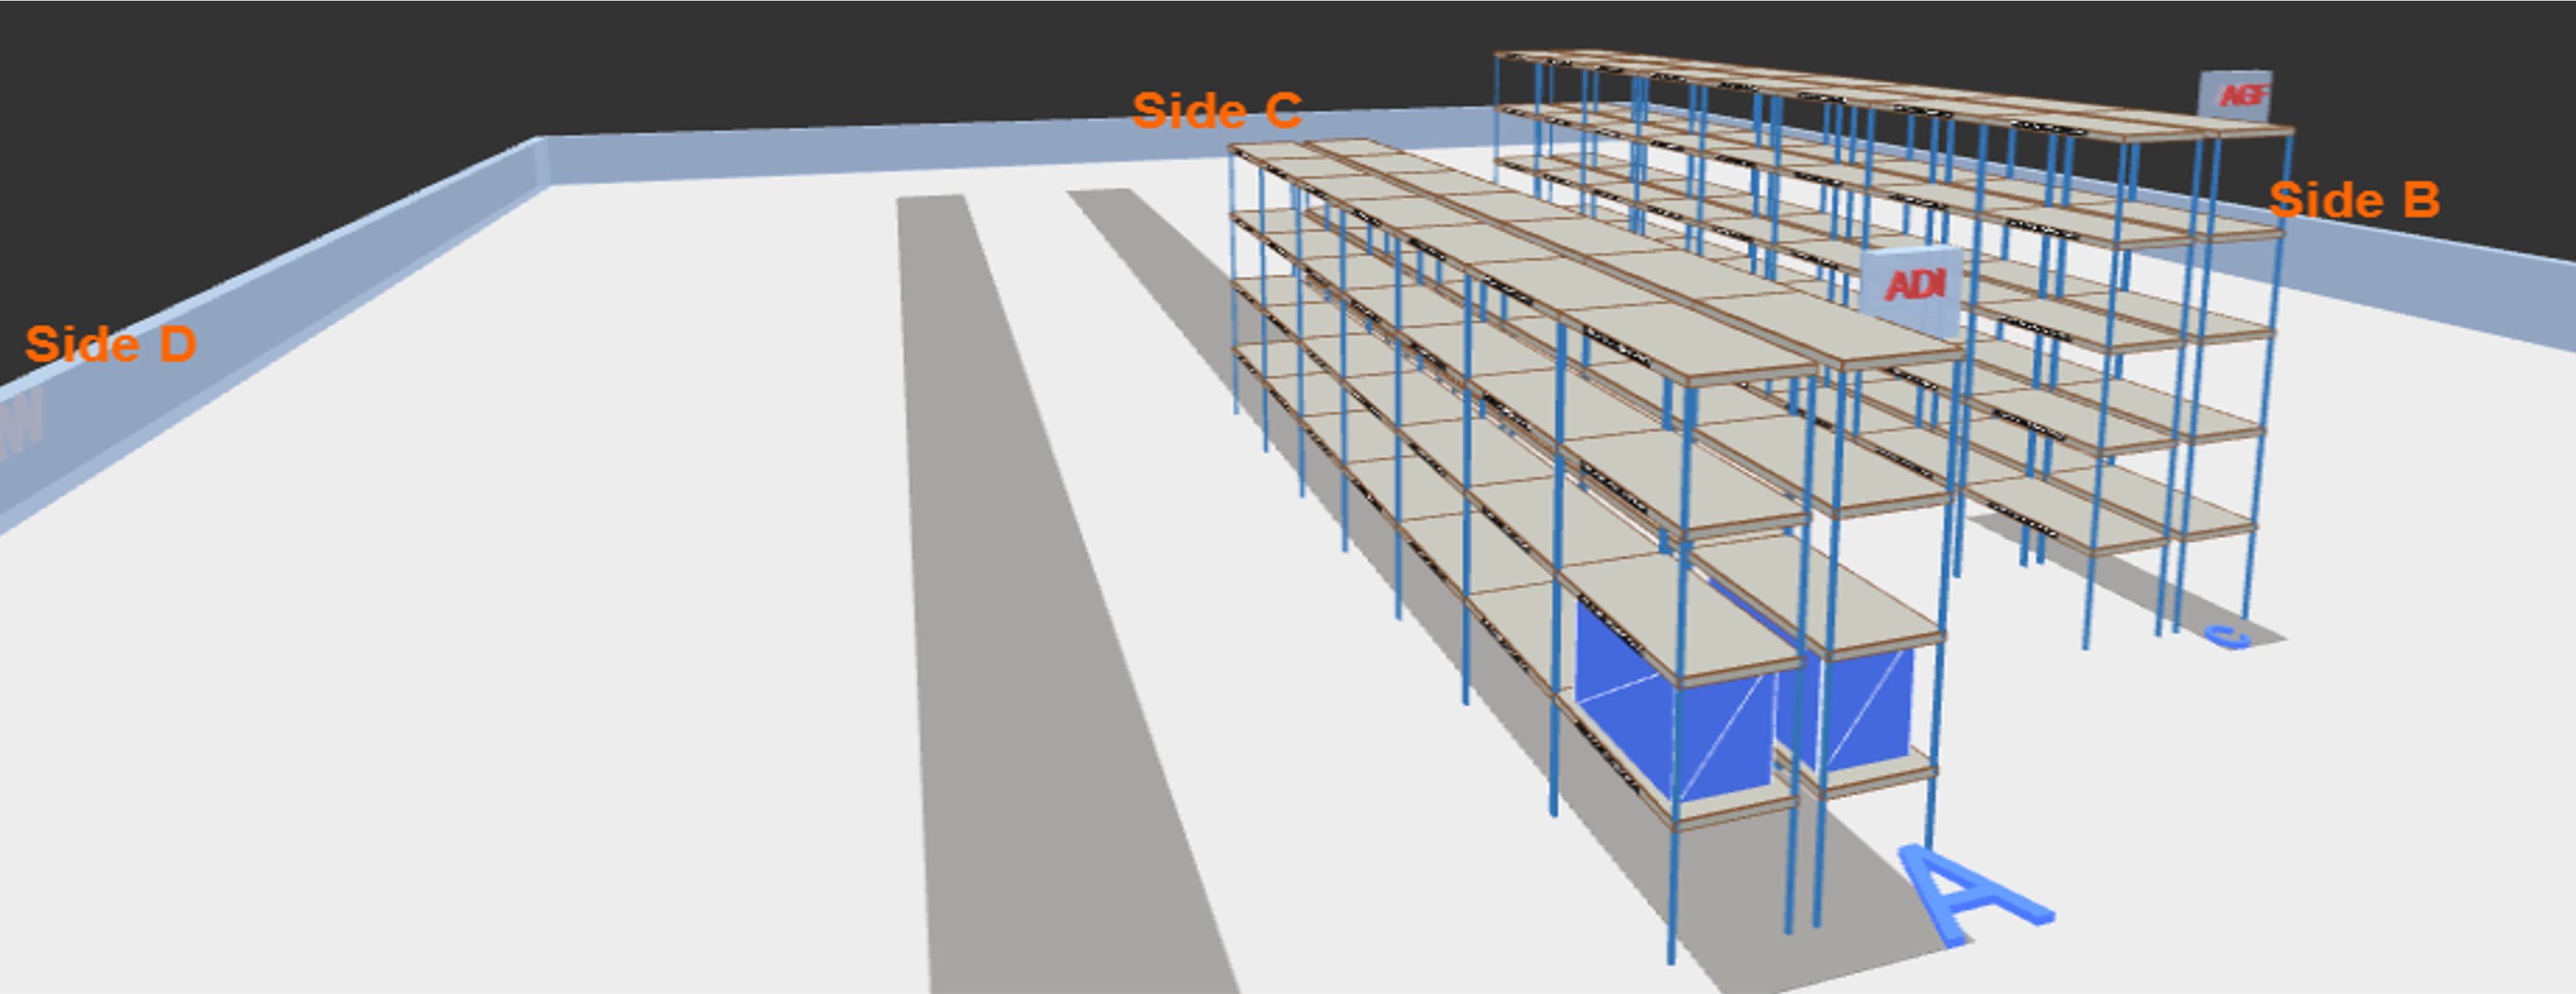
- In the pop-up window, input no of layers, shelves per layer, front side/ rear side, Height of shelf (meter), Length of shelf (meter), Width of shelf (meter), select the buyer, then click “save changes” button.
- Front side(A)/ rear side(B): WIP warehouse allows selecting different layout of racks.
- Buyer selection: Optional selection if the rack is allocated to specific buyer.
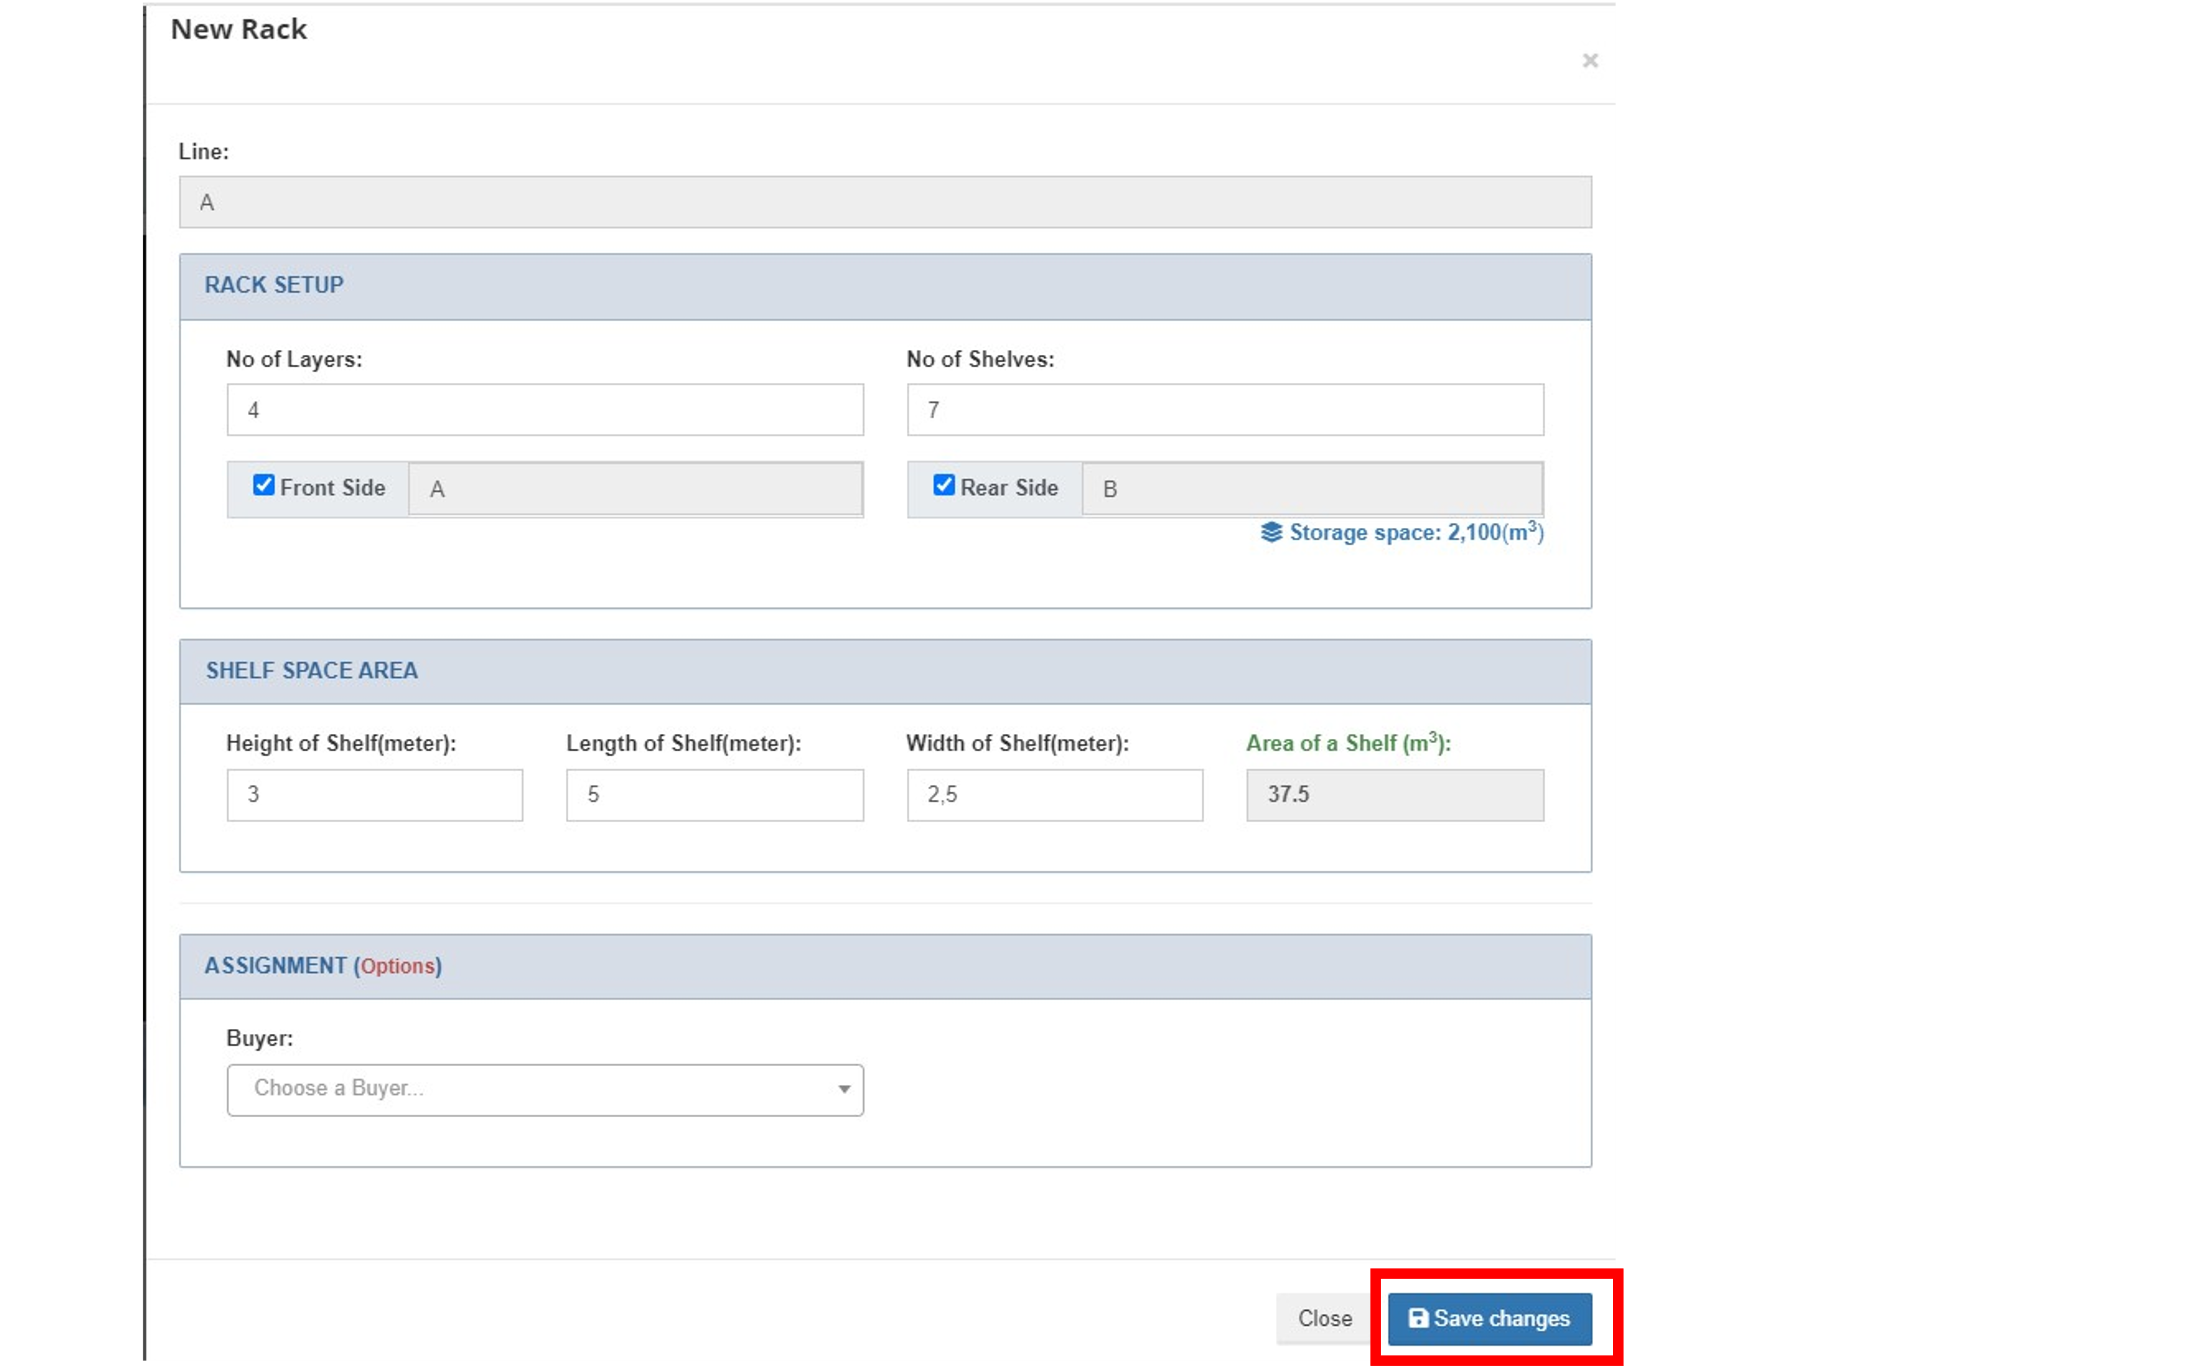

- The new rack has just been created at line A.
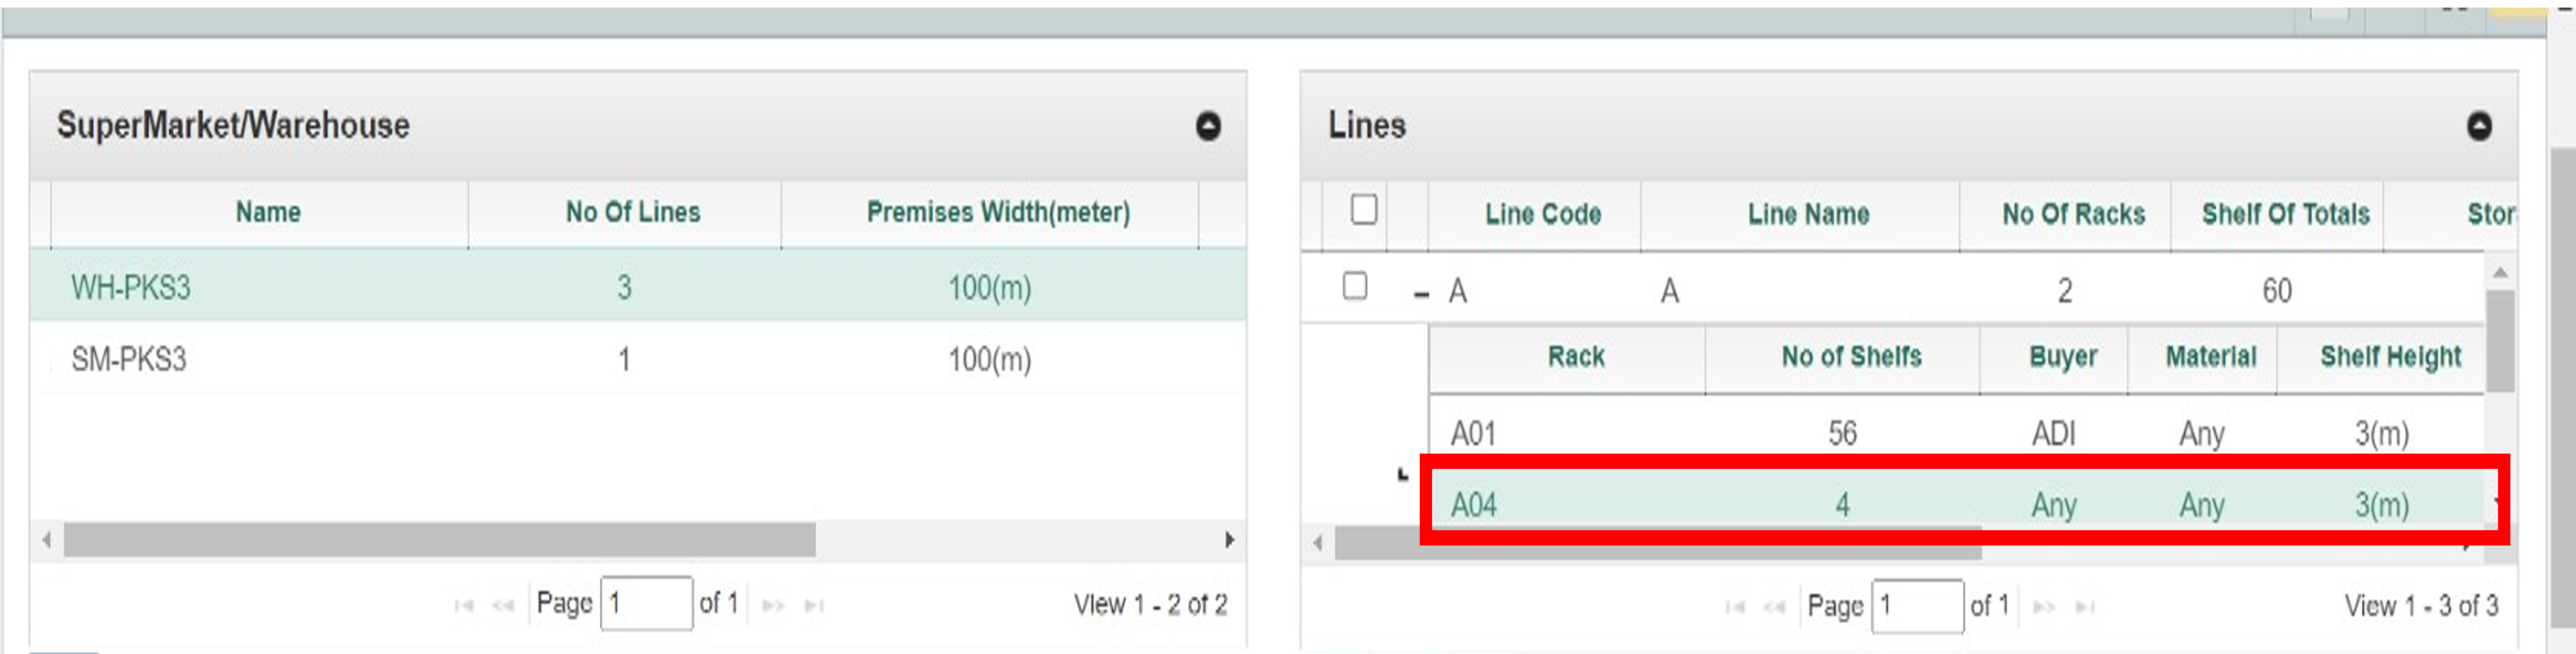
Edit Rack
Precondition: No stock in the rack
To edit a rack:
- Double click on the Rack.
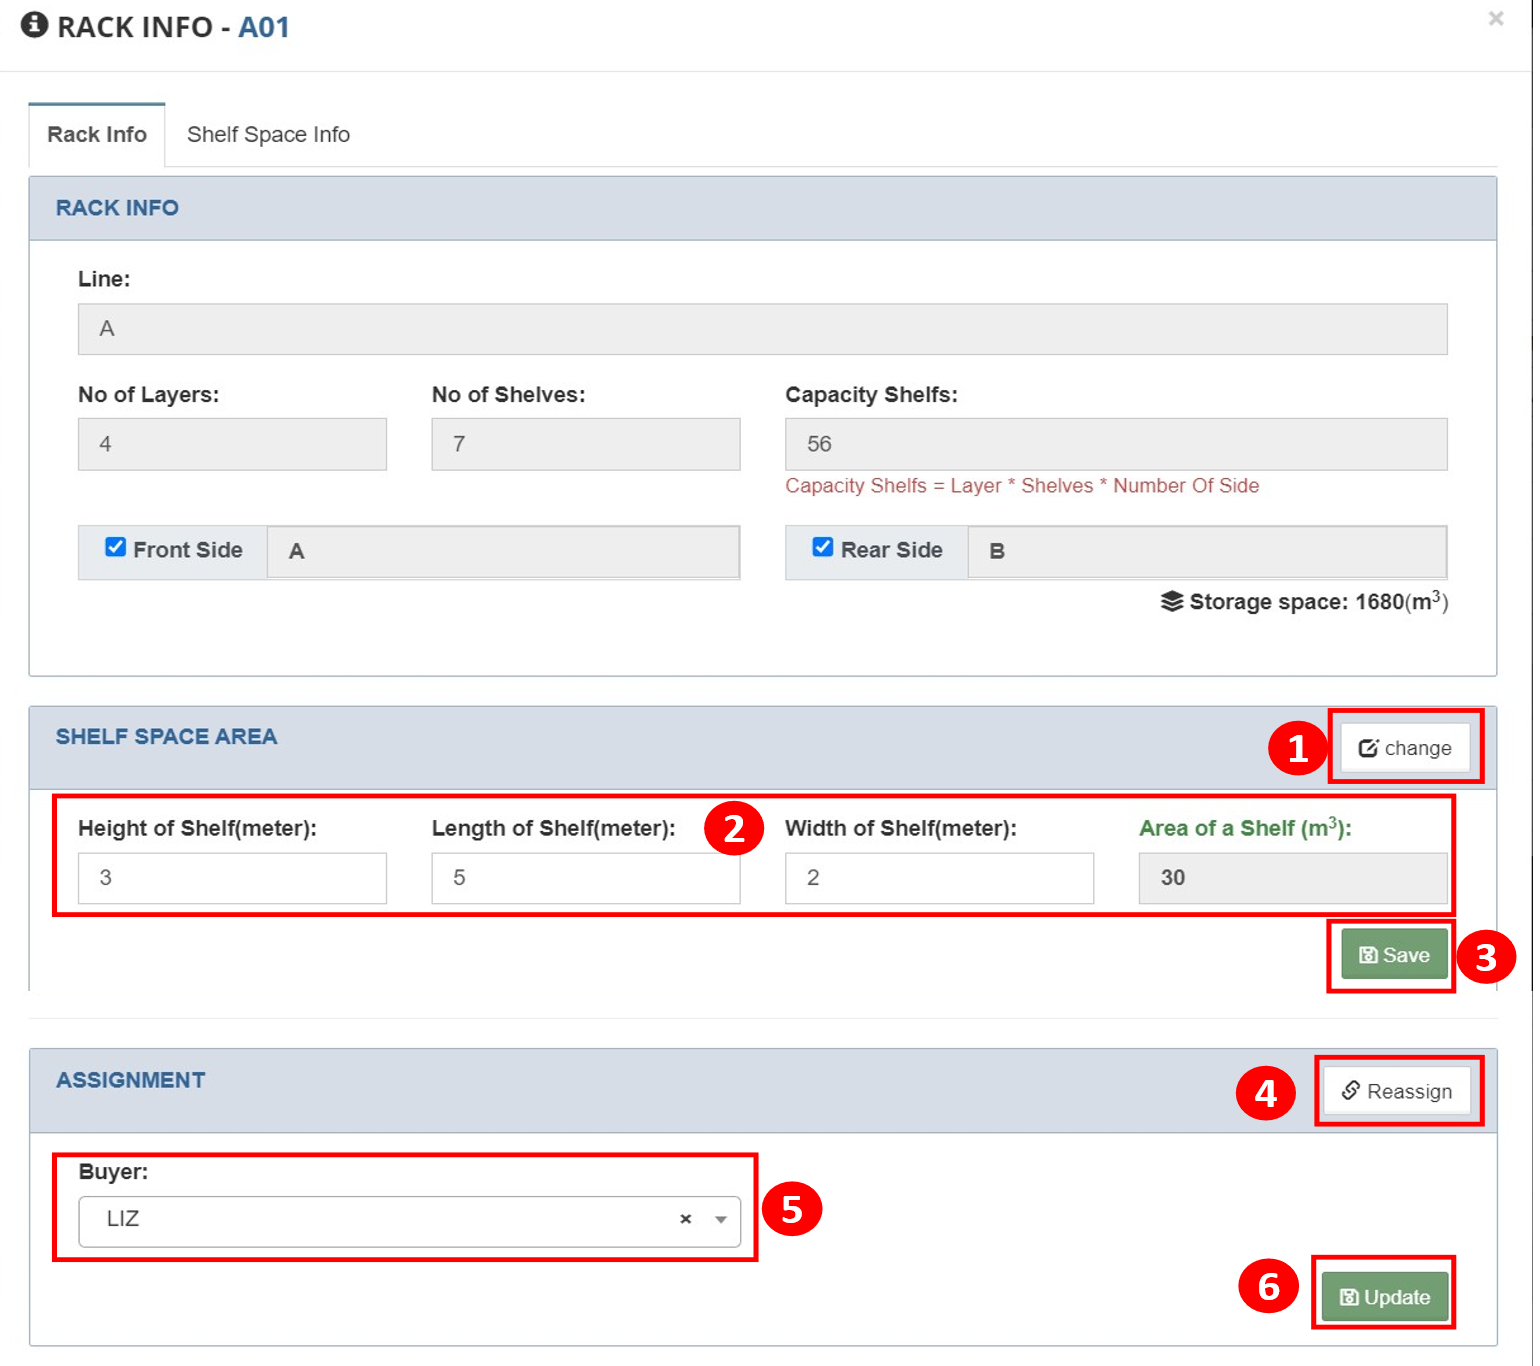
At rack info window:
To change shelf space info:
- Click change
- Adjust needed information.
- Click save
To change Assignment:
- Click reassign
- Select Buyer
- Click update
Delete Rack
Precondition: No stock in the rack
To delete a rack:
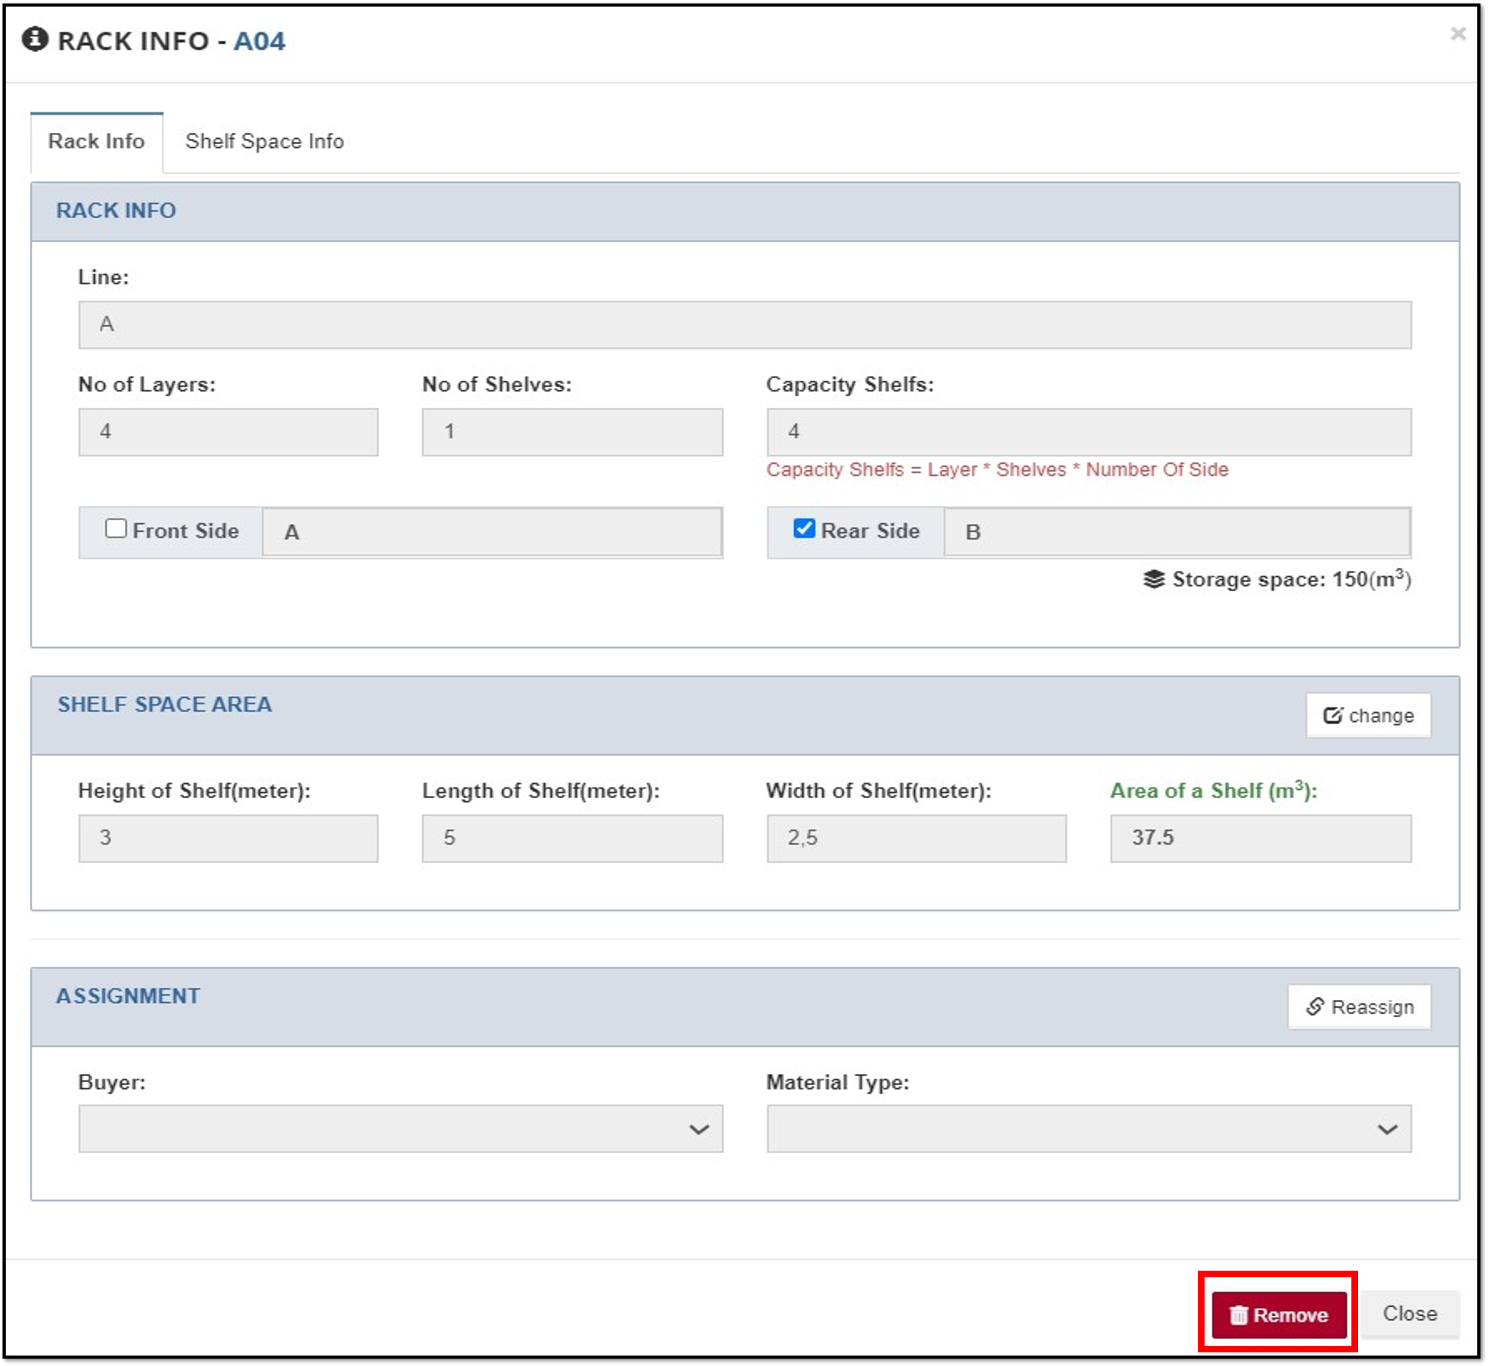
- Double click at the Rack.
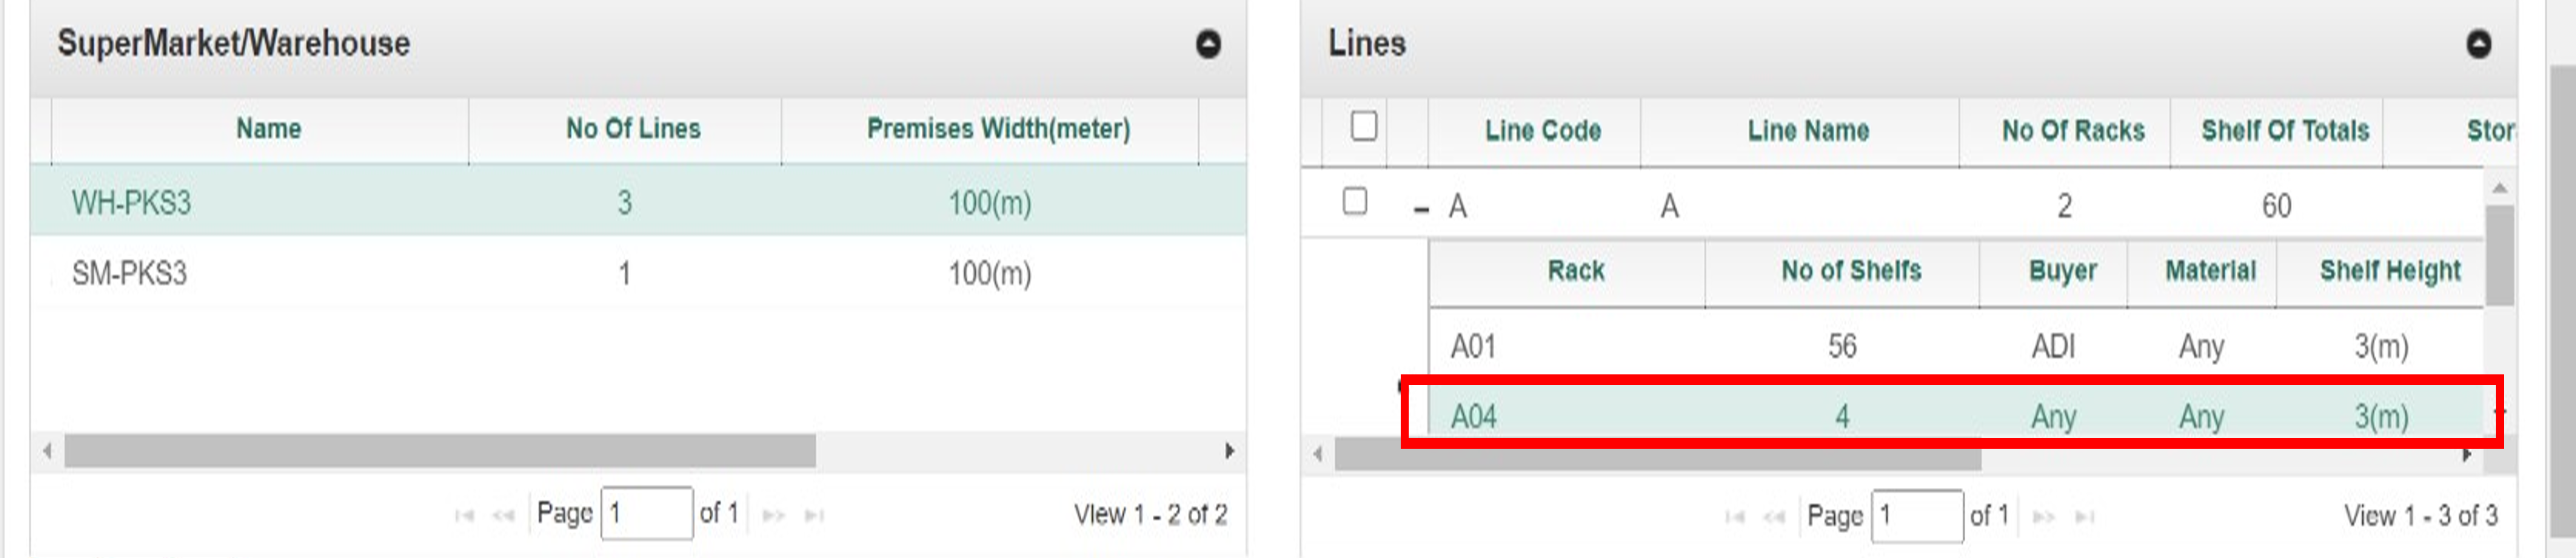
- At Rack info window, click Remove button.
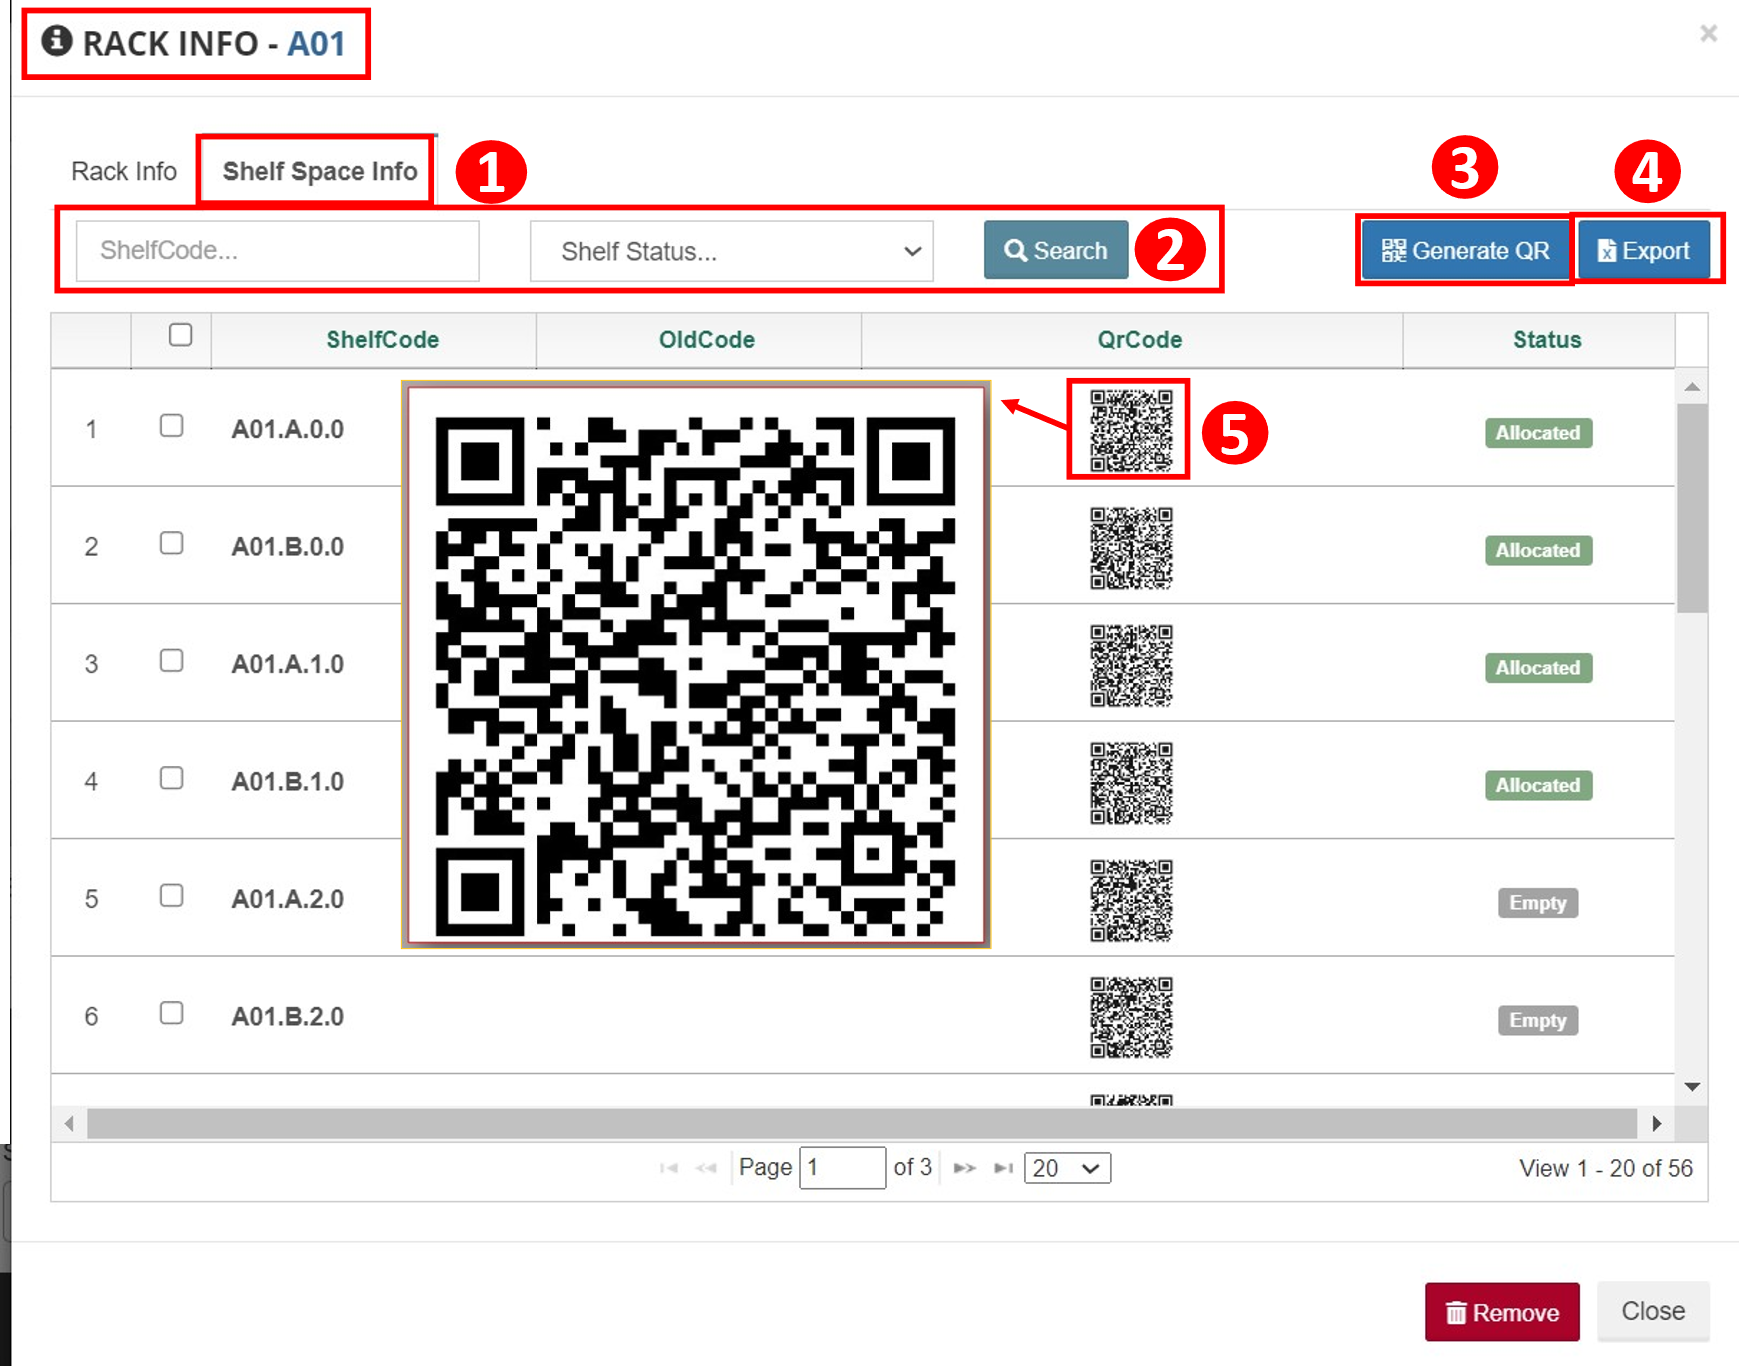
Viewing shelf space information
- At rack info window, select Shelf space info tab to see shelf space status.
Each shelf code, example A01.A.2.0, contains:
|
ShelfCode |
A |
01 |
.A |
.2 |
.0 |
|
Definition |
LineName |
Rack code |
Side (A or B) |
Layer code |
Shelf Code |
- Fill ShelfCode/Select Shelf Status then Search for quick filter.
- Click Generate QR to create QR Code for ShelfCode.
- Click Export button to download Excel file of Rack detail information including QR code.
- Click on any QR Code to zoom-in.
WAREHOUSE 3D SIMULATION
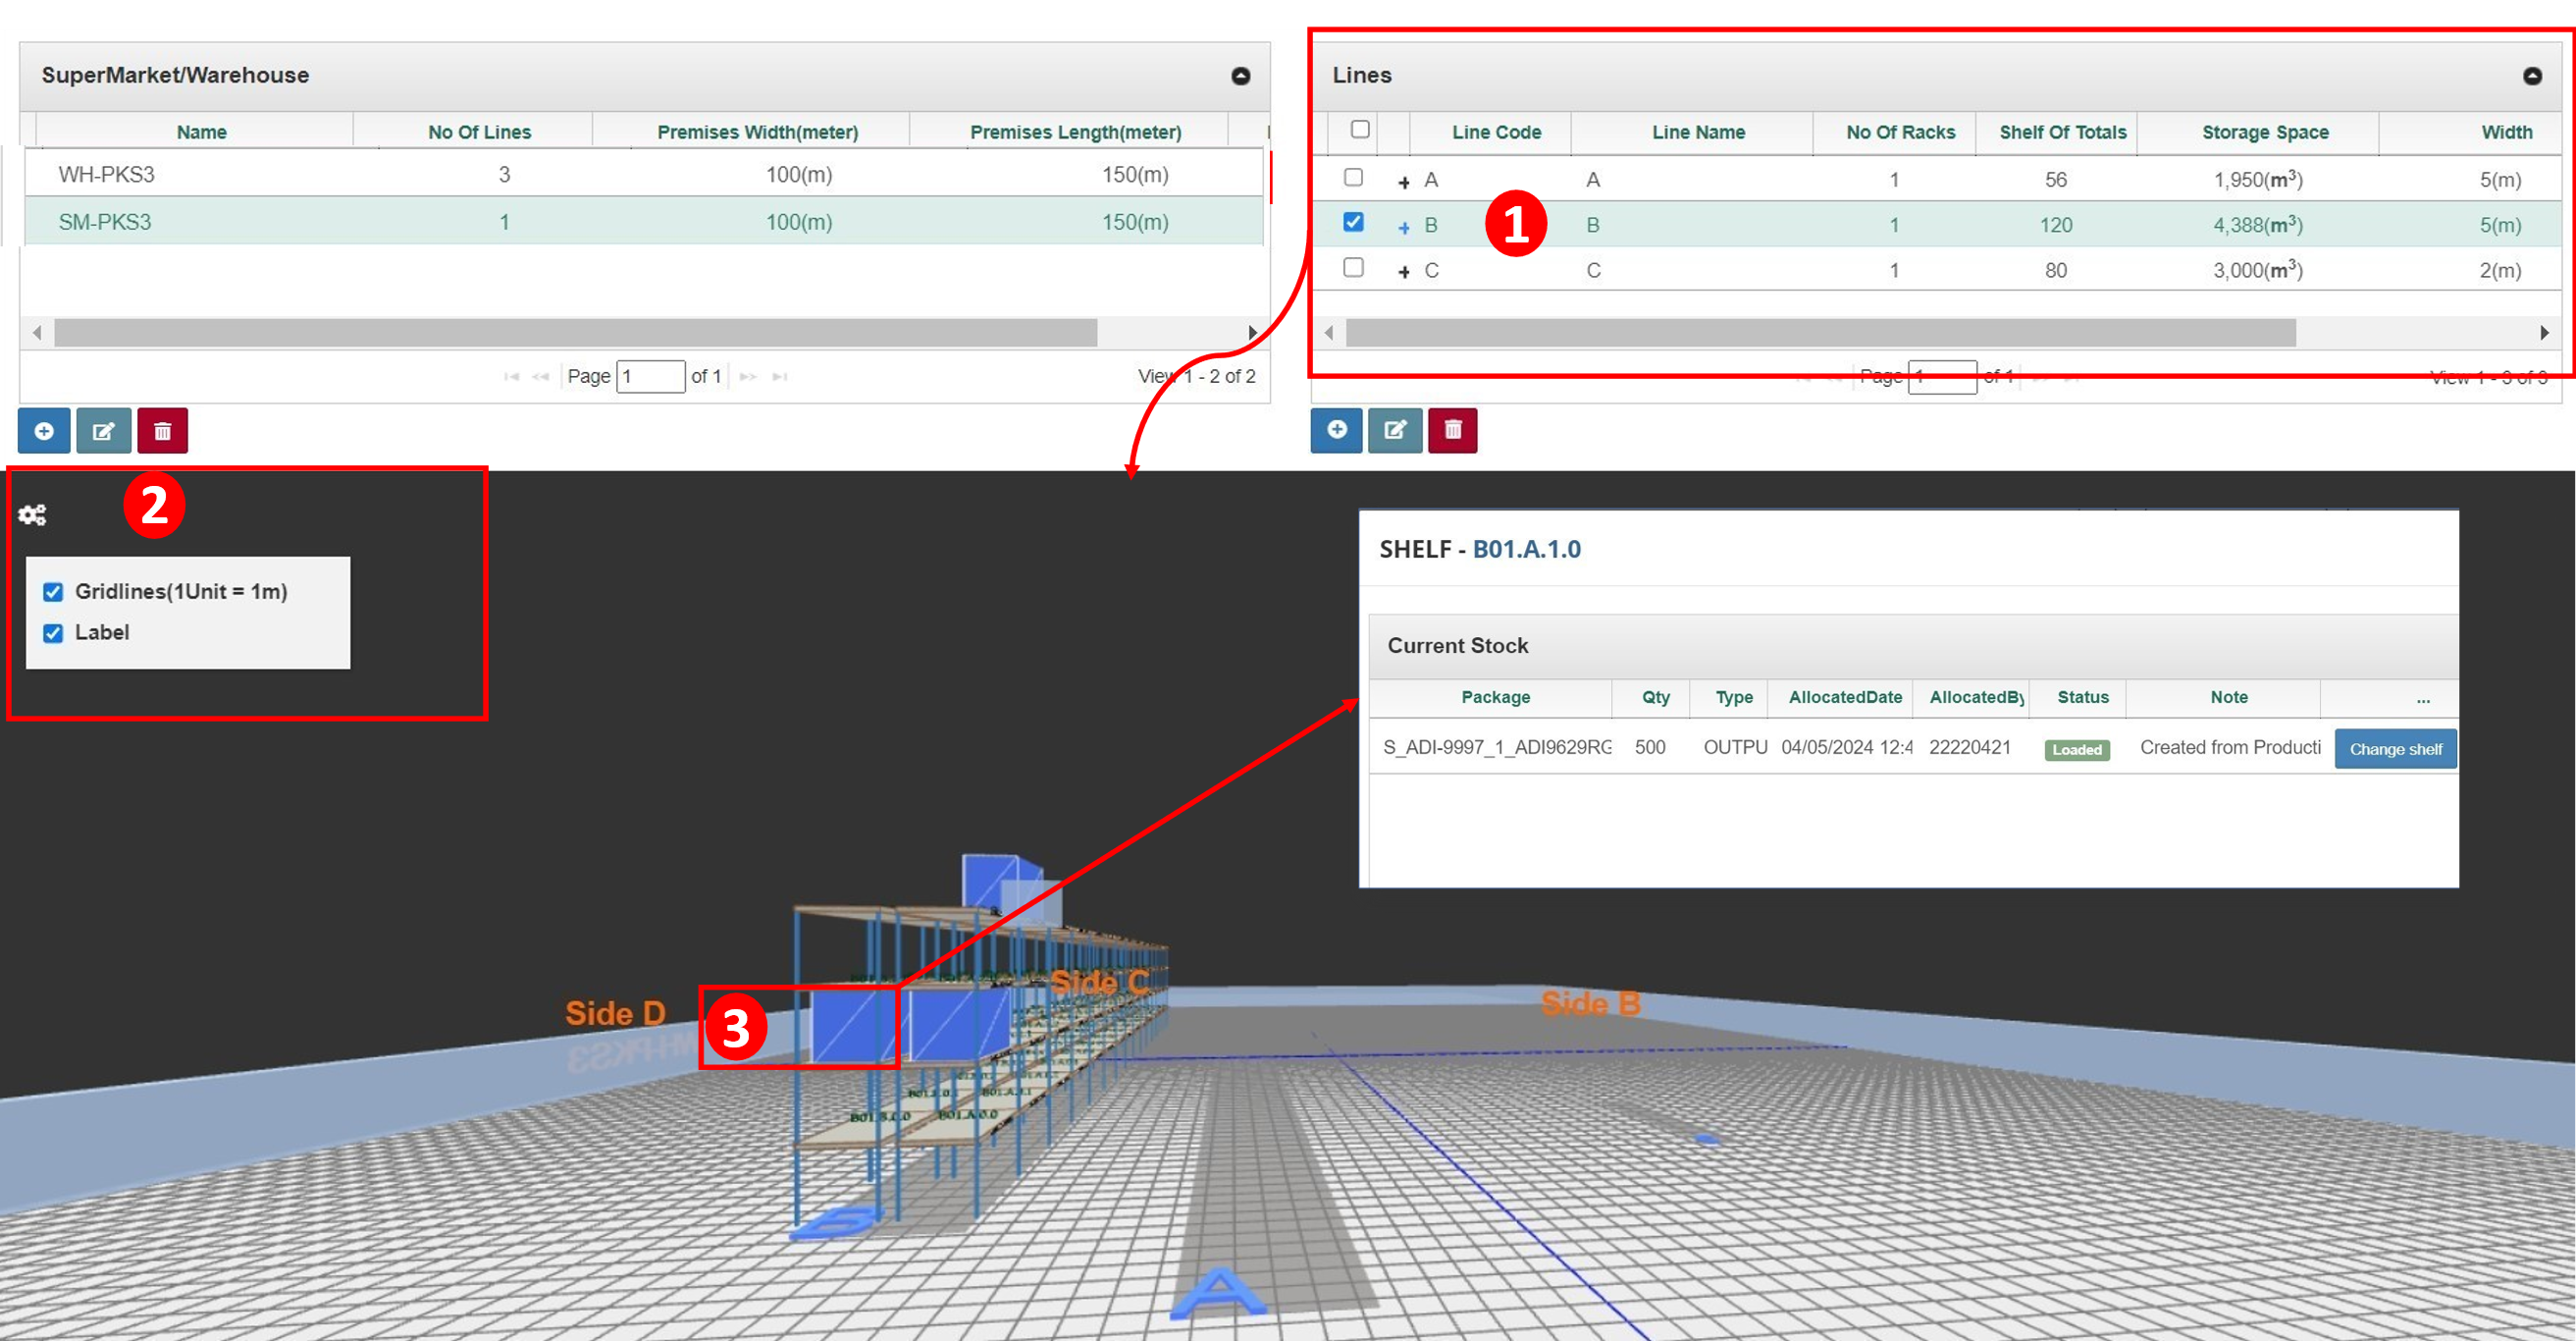
View warehouse
- Select 1 or multiples lines to see their simulation racks, shelves, and inventory status in the bottom section.
- Click the set-up icon
 to add Gridlines and Label information to simulation warehouse.
 - Click at any shelf to open the Shelf detail window.
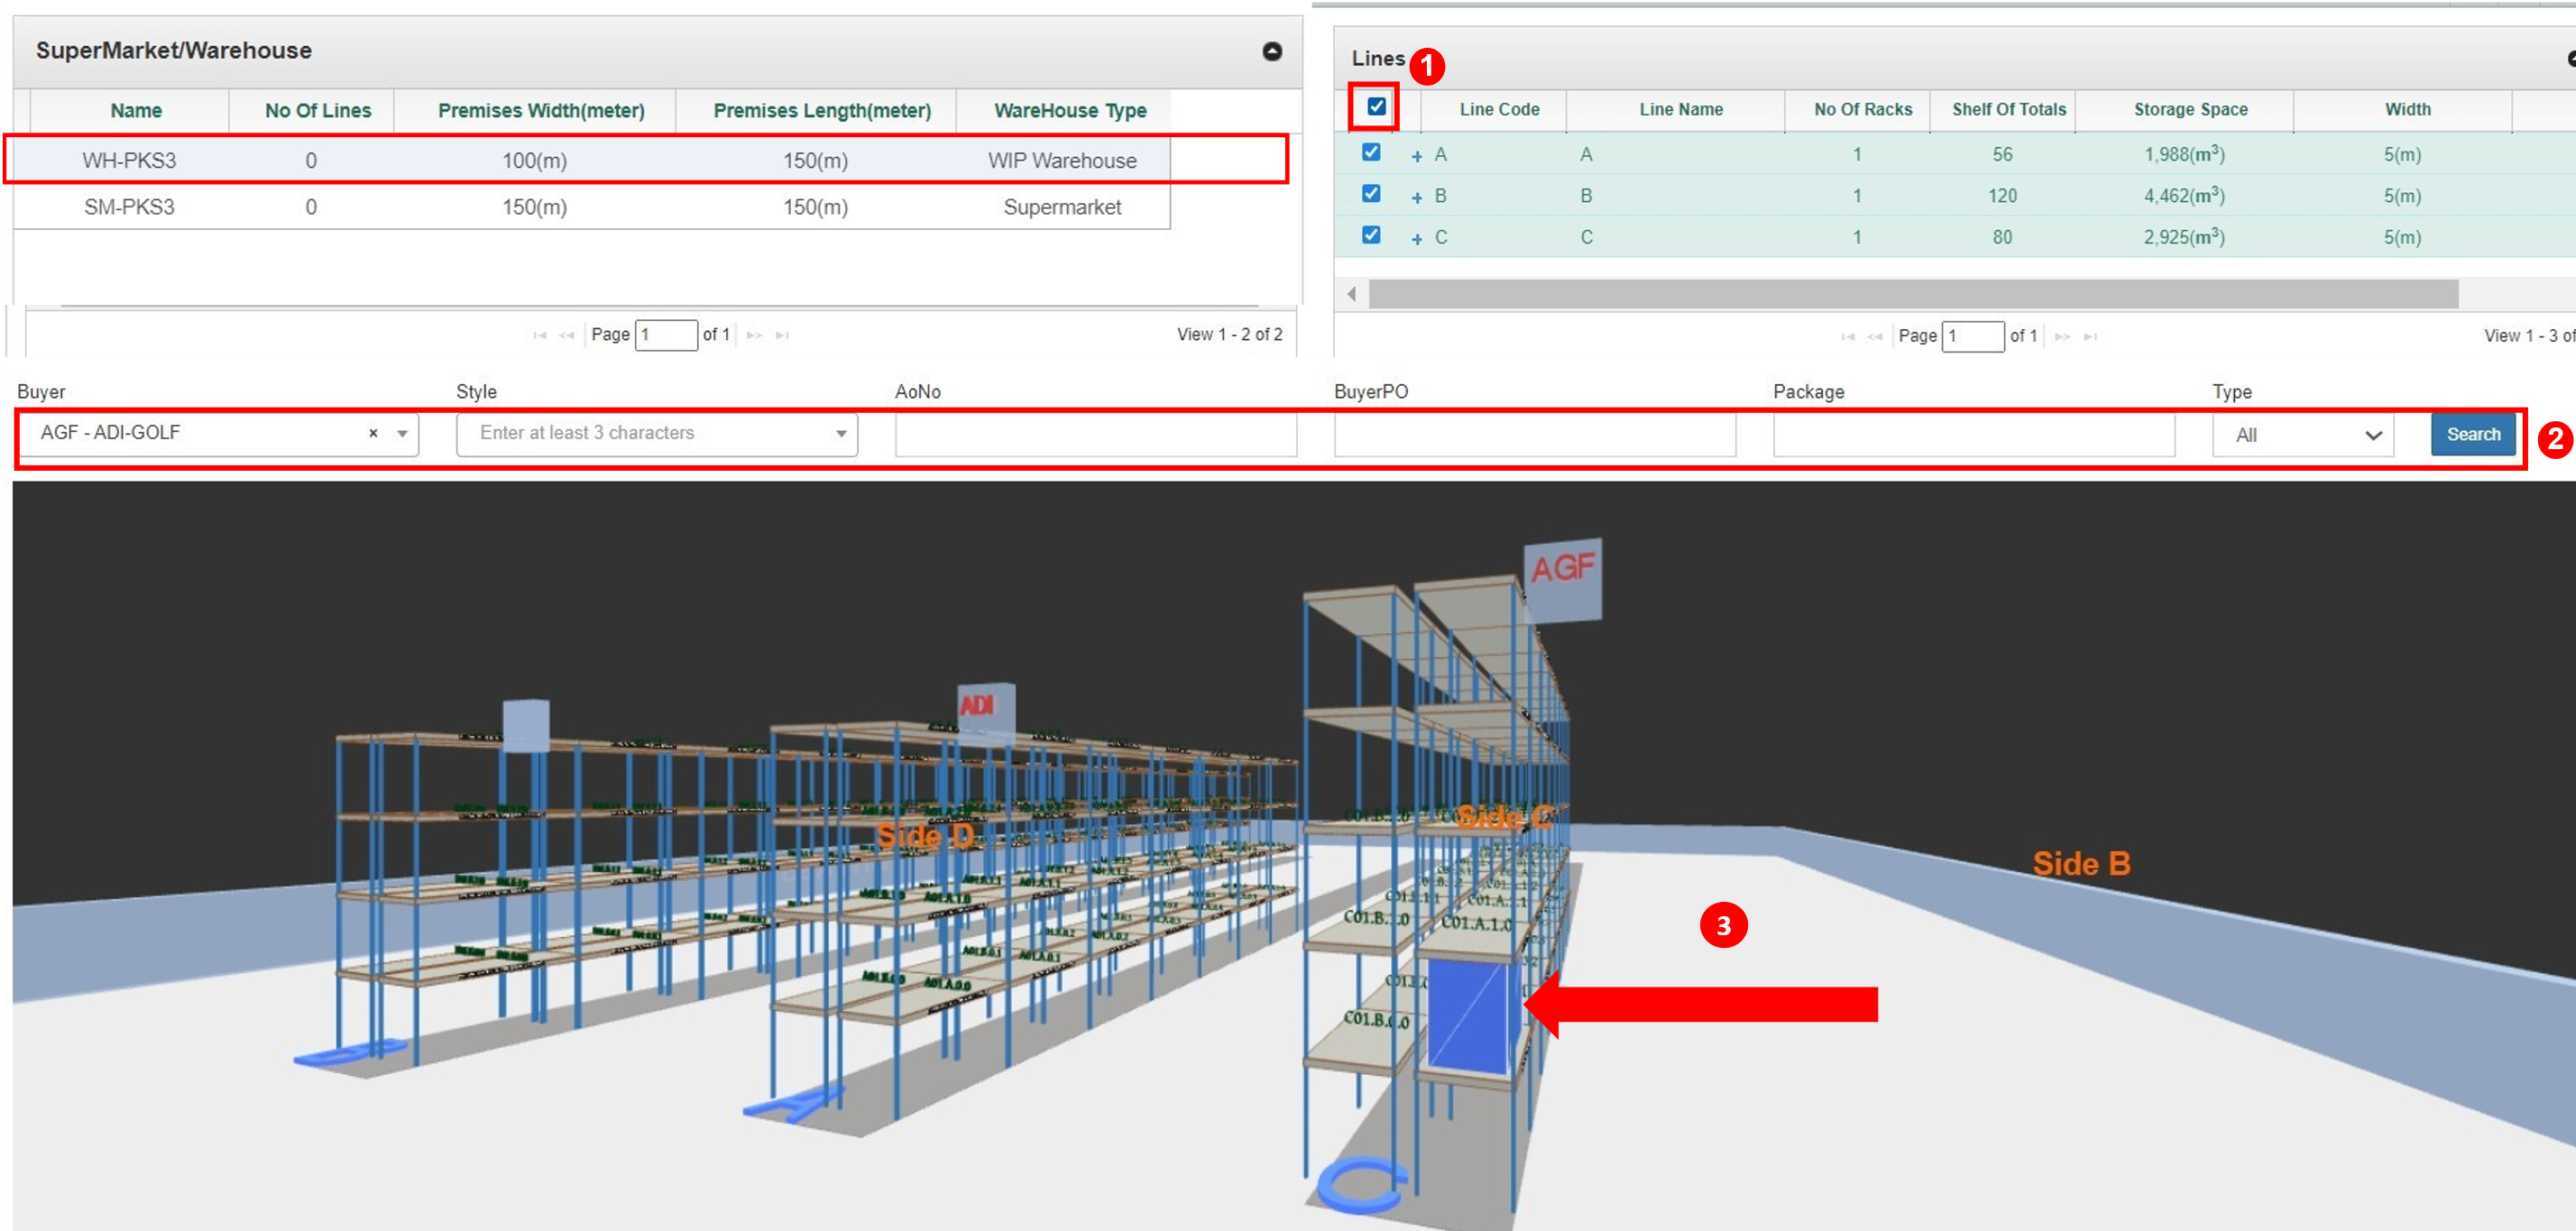
Viewing shelf stock
- At Layout menu, select the warehouse, tick All box to choose all relevant lines.
- At search area below, provide filtering conditions and click Search
- The warehouse simulator will highlight all the shelves containing the material matching search criterias.
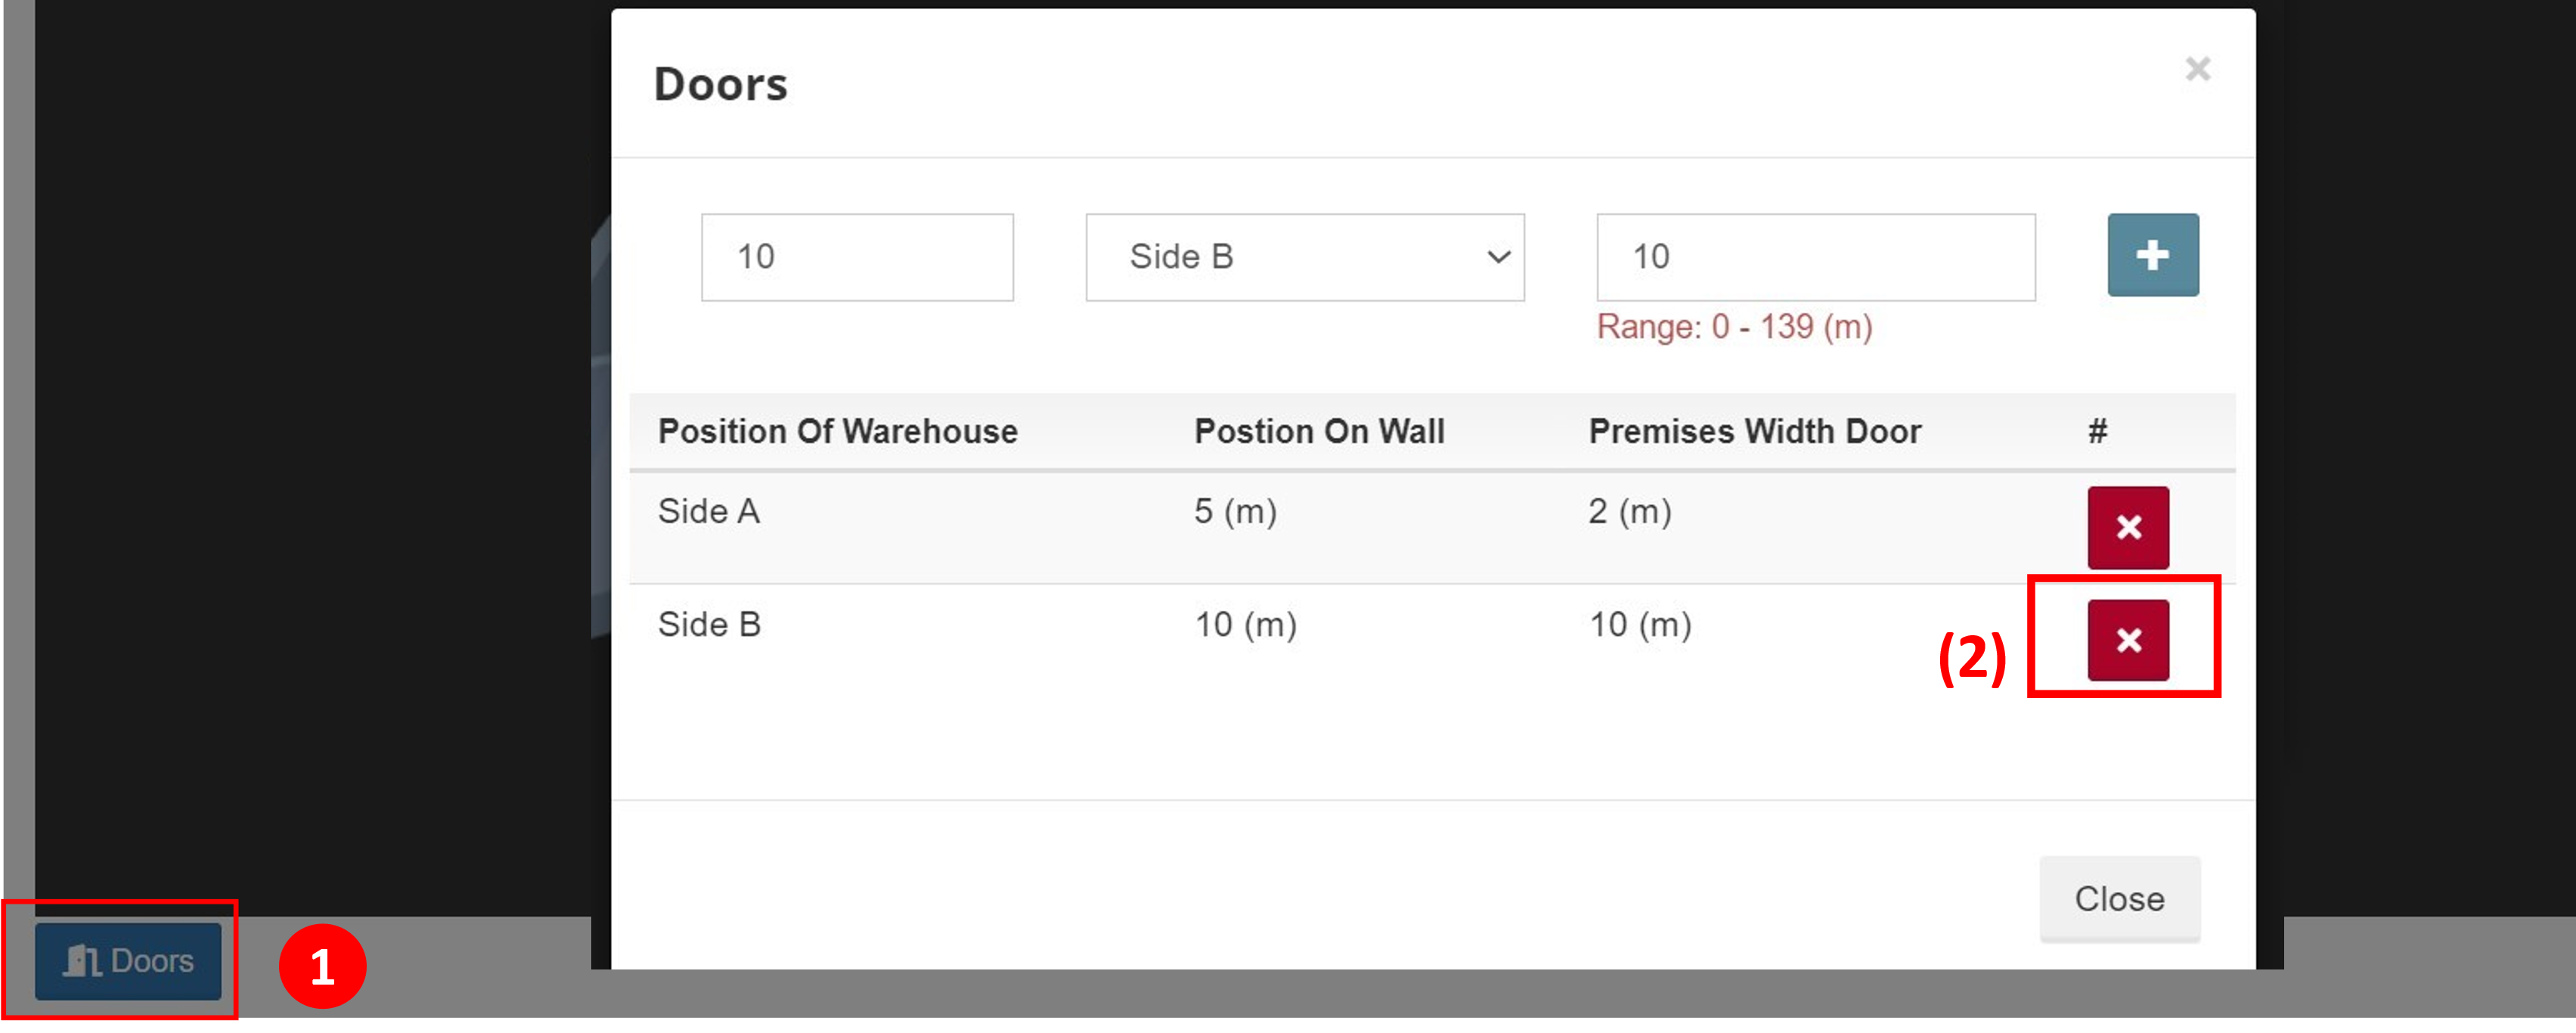
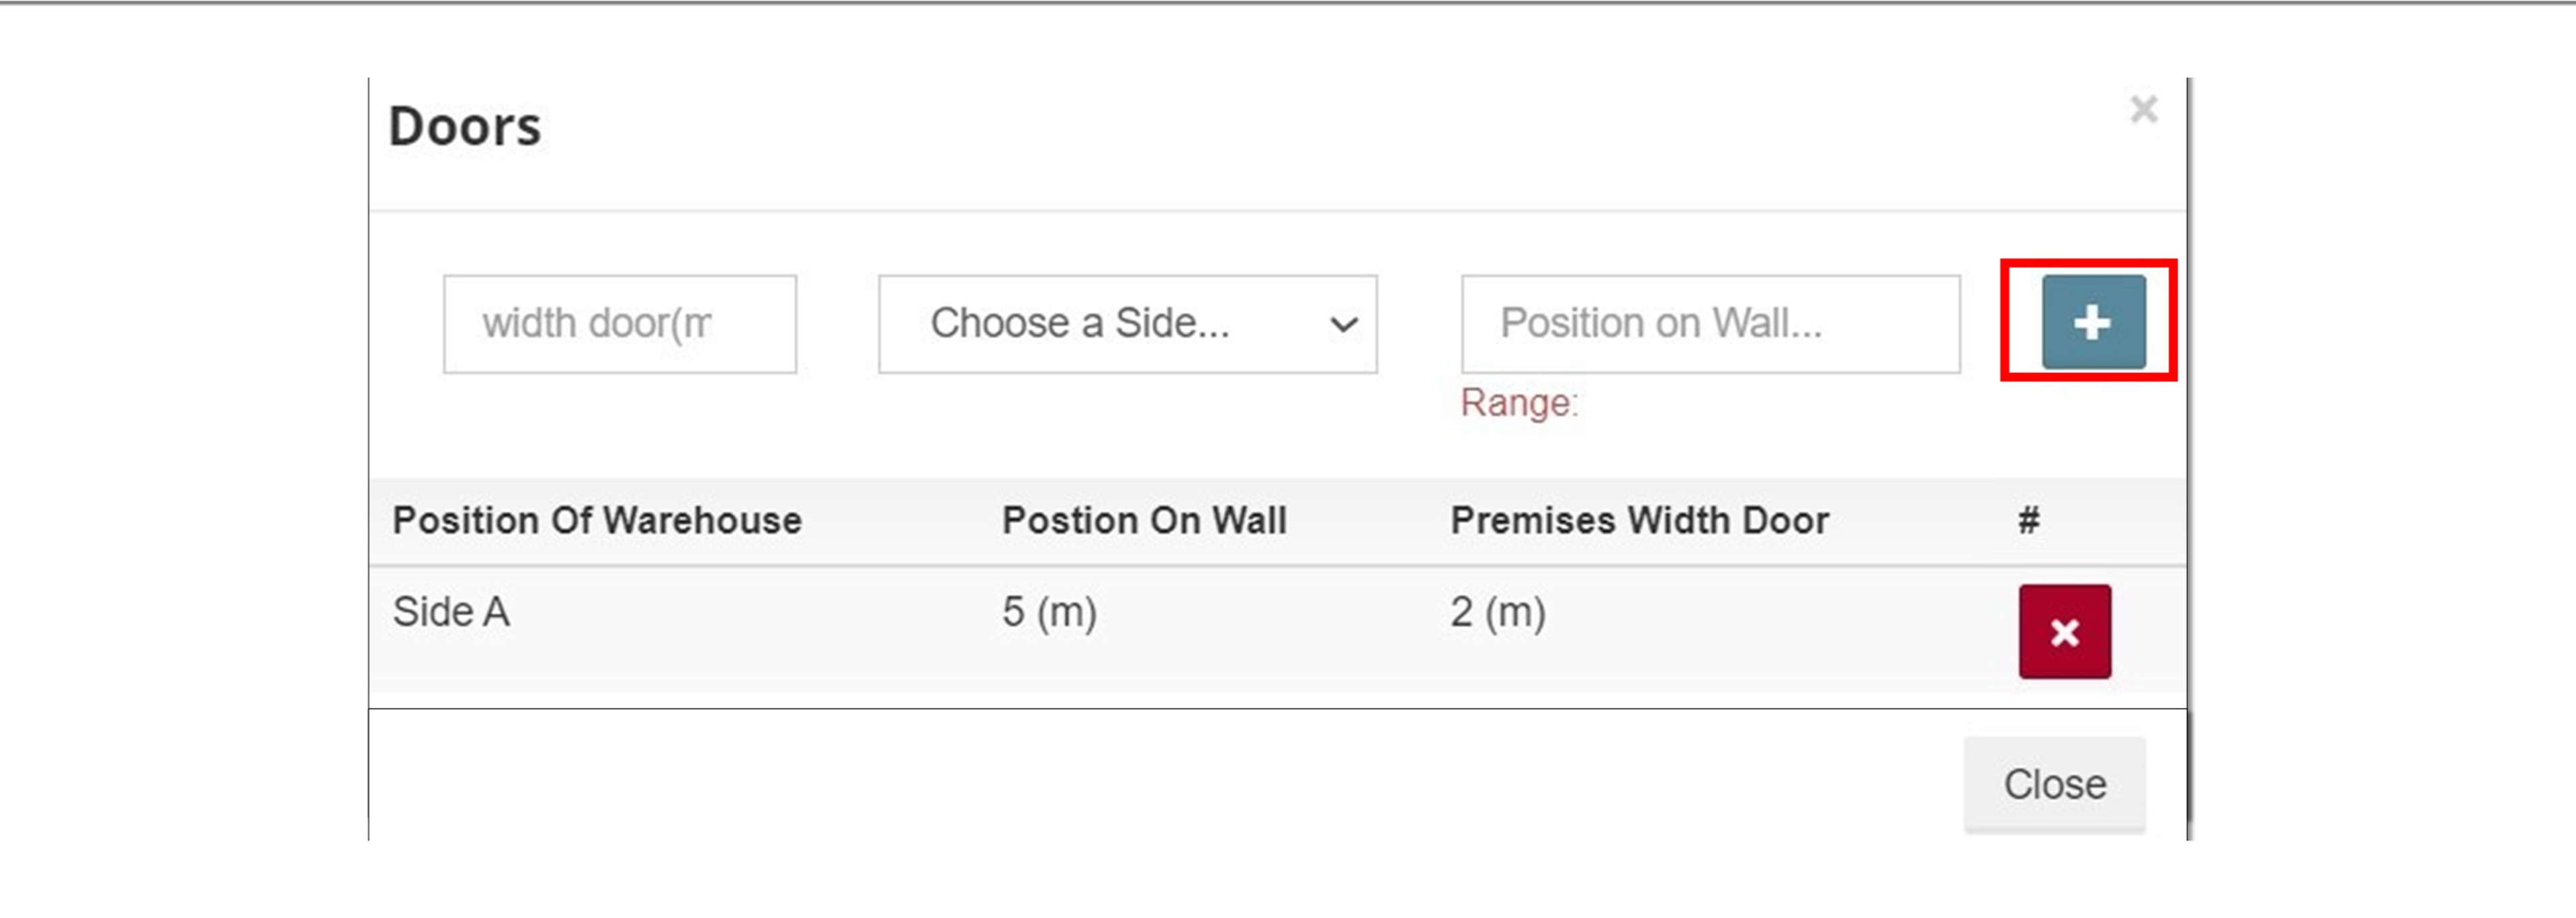
Create door
Purpose: Allow creating doors to simulate actual warehouse premises.
- At simulation warehouse section, click the Doors button.
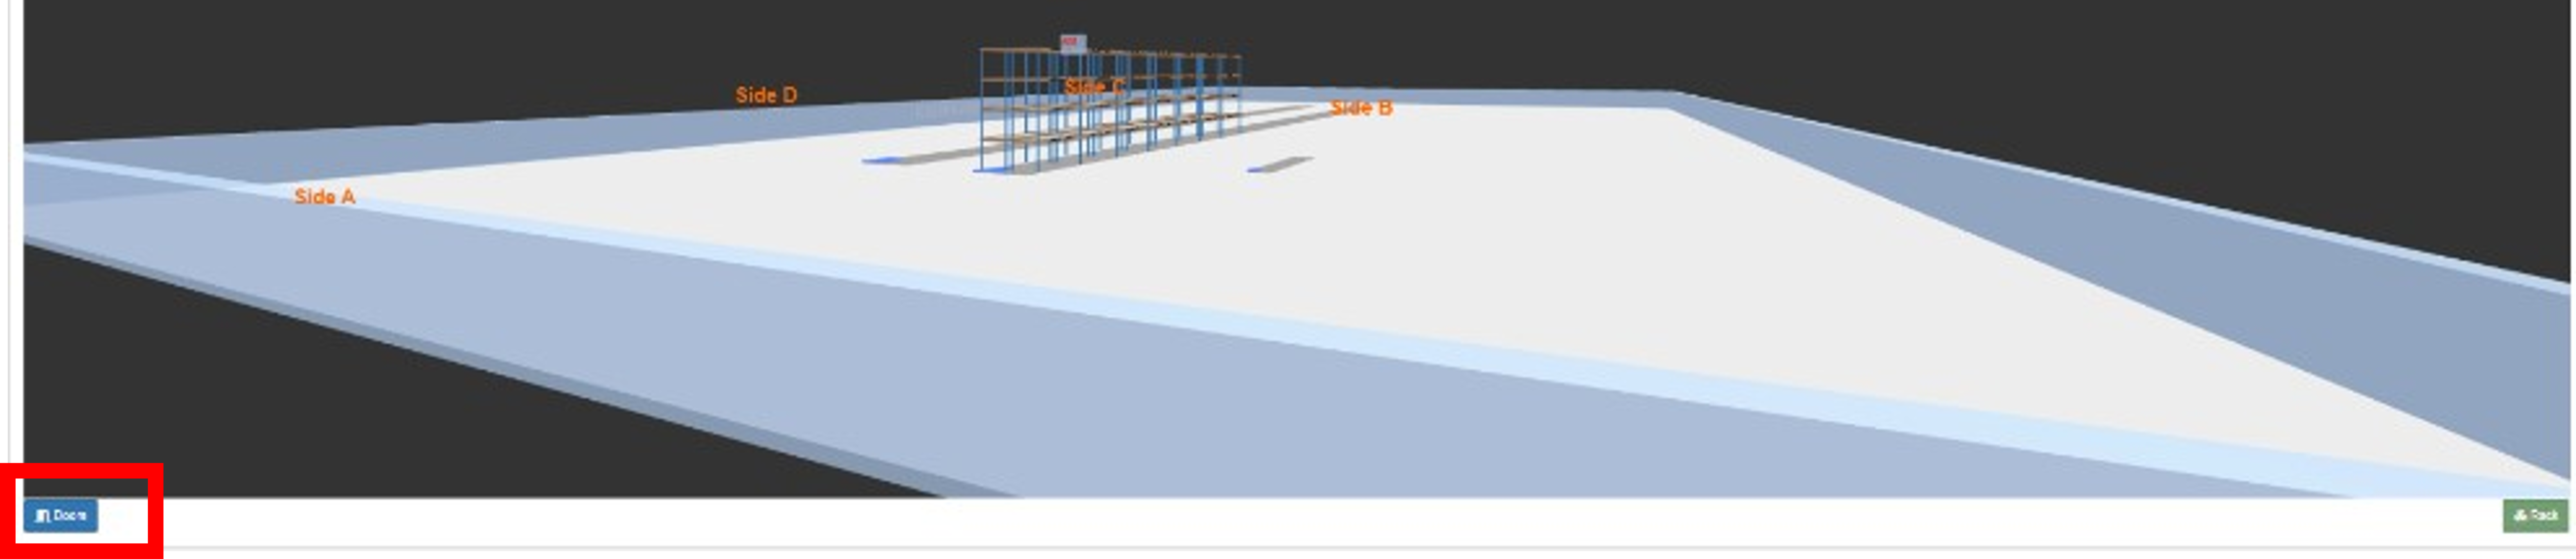
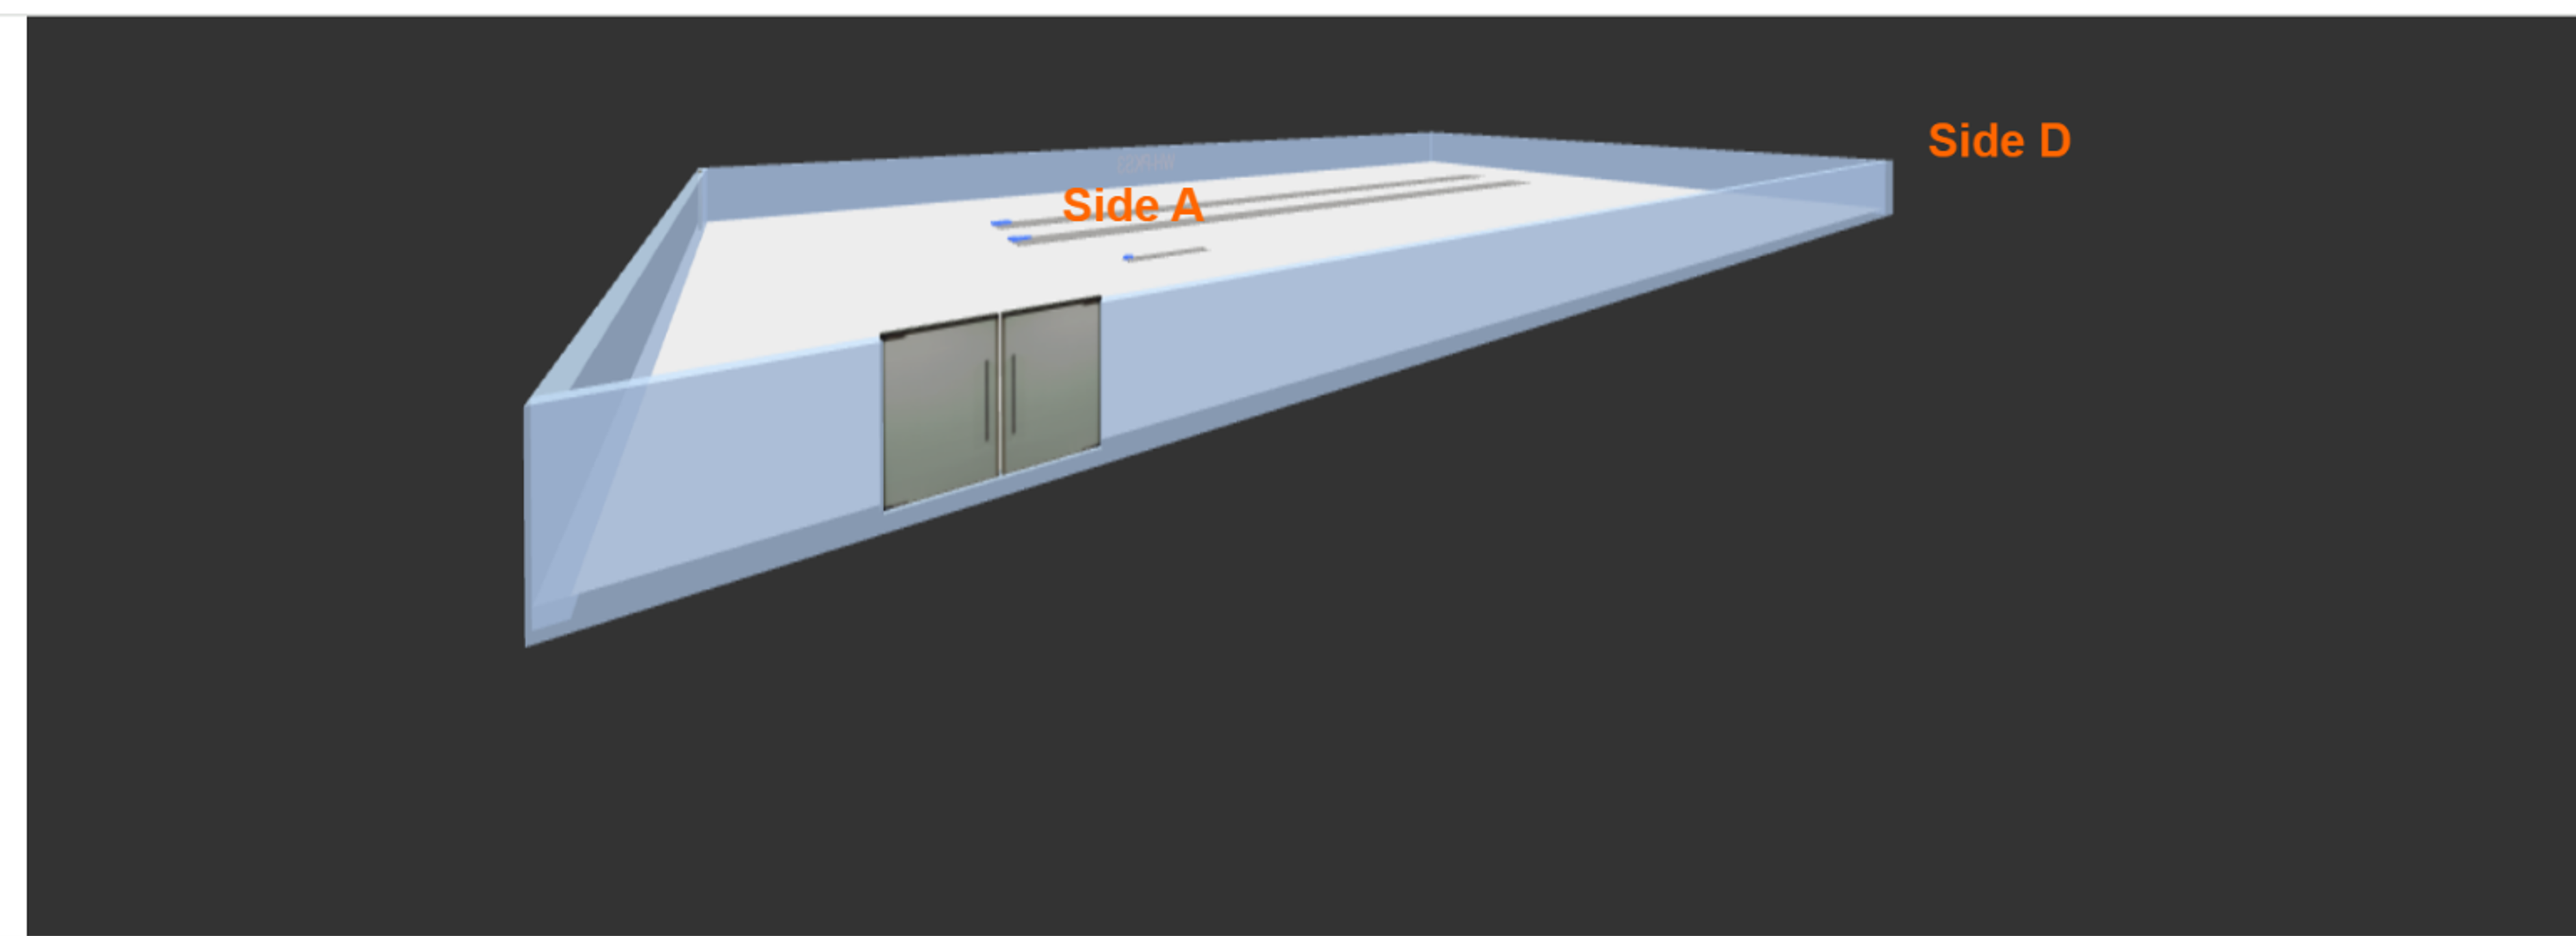
- At pop-up window, input door width, choose a side, position on wall, and click “+” button to add.
- The new Door has been created as below photo
Delete door
Purpose: Allow deleting the selected door of warehouse.
- Please select Doors button
- Click Delete icon on the door.